Another busy week is on the horizon, mainly because we're getting ready to head to a family wedding next week. So it's shopping, packing, cleaning (who wants to come home to a messy house?), and getting ready for a long road trip all week. I will manage to squeeze in a girls' night out with my best friend Suzanne, though. If not this week, we'll never get around to it!
So here's the plan for the week:
Sunday
We were thinking Arby's - ha ha!
Monday
Pork carnitas, Southwestern lentil salad
Tuesday
Pizza - Girls' Night Out!
Wednesday
Rice and bean burritos, tortilla chips and homemade salsa
Thursday
Steak sandwiches, twice baked potatoes, broiled tomatoes
Friday
Crockpot lasagna, garlic bread
Saturday
Must-go Night - everything in the fridge must go!
For more meal planning inspiration, visit Organizing Junkie's Menu Plan Monday.

Sunday, June 6, 2010


Chocolate Sheet Cake
Last week was hubby's birthday, so I baked him his favorite cake - chocolate with chocolate icing. Now, most people like chocolate cake with chocolate icing because it's incredibly sweet, but my husband doesn't like really sweet. Just a little sweet is his preference. Or not sweet at all, since he drinks his unsweetened tea with no added sugar.
This cake is the perfect balance of chocolate and not-too-sweet. The cake itself is made with bittersweet chocolate and is light, not dense. The icing has much of the sugar, but it's not overpowering or thick. It serves a lot of people, too, so it's just right for a not-too-heavy dessert after a dinner party or gathering.
Here's what you need for the cake:
1 cup butter, softened
2 cups sugar
4 eggs
2 tsp vanilla
2 1/4 cups flour
1 tsp baking soda
1 tsp salt
1 cup buttermilk (see tip below)
3 (1oz each) bittersweet chocolate squares, melted
In a mixing bowl, cream butter and sugar.

Add eggs one at a time, beating well after each addition. Beat in vanilla.

In another bowl, combine the flour, baking soda and salt. Add to the creamed mixture alternately with the buttermilk. Beat in the melted chocolate.

Doesn't that chocolate look yummy! Here's what your mixture will look like after the chocolate is added. I could slurp it up with a straw!

Pour the batter into a greased 15x10 pan and smooth out.

Bake at 350 degrees for 22-27 minutes or until a knife inserted in the center comes out clean. My cake overflowed just a bit, as you can see. What to do with the excess chocolate cake? Hmmmm, let me think....it would be a sin to waste chocolate cake. Maybe you can trim off the extra and taste it to be sure it's worthy of being served to the birthday boy? Well, that's exactly what I did! And it was worthy!

Tip: I rarely keep buttermilk on hand, so I make my own. Place 1 TBSP lemon juice or vinegar in a measuring cup, then add enough milk to equal one cup. Allow to stand for 10 minutes. And now you have the buttermilk you need for this recipe!
While the cake is cooling, prepare the icing. You'll need:
1/4 cup cocoa
1/3 cup milk
1/2 cup butter, cut into pieces
1 tsp vanilla
3 1/2 cups powdered sugar
1/2 chopped pecans, optional
In a saucepan, bring cocoa and milk to a boil over medium heat, stirring constantly. Make sure you use a saucepan that's large enough to add 3 1/2 cups of powdered sugar to later!

Remove from the heat and stir in butter and vanilla. Keep stirring until the butter is completely melted.

Whisk in the powdered sugar until smooth.

Stir in the nuts. Pour icing over cake and spread quickly to the edges.

Enjoy!
For a printable recipe, click here.
This cake is the perfect balance of chocolate and not-too-sweet. The cake itself is made with bittersweet chocolate and is light, not dense. The icing has much of the sugar, but it's not overpowering or thick. It serves a lot of people, too, so it's just right for a not-too-heavy dessert after a dinner party or gathering.
Here's what you need for the cake:
1 cup butter, softened
2 cups sugar
4 eggs
2 tsp vanilla
2 1/4 cups flour
1 tsp baking soda
1 tsp salt
1 cup buttermilk (see tip below)
3 (1oz each) bittersweet chocolate squares, melted
In a mixing bowl, cream butter and sugar.

Add eggs one at a time, beating well after each addition. Beat in vanilla.

In another bowl, combine the flour, baking soda and salt. Add to the creamed mixture alternately with the buttermilk. Beat in the melted chocolate.

Doesn't that chocolate look yummy! Here's what your mixture will look like after the chocolate is added. I could slurp it up with a straw!

Pour the batter into a greased 15x10 pan and smooth out.

Bake at 350 degrees for 22-27 minutes or until a knife inserted in the center comes out clean. My cake overflowed just a bit, as you can see. What to do with the excess chocolate cake? Hmmmm, let me think....it would be a sin to waste chocolate cake. Maybe you can trim off the extra and taste it to be sure it's worthy of being served to the birthday boy? Well, that's exactly what I did! And it was worthy!

Tip: I rarely keep buttermilk on hand, so I make my own. Place 1 TBSP lemon juice or vinegar in a measuring cup, then add enough milk to equal one cup. Allow to stand for 10 minutes. And now you have the buttermilk you need for this recipe!
While the cake is cooling, prepare the icing. You'll need:
1/4 cup cocoa
1/3 cup milk
1/2 cup butter, cut into pieces
1 tsp vanilla
3 1/2 cups powdered sugar
1/2 chopped pecans, optional
In a saucepan, bring cocoa and milk to a boil over medium heat, stirring constantly. Make sure you use a saucepan that's large enough to add 3 1/2 cups of powdered sugar to later!

Remove from the heat and stir in butter and vanilla. Keep stirring until the butter is completely melted.
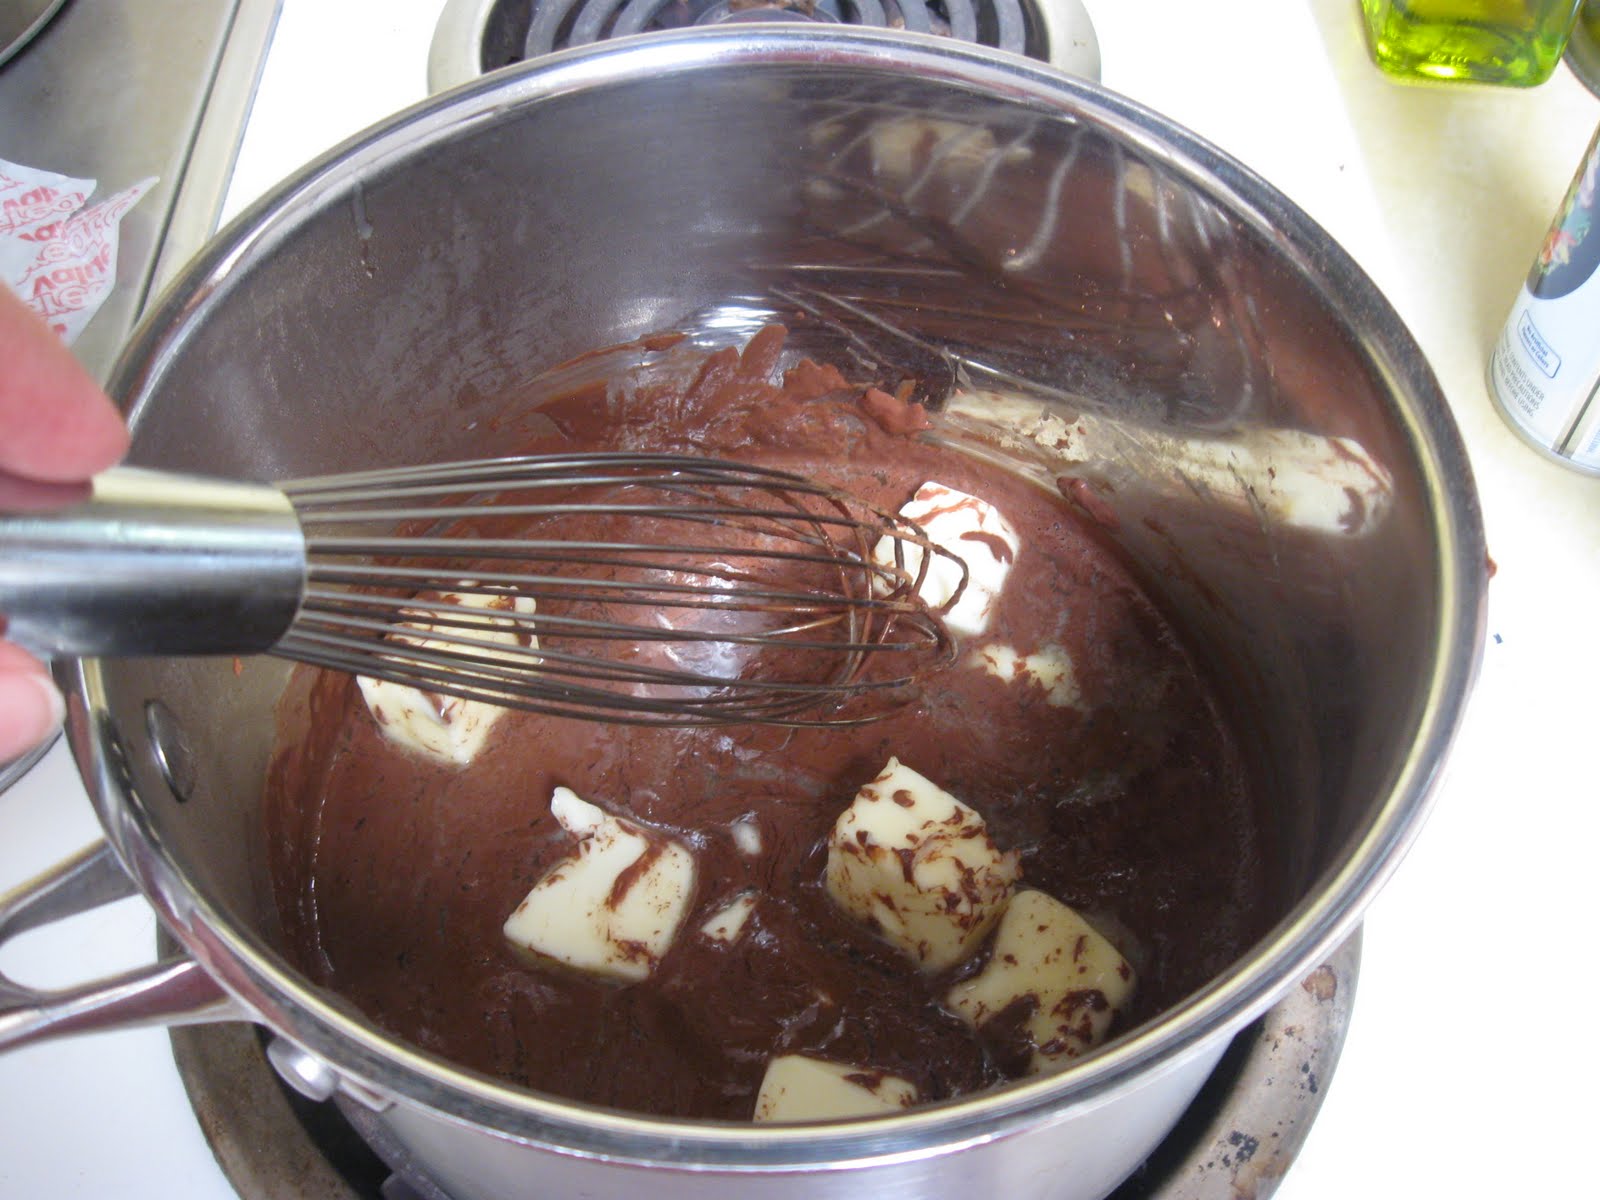
Whisk in the powdered sugar until smooth.

Stir in the nuts. Pour icing over cake and spread quickly to the edges.

Enjoy!
For a printable recipe, click here.
Thursday, June 3, 2010
The Internet is still here! Yay!
Last Friday our high speed internet went out during a big ol' thunderstorm. Charles called the cable company and got the recorded message that there were outages in our area. So we figured an hour or so and we'd be back. See, he works from home and he really needs a high speed connection to do his job. I need it too, but only because I'm an internet junkie.
But an hour or so later and we still were without internet. And phone service because we use Vonage. Our cable tv was working just fine so he called again and this time talked to a real person. Real person told him it looked like we had a problem with the splitter coming into the house. Or something like that. The earliest a technician could come look at it was Wednesday. Wednesday?!?
Hubby managed to hook up his Verizon 3G broadband something or other (really technical, I know!) and let me check my emails and stuff. But it was slow. And I didn't like it. I wanted MY internet back! I felt like I was cut off from civilization!
So yesterday the technician came. Nice guy. He quickly determined it was the modem, not the splitter. So we went all that time without high speed internet and all we needed was a new modem. That we could have gotten Friday. Oh, well.
Yesterday was also hubby's birthday. I made him chocolate cake, his favorite. I'll post the recipe later. And we took some pictures of our lovely hydrangea. Want to see?

I love the purple, pink, and violet blooms. The pink comes from putting lime around the base of the bush.
A close-up of a pink bloom:
 A purple one:

A little of both:

Beautiful!
Sunday, May 30, 2010
Menu Plan May 29-June 5
On Friday our high-speed internet connection went haywire. It won't be fixed until Wednesday, so I don't know if I'll have a chance to post or not after this. Right now I'm using my husband's phone which has its own broadband connection. Thanks, honey!
Here's the menu plan for the week:
Sunday
Leftovers
Monday
Hot dogs, hash brown casserole
Tuesday
Cheeseburger rice, lemon pepper broccoli, homemade bread
Wednesday
Pork loin, parsley potatoes, green beans
Thursday
Spaghetti with veggie sauce, cheesy garlic breadsticks
Friday
Make your own pizza
Saturday
Homemade chicken nuggets, fries
For more meal planning inspiration, visit Organizing Junkie's Menu Plan Monday.
Thursday, May 27, 2010
Make your own puzzles
I've been trying to come up with things to keep my children occupied this summer. I posted a couple of lists here and here if you're interested. Making puzzles was on the list. Here's what to do.
Cut up a cereal box as the backing for your puzzle. Let your children color a picture of their choosing. The Princess chose to color a dinosaur picture. No big surprise there.

Trim off any parts of the picture you don't want in the puzzle, like all that empty white space. Then glue the picture to the gray side of the cardboard from the cereal box. Press down firmly.

I use a Scotch craft stick, but you can use whatever kind of adhesive you desire. Chances are after your child has played with the puzzle a couple of times, you'll have to glue down the edges of each piece again anyway. The pressure from cutting the cardboard apart causes the picture to pull away. That's okay, just use a little more glue.

Trim away the excess cardboard with scissors or a craft knife.
 Now comes the fun part! Cut the puzzle into pieces. Use all sorts of funny angles and shapes. Why is cutting things up so therapeutic for me?

Here's the Princess putting the pieces back together.

The puzzle Mr. Lego did - Bullet Bill from Super Mario Brothers.


A couple of hints and tricks for you - take a picture of the puzzle before you cut it up. Would you like to try to put a puzzle together without knowing what it's supposed to look like? Even though your child knows today what the picture looked like before it was severed into little pieces, he or she might forget by tomorrow!

Keep each puzzle in a separate Ziploc bag and label it. When you print the picture you took of each puzzle, slide it down in the bag with the pieces for future reference.
 We all enjoyed creating these puzzles together. The kids liked exchanging puzzles and seeing if they could put together the other's creation. And it was great fun having Daddy put the puzzles together, too.
You can also use old calendar pages, cards or posters instead of coloring your own pictures. Anything printed on paper can be recycled into a puzzle.
For more money-saving ideas, visit Life as Mom's Frugal Friday blog carnival.
Happy Anniversary, Mom and Dad!
Today my parents celebrate their 44th wedding anniversary! Marital longevity is rare these days, so I feel blessed to have such a great example.
My mother's parents were divorced, long before it was a common occurrence. She grew up in a broken home and determined that her children would never go through the hurt and confusion she did. I learned from her to let go of the little things about my husband that drive me crazy. It's more important to be happy than to be right all the time (which we all know I am, wink, wink).
My dad always made sure we knew how much he loved Mom, so I grew up feeling secure in my family. I know they had their disagreements but they didn't fight in front of us. There was never a time that I doubted their love for each other. I still don't.
Most importantly, both parents taught me to walk with the Lord. Dad still gets up early every morning to read his Bible and pray. Maybe he didn't think I'd notice as I was growing up, but I did. Mom serves others with a glad heart and prays about everything. Before we left the house each morning for school, she prayed with us and asked God to watch over us. What greater blessing can a parent be to a child?
So thanks, Mom and Dad, for being such godly examples to me. Happy Anniversary! I love you both!
P.S. Did you know that the anniversary gift for 44 years is groceries? No kidding.
Wednesday, May 26, 2010
Homemade Seasoned Salt
I've been trying to make things from scratch as much as possible this year. So I thought, why not try my hand at making my own seasoning blends? So I played around with some seasoned salt blends and this is what I came up with.
In a blender or food processor, combine the following:
5 TBSP coarse sea salt
2 TBSP dried parsley flakes
2 1/2 teas paprika
1 teas dry mustard
1 teas dried thyme leaves
1/2 teas garlic powder
1/2 teas curry powder
1/2 teas onion powder
1/2 teas celery seed
1/2 teas dried oregano
1/8 teas dill weed
Blend until all the spices are about the same size particles. Pour into a shaker container and use in any recipe that calls for seasoned salt. I love to sprinkle this on french fries and other potato dishes. It's also very good on pork chops and chicken.
Subscribe to:
Posts (Atom)