Showing posts with label pizza. Show all posts

Wednesday, June 11, 2014

Pizza Rolls

My family loves pizza. I've been making it homemade for several years now, saving us tons of money. Using my quick and easy crust recipe, I can have the pizza on the table ready to eat in the same amount of time it would take to have it delivered.

These pizza rolls use the same crust recipe, but provide a fun little twist on pizza night.

Here's what you need for the crust:

1 cups warm (not hot) water
1 teas sugar
1 TBSP yeast
2 TBSP olive oil or melted butter
2 1/2 cups flour (I use half unbleached white and half white wheat flour)
1 teas salt

In the mixing bowl of a stand mixer, combine the water, sugar and yeast. Allow to sit for about 5 minutes until puffy.

Mix in the olive oil or butter, flour and salt. Knead for 5 minutes until smooth (this is where a stand mixer comes in handy). Allow to rest for 10 minutes.

Now for the pizza rolls, you'll need:

1//4 cup pizza sauce, divided
1/2 cup shredded cheese
any additional toppings you'd like (we like pepperoni and/or sausage

After the dough has rested, divide it in half. Roll each half into a rectangle, about 9x13. Spread 2 TBSP of the pizza over each rectangle, leaving a little space at the bottom. If you don't leave that little space, all the filling will squish out when you roll the dough up. Two tablespoons may not seem like enough sauce, but any more will cause the rolls to be doughy.

Now place your toppings over the sauce and press down lightly.
Beginning at the top of the rectangle, roll the dough toward you, trying to keep it as tight as you can.
When you reach the end of the dough, pinch it to seal the roll together.
Slice the dough into 8 pieces. Place in a lightly greased 9x13 pan.
Bake at 400 degrees for 15-20 minutes, or until browned.
As you can see, the rolls expand as they bake, so leave a little room between them when you place them in the pan.


Tuesday, November 6, 2012

Deep Dish Skillet Pizza

Domino's Pizza has a new deep dish pan pizza that Charles just loves. They advertise that the toppings go all the way to the edge. But it's $7.99 for a medium pizza, and that's more than I like to spend when my growing children could eat one pizza all by themselves. So I decided to recreate the pizza at home, using my tried and true pizza dough recipe. It turned out wonderfully!

I started by making the dough:

1 cup warm water
1 TBSP yeast
2 teas sugar or honey

Mix these together in the bowl of a stand mixer. Allow to sit for about 5 minutes until the yeast starts to puff up.

Then stir in 2 TBSP olive oil or melted butter.

Then mix in 2 1/2 cups flour (I use half unbleached white and half white wheat) and 1 teas salt.

Using the dough hook, knead for about 5 minutes. Allow the dough to rest for 10 minutes. It's much easier to work with this way.

While the dough is resting, get your cast iron skillet prepared. Melt 2 TBSP butter and mix with 1/2 teas garlic powder. Brush along the bottom and sides of the skillet. Use all of it! I used a 12-inch skillet, by the way.

Roll the dough out to a uniform thickness that will fit nicely in the skillet. Place in the skillet and stretch to fit, if necessary. Prick all over with a fork. Then bake at 425 degrees for 8 minutes.

Carefully remove the pan from the oven and cover with your favorite toppings. Go all the way to the edge of the skillet with the sauce, cheese, everything. Bake for another 10 minutes.
Run a knife or spatula around the edges to loosen. With two spatulas, transfer the pizza from the pan to a cutting surface.
See how crispy that is on the sides? It's the same way on the bottom. The yummy garlic butter did that. It's absolutely crucial to use the butter, trust me.

Cut into slices and enjoy!


Monday, October 8, 2012

Individual Deep Dish French Bread Pizzas

My family loves pizza, but occasionally I like to change things up and serve it in a different way. I was inspired by this recipe I found on Pinetar Press to make individual French bread pizzas. I changed up the recipe to suit our tastes, as I usually do with most recipes. The results were fantastic and left my family wanting more.

Here's what you need:

4 French bread rolls
1/2 lb bulk sausage
1/2 cup chopped mushrooms
20 slices pepperoni, quartered
1/2-3/4 cup pizza sauce
1 cup (or more, depending on how cheesy you want this)shredded mozzarella cheese

Cut all around the edges of the French rolls without going all the way through. Scoop out the bread, leaving a 1/4 inch shell all the way around. Use the scooped out bread for another use, like making bread crumbs or croutons. Set the hollowed out rolls aside.
 
Brown the sausage in a skillet and drain. Add the mushrooms, pepperoni and pizza sauce. Cook until the mushrooms are softened. If you don't like mushrooms, substitute with another pizza topping like green peppers or onion.

Divide the sausage mixture among the rolls.
Sprinkle with the shredded cheese.
Place on a baking sheet and bake at 400 degrees for 10 minutes until the rolls are a little crisp and the cheese is melted.
The easiest way to eat these is to cut them in half.
If you want to freeze these pizzas for later, it's very simple. Wrap each unbaked pizza in foil or plastic wrap. Place inside a Ziploc bag and freeze. To reheat, allow to thaw on the counter for 30 minutes or so. Pop into a 350 degree oven until the cheese is melted and the pizza is heated through. It took my oven about 15 minutes.


Thursday, May 17, 2012

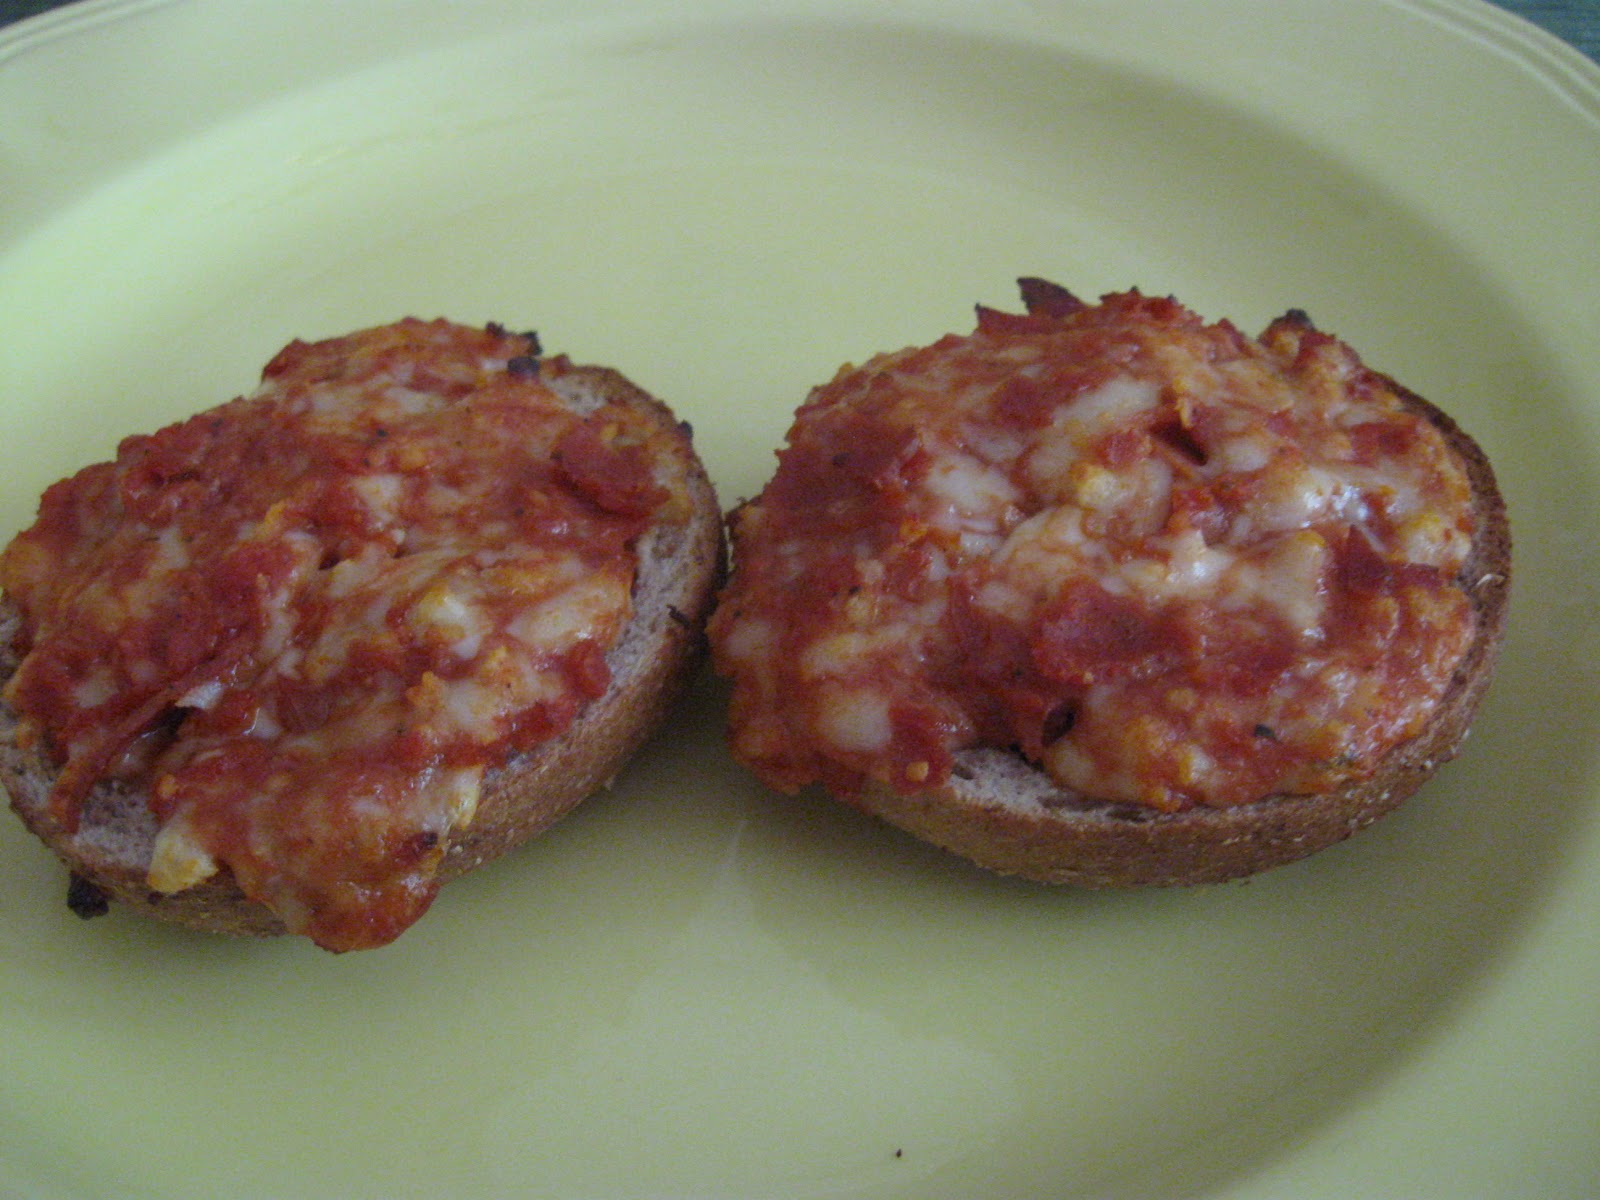
Homemade Pizza Bagel Bites

Have you ever tried the Bagel Bites from the freezer section of the store? There are nine little bagels covered in pizza toppings per package. You reheat them in the oven or microwave. But looking at the ingredient list, there are also all kinds of yucky, unpronounceable ingredients.

I just couldn't bring myself to buy them for my kids not snack on, not when they are so easy to make at home. Not to mention cheaper.

Here's what you need:

Whole wheat mini bagels (I used the Thomas brand), I think there were 12-14 in the bag
1/2 a package of turkey pepperoni slices
2 cups shredded mozzarella cheese
1 1/2 cups pizza sauce

Split the mini bagels in half and place cut side up on a baking sheet or two. I lined my sheets with parchment paper so they didn't stick after being frozen.


In a food processor, combine the pepperoni slices and shredded cheese. Pulse a few times until the pieces are small and well-mixed.


Transfer to a bowl, then add the pizza sauce and mix well. Place a heaping tablespoon of the mixture on each bagel half. Go back and press the toppings down so they stick to the bagel. It is much easier and quicker to top the bagels this way, instead of spreading sauce on each one, then pepperoni and then cheese.


Place the baking sheets into the freezer until the bagels are frozen. Then remove them from the sheets and store in plastic freezer bags.


To serve, take the desired number of mini pizzas from the bag. Place on a baking sheet and bake at 425 degrees for 10-15 minutes until warm and melty.


I love that these are made with healthier ingredients than the store-bought ones. And they're so easy! I think it took me about 10 minutes from start to finish to get two dozen bagel bites in the freezer. And the results were delicious!


Mr. Lego certainly enjoyed them!

I'm linking this post to Miz Helen's Country Cottage and her Full Plate Thursday linky!

Thursday, May 3, 2012

Frozen Pizza Experiment

I've been trying some freezer meals around here lately, and one of my experiments has been frozen pizza. I've eaten my share of Totino's cardboard pizzas in the past, but in recent years I've tried to avoid buying frozen pizza. I have a super simple pizza crust recipe, so I decided to use that as my base and experiment from there.

Here's what I did.

My first experiment consisted of prebaking the crust for about 10 minutes, then allowing it to cool completely. I topped it with homemade sauce, pepperoni and shredded cheese. I wrapped it with plastic wrap, followed by a layer of foil, then placed it back on the pizza pan which helped it remain flat as it froze.

When it was completely frozen, I removed the pan and put the pizza back in the freezer. All I had to do to serve it was remove it from the freezer, unwrap it and bake for about 15 minutes. I kept an eye on it to make sure the cheese didn't burn.

The advantage of topping the pizza before it's frozen is that nothing has to be done when it's time to bake it. The disadvantage was that it took longer to bake and so the crust was a little dry. Also, trying to find a completely flat spot in the freezer so the sauce and cheese didn't slide around was tricky. Just something to keep in mind when deciding if you should top your pizza or not before freezing.


For the second experiment, I prebaked the crust for about 8 minutes. I allowed it to cool completely, then wrapped it in layers of plastic wrap and foil. Again, I placed it back on the pizza pan while it froze so it wouldn't bend or fold.


I took this crust from the freezer about 30 minutes before I baked it. I did our usual toppings, then popped it into the oven at 425 degrees for 10 minutes. The crust on this one turned out much softer and chewier!

I made mini pizza crusts for the third experiment. This is something I thought would be easy to pull out for quick lunches. And I was right!

I made a batch of pizza dough, then divided it into 8 pieces. I rolled each one out into an oval (not a circle, because I'm circle impaired). I baked these crusts on a cookie sheet lined with parchment paper for about 6 minutes.


After letting them cool completely, I just slid them right into a freezer bag. To prepare, I pulled as many as I needed out of the freezer and let them sit on the counter for about 20 minutes. I topped them with our usual toppings, then into the oven for 6 more minutes.

Every experiment has to have a conclusion, right? Well, here's mine.

While I did like having the complete pizza frozen and ready to pop into the oven, it was harder to freeze because it had to stay flat. And the crust was drier.

So my preferred frozen pizza method is to prebake the crusts and top when I'm ready to bake. It was such a huge timesaver to have the crusts ready to go when I needed them. If you have never made frozen pizza, you need to try this.

A few tips:

Oil your pizza pans well before rolling out your crust. I spread a little olive oil over mine with a pastry brush. Sprinkle a little cornmeal over the pan to give your pizza a gourmet flair. After you've rolled out your crust, test it to be sure it doesn't stick to the pan. Once it's baked, it is very difficult to remove from the pan if it sticks.

Always prick the crust with a fork before prebaking. This allows steam to escape and prevents air bubbles in the crust. Air bubbles leads to the crust cracking, and when the crust cracks, your toppings might make it soggy.

Grate your own cheese. I know it will take a couple of extra minutes, but the difference in the meltiness (not a real word, I know, but you get my drift) of the cheese when it is baked is amazing! Packaged shredded cheese dries out and doesn't melt as nicely. So go with the block cheese and shred it yourself.

Mini pizzas allow more flexibility. Each family member can choose their own toppings. So while my family enjoys their boring pepperoni pizzas, I can have BBQ chicken! LOL

So, do you make your own frozen pizza? How do you do it? If you don't, try some of these tips to save yourself time later.

Monday, March 12, 2012

Ranch Veggie Pizza


Sometimes I enjoy a change from traditional tomato-sauce, pepperoni and cheese pizza. Don't you? So I used the idea of an olive-oil "sauce" with veggies as the toppings. The end result was delicious! Charles, my traditional pizza guy, even commented that he'd love to have this one more often.

Here's what you need:

1 pizza dough recipe
3 TBSP olive oil
1 TBSP ranch dressing mix
1 red onion, thinly sliced
1 green, red or yellow pepper, thinly sliced
2 Roma tomatoes, thinly sliced
1-2 cups shredded mozzarella cheese

Mix up a batch of your favorite pizza dough. You can use thawed frozen bread dough or even a pre-made store bought crust.

Combine the olive oil and ranch mix. Allow this to sit for several minutes so the oil gets infused with the ranch flavors. I actually do this before I start mixing my pizza dough.

Stretch the dough onto a greased pan. I like to use a rectangular cookie sheet instead of a round one for this pizza. I don't know why. Prick the crust several times with a fork. Bake at 425 degrees for 7-8 minutes.

Brush the olive oil mixture on the crust. Layer the toppings with tomato slices on top. Tomatoes have a lot of moisture and if they're right on top of the crust, your crust might get soggy. Sprinkle with cheese.

Bake for another 10 minutes until the cheese is melted and the crust is golden brown.

This pizza is so yummy! Without the heavy tomato sauce, it crisps up nicely. You can add mushrooms or other veggies to suit your family's tastes.

Monday, September 12, 2011

Chicken Pesto Pizza

I love different kinds of pizza. My family does not. They're plain ol' pepperoni pizza lovers. Occasionally I can throw on some sausage or bacon and they'll eat it, but traditional pizza is their style.

That's why I love to have company over and create a pizza buffet! I can offer several variations and don't have leftovers that only I will eat! The last time we had a buffet was in August when some friends from Iowa visited. We had pepperoni, sausage, BBQ chicken and this newest creation - Chicken Pesto Pizza! It's fantastic!


Here's what you need:

Dough for one pizza crust (here's my crust recipe)
1/2 small red pepper, thinly sliced
1/2 small orange or yellow pepper, thinly sliced
1/2 small green pepper, thinly sliced
1/2 small red onion, thinly sliced
1/4 cup pesto
1 cup shredded cooked chicken
2 small Roma tomatoes, thinly sliced
1 1/2 cups shredded mozzarella cheese
2 TBSP grated Parmesan cheese

After you've sliced the peppers and onions, heat a little olive oil in a small skillet. Saute the veggies for 5 minutes, or until slightly soft. Roll out the dough and spread the pesto sauce over the crust. Arrange the shredded chicken evenly over crust. Place the tomato slices over the chicken, then top with peppers and onions. Sprinkle the cheeses over the top. Bake at 425 degrees for 15-20 minutes.


The resulting pizza is delicious! You can reduce the amount of veggies or tomatoes, but don't skimp on the pesto. It gives the pizza so much flavor! You can make your own pesto, of course, but I use the Classico brand. You can find pesto sauce near the spaghetti sauce at your grocery store.

Monday, June 14, 2010

Homemade pizza crust and sauce

We like pizza around here. Except for the Princess, who threw up after eating pizza last year and hasn't touched it since. Nice visual, huh? We have pizza night often because it's quick, easy and yummy.

It's quick because I make a no-rise pizza crust. I let my Kitchenaid mixer do most of the work, so it's very easy. And it's yummy because I've started making my own sauce, thanks to a recipe shared by my sister-in-law Jennifer. I tweaked it just a bit, as is my way. It's so much better than any sauce from a jar!

Here's the crust recipe:

1 cup warm (not hot) water
1 TBSP yeast
1 tsp sugar

Mix these together in a bowl and let proof for about 10 minutes. The sugar feeds the yeast and helps it grow. It should look something like this.


When the mixture has proofed, add:

2 TBSP olive oil
2 1/2 cups flour (I use half white, half wheat)
1 tsp salt

Knead this for 5 minutes until the dough is smooth. Let rest for about 5 minutes. This makes it easier to form the crust in a pan or on a pizza stone.

If you're using a pan, spritz it with cooking spray or olive oil. Sprinkle a little corn meal over the pan. Roll out the dough to the edges of the pan or stone.


Top with sauce and your favorite pizza toppings. Bake at 425 degrees for 15 minutes, longer if you use a small pan for a thicker crust.


If you plan ahead and make the dough a few days before using it, the crust is so chewy and delicious! Just mix the dough and place in a covered bowl in the fridge. Roll it out when you're ready to fix your pizza!

For the sauce you'll need:

1 can (29 oz) tomato sauce
1 can (6oz) tomato paste
2 TBSP grated Parmesan cheese
1 tsp onion salt
1 tsp garlic salt
1 tsp sugar
1 1/2 tsp. oregano
1/2 tsp fennel seed
1/2 tsp marjoram
1/2 tsp basil
1/2 tsp salt
1/4 tsp thyme
1/4 tsp rosemary

Whisk all ingredients together in a sauce pan; simmer 2 or 3 hours. Stir occasionally. The longer you let this simmer, the thicker it will be.


This recipe makes enough sauce for 4 large pizzas. You can easily freeze it in Ziploc bags in the portions you need. To thaw, simply remove the bag from the freezer and place in a bowl of warm water. It should be ready to use in 10-15 minutes. Or if you're organized and thaw things the night before you need them, just put the bag in the fridge. It will be ready to go the next day.

In no time at all, you can have homemade pizza that leaves Papa John's in the dust!

Thursday, March 11, 2010

BBQ Chicken Pizza

Tonight I made three different kinds of pizza for a Pizza Buffet night with some friends. Well, four kinds really, because I changed my mind at the last minute and added a bacon pizza to the menu. I had intended to make a BBQ chicken pizza, a spinach alfredo pizza and two pepperoni pizzas (for the unadventurous among us). But to mix it up a little more, I turned one of the pepperonis into a bacon which Mr. Lego likes better anyway.

The BBQ chicken pizza was fabulous! Unfortunately, I didn't measure the ingredients, except for the Gouda cheese. I used the whole 8 ounces! Yum! So the amounts I have posted here are approximations, not exacts.

For the sauce, let me recommend my favorite BBQ sauce in the whole world, Sweet Baby Ray's.

I used the original recipe flavor, but SBR has a whole bunch of unique flavors like Raspberry Chipotle, Sweet Vidalia Onion, and Sweet n Spicy. Pick one that suits your tastes.

Here's what I did:

I took about 1 cup of shredded cooked chicken and mixed it with 1/2 cup of SBR's. I stretched my pizza dough out onto a baking sheet, then spread about 2 TBSP of sauce on it.


I spread the chicken out over the sauce.


Then I topped it with thin slices of red onion. I followed this with sliced Gouda cheese, an entire 8oz round.


I baked this at 400 degrees for 15 minutes until the crust was cooked through. I didn't have a chance to take a picture of the finished pizza because we were all so hungry and dug right in. But I did get a picture of one slice, all that's left of it. It was so, so, so good!


This post is linked to Tempt My Tummy Tuesday at Blessed with Grace. You can find some delicious recipes over there.

Monday, December 14, 2009

Deep Dish Pizza


Pizza is one of my favorite foods. I like all kinds. I like going to CiCi's Pizza buffet so I can try out new variations. I enjoy their alfredo and spinach pizza, taco pizza, and especially their BBQ chicken pizza. Unfortunately my family prefers regular pizza, you know the kind with mozzarella cheese and pepperoni. Sometimes they'll eat sausage or bacon instead of pepperoni, but it's all the same style of pizza. That means I don't fix the unusual variations at home, because they just won't get eaten except by me. And I really, really don't need to eat an entire pizza by myself.

Then there's the Princess, the youngest member of the family. She no longer likes pizza. Several months ago, she had pizza over at a friend's house while Charles and I went out to eat for my birthday. Later that night she got sick and threw up. Guess what she threw up? Pizza. Now she won't eat it. She blames the pizza for making her sick, and since it made her sick once, it will always make her sick. No amount of reasoning will persuade her otherwise. Of course, this is also the child who won't eat sauce on her spaghetti, gravy on her mashed potatoes, and butter on her toast.

Can I just say that not eating pizza makes usual childhood activities a little harder for us? You know what is served at the majority of children's birthday parties? What do you think the children's clubs at church serve for fellowships? And when she's old enough for the youth group, how many gatherings include pizza? She's definitely going to stand out in the crowd! Ha ha!

Here's a recipe for deep dish pizza. It's the one kind of "unusal" pizza that Charles and Mr. Lego really enjoy. And of course, I love it too. I make breadsticks for the Princess. Plain, of course.

Deep Dish Pizza

1 loaf frozen bread dough (or your favorite pizza crust recipe, enough for one pizza)
1/2 lb bulk sausage, browned and drained
2 cups mozzarella cheese
1/2 can Italian style diced tomatoes
2 TBSP grated Parmesan cheese

Grease a 9x13 pan. Stretch the dough to fit the pan, pressing up the sides a little to form a rim. Sprinkle the sausage over the dough, pressing down a little as you go. Cover with cheese. Sprinkle the tomatoes over the cheese. I go easy on Mr. Lego's portion because he doesn't care for a lot of tomatoes. Then sprinkle the Parmesan cheese over the top. Bake at 350 degrees for 30-35 minutes until the dough is baked through.

Yes, there is no sauce on this pizza. The tomatoes provide the sauce flavor. The crust is thick and chewy. Delicious! And different.