Thursday, May 31, 2012

Disney with Kids - How old should they be?

A while back a reader asked me to give some tips on taking a trip to Disney with kids. So I've decided to break it down into a series of posts ranging from what age they should be when you take them to choosing a resort to learning opportunities for kids. I'll also share some travel tips as well. If you want to read my Top 10 Disney tips (which are more generic), click here.

So let's tackle our first topic. How old should your children be when you take them to Disney World?

The Princess was four and Mr. Lego was five, almost six on our first trip.

Well, it's really up to you. You know your child better than anyone. You know their abilities and limitations. But here are some considerations to keep in mind.

1. Is this a once-in-a-lifetime trip for your family? If it is, wait until all of      your children are old enough to remember the experience. Your children might be spread out in age, but be assured that Disney offers something for everyone of all ages. If you plan to take your family several times as they grow up, it can be fun watching them experience the magic of Disney at different ages. Here's a tip - I wish I'd thought of it before this year! Take a photo of your children in front of the same ride, statue or landmark every time you go. You can capture the changes and growth of each one through the years.

2. Do you want to push a stroller around all day? If your child is a toddler, chances are they're not going to be able to walk, walk, walk all day long. And since the average guest walks about 7-10 miles per day, your young child might not be able to keep up. Strollers can make for some tight manuevering through crowds. And they are not allowed in queue lines, so you have to park them outside the rides. If your wait time for a ride is 30 minutes, you're going to be standing in line either holding or holding on to your child. Also, if you aren't able to bring a folding stroller from home, you can rent one at the parks. But don't forget to budget that expense as you plan your trip. Click here for info on renting strollers at the parks.

3. How important it is that you ride the big attractions, like Space Mountain or Expedition Everest? There are height requirements for every ride, so your young children may not be able to ride everything with you. Oh, there are plenty of toddler-friendly rides like Dumbo and Peter Pan's Flight. But some guests feel they aren't getting their money's worth if they can't ride every single ride. Fortunately, there is a rider switch option for some of the bigger attractions that allows one parent to ride with the children who are old enough while one parent waits with those who can't. The waiting parent then switches with the parent who just rode without having to go to the back of the stand-by line. Just ask the Cast Member at the entrance to the ride for details. Click here to see descriptions and height requirements for all Disney attractions.

4. Are you willing to take breaks throughout the day? Some parents are commandos, meaning they won't stop for anything. But remember that a small child is used to taking naps throughout the day. That's not going to change simply because you're at Disney. Their little bodies still are going to need recharging. And don't forget that older children may need a break, too. Go back to your resort and take a swim, if the weather permits. Then head to the park again for the evening. Bottom line, taking small children to Disney requires flexibility.

Our Experience

We took our kids to Disney when the youngest was four. Here's why we waited.

1. We weren't sure if we'd ever have the opportunity to go back, so we wanted her to remember the trip. Four was the perfect age, as she was still young enough to think everything was magical. And she remembers it very clearly.

2. We didn't want to deal with the stroller issue. Outside every ride is a sea of strollers that you have to wade through to get to yours. So we felt like we'd be spending a lot of time unloading the kids for a ride, trying to find our stroller, then loading back up again. Also, on the Disney bus system, all strollers have to be folded up, so we thought it would be a hassle every time we got on or off a bus.

3. We wanted both kids to be able to ride as many things as possible if they wanted to. On that first trip, there were only a few things they weren't tall enough to ride. Disney enforces their height restrictions, so if your kids aren't tall enough, they're not riding even with you. If I recall, the only ride the children really wanted to go on but couldn't was Primeval Whirl in Animal Kingdom. After riding it myself, I could see why. The twists and turns on the ride really throw you around!

4. We didn't want to worry about diaper changing or potty accidents. By age four, my child could tell me when she had to go soon enough that we could find a restroom. Silly, maybe. But not something I wanted to deal with at Disney.

Please keep in mind, that these are OUR reasons for waiting. If you want to take children younger than that, you will get no criticism from me. You know your children and what they can handle. You also know you and what you can handle!

Now, here's a great video by the Wolf family. They clearly know how to have fun and not worry about what people think of them. And they're making fantastic family memories at the same time. Enjoy!


Wednesday, May 30, 2012

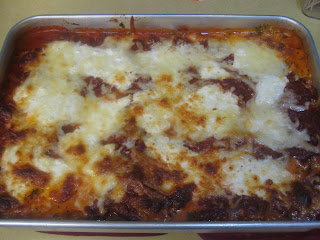
Mom's Lasagna

My mom is famous for her lasagna. We requested it for nearly every birthday dinner as we were growing up. She makes it for families in her church who are bereaved or who have just had a baby. And it's the first meal she ever prepared for my husband when I brought him home to meet my parents. Even now, when we head there for a visit, it's often on the menu.

And even though I asked for her recipe and try to stick to it as much as possible, I have to say, she makes it better. Still, I try. And now you can, too! Not only that, but you can prepare it in the crockpot if you've a mind to. Look for instructions at the bottom of this post.

Here's what you need:

9 lasagna noodles
1 lb ground beef, browned and drained
5-6 cups spaghetti sauce (she uses Ragu)
2 TBSP dried oregano
1 TBSP each dried basil and Italian seasoning
1 (15 oz.) container Ricotta cheese
1 (24 oz) cottage cheese
4 cups shredded mozzarella cheese
1 cup grated Parmesan cheese

First, cook the lasagna noodles according to the package directions. I use whole wheat noodles, but any are fine. If you're planning to freeze it, only cook for half the recommended time. Also, I sometimes cook a few extra noodles, just in case.


In a large pan, combine the cooked ground beef with the spaghetti sauce. Add the seasonings and allow to simmer for 30 minutes or so to let the flavors blend.


In another bowl, mix the ricotta and cottage cheeses. Season with a little salt and pepper, if desired.


Now get ready to assemble your lasagna. I decided to make two at a time, one for dinner and one for the freezer.


Start by covering the bottom of the pan with a little sauce. This way the noodles don't stick to the bottom.


Place three noodles in the pan, trying to cover the whole thing. This is why I often cook a couple extra noodles, to cut them to fit in any leftover spaces. Then layer 1/3 of the meat sauce over the noodles.


Layer 1/3 of the cottage cheese mixture, then 1/3 of the mozzarella and Parmesan cheeses. Repeat layers two more times.


Bake at 350 degrees for 30- 40 minutes. The top should be bubbly and the cheese starting to brown.


Allow to rest for 15 minutes before cutting.


To freeze, skip the baking step. Cover the pan tightly with foil and freeze for up to three months. When ready to eat, thaw in the fridge for at least 24 hours. Bake as directed above.

If you want to prepare this in the crockpot, do all the prep work EXCEPT cooking the noodles. Believe it or not, you want raw, dry noodles because if they cook too long in the crockpot, you'll end up with mush. Not good. The moisture from the sauce will cook them, so don't worry about crunchy lasagna either.

Assemble as directed above - a little sauce in the bottom, then a layer of uncooked noodles. Break them gently to fit the shape of your crockpot. Then layer the meat and cheeses. Repeat until your crockpot is full.

Cover and cook on low for 3-4 hours. Much longer than four hours will result in mush, too. I love doing this on Sundays because it's ready when we get home from church right after noon.

Tuesday, May 29, 2012

Southwest Rub and Marinade

I love the flavors of Southwestern food. Some people refer to it as Tex-Mex. Whatever you call it, it's good!

I love having this seasoning blend on hand for a variety of dishes. It can be used a rub for chicken, beef or pork before grilling. It can be added to a marinade for a Southwestern flair or used to season fajitas and tacos. I sprinkle it over corn or potatoes - even scrambled eggs! That's a lot of uses for one seasoning blend!

However you choose to use it, it's simple and flavorful. Who doesn't like that?

Just mix 2 TBSP each cumin, garlic powder and dried oregano with 1 TBSP each chili powder and sea salt. Store in an airtight container.

The basic recipe is 2 parts cumin, garlic powder and oregano to 1 part chili powder and sea salt. So you can make as much as you want to have on hand. Simple, huh? And if you like your Southwestern food a little spicier, add more chili powder to your taste.

To make an easy marinade using this blend, here's what you need:

1/2 cup water
1/4 cup olive oil
1-2 TBSP lime juice

1 TBSP Southwest rub blend

Pour all the ingredients into a plastic Ziploc bag. Smush it around until the seasonings and liquids are well combined.

Add the meat and make sure all the pieces are coated. Allow to marinate for a few hours or overnight. You can freeze the meat in the marinade for later, too. Just thaw in the fridge overnight.


This recipe will coat about a pound of meat well. Double the recipe and use a bigger Ziploc bag for more meat.

Monday, May 28, 2012

A Day of Remembrance

We're going to spend the day with friends, enjoying a cook out and fun. But I wanted to take a moment to think about why we have this day of remembrance. It's not just a paid vacation day or holiday.

Today we remember those who gave their lives in service for our country. We live in freedom because of their sacrifices. Words are inadequate to express my gratitude to these heroes.


Sunday, May 27, 2012

Menu Plan May 28-June 2

Before I share my menu plan for the week, I just want to give a shout out to my parents, who today celebrated their 46th wedding anniversary. They've been an outstanding example to me of love and respect between spouses. I know the secret of success for their marriage has been their commitment to put God first in every area of their lives. I'm so thankful to have such godly parents. (This pic is from a couple of Christmases ago.)


Now, on to this week's menu plan. It's been hot, hot, hot around here in the Deep South. I've got some skillet meals planned to keep the oven off. I've even revamped my chicken spaghetti preparation to get it all done without the oven. But Saturday is Charles' birthday, and he requested lasagna. Since I have one in the freezer ready to be baked, I'll have to use the oven that day. And I have to bake a chocolate cake, too. Hubby's request.

So here's what we're eating this week:

Monday - Memorial Day
Hamburgers and hot dogs on the grill, West Virginia hot dog sauce

Tuesday
Tori No Kara-age (Japanese fried chicken nuggets), rice

Wednesday
Smoked sausage and pepper skillet over mashed potatoes

Thursday
Chicken spaghetti, cauliflower

Friday
Southwest pepper steak, fiesta potatoes

Saturday
Lasagna, chocolate cake


Sunday
Roast and potatoes in the crockpot

For more meal planning inspiration, visit Organizing Junkie's Menu Plan Monday.

Friday, May 25, 2012

Easy Iced Coffee

I love coffee. But I usually drink it only in the mornings. My husband drinks it all day long. And he likes it hot, very hot.

In the summer, though, I like an occasional iced coffee. But I don't have them often because at a coffee shop, they're a little pricey! So I found an incredibly easy way to make them at home for a fraction of what I'd pay at Starbuck's.

And all I have to do is freeze leftover brewed coffee in ice cube trays. I make coffee every day, and some days Charles and I don't drink it all. So instead of dumping it down the drain, I freeze it! And now my iced coffee is almost ready to go! Plus, I'm saving money by NOT going to Starbuck's and by NOT dumping out perfectly good coffee (which is getting kinda expensive anyway).

Iced coffee also needs a milk component. My personal favorite is coconut milk. This isn't the canned stuff. You can find this in a carton in the dairy case. But if you prefer whole or skim milk, go with that.

Depending on how sweet you like your coffee, add a little sweetener. I use a drizzle of agave nectar. The coconut milk is a little sweet on its own so I don't need much.


I use 5-6 coffee cubes. I like mine a little strong. A cup of coconut milk, a splash of sweetener, then whirl it up in a blender.

It's easy to customize your own iced coffee, too. Add some yummy vanilla extract. Almond or hazelnut extract would be delicious, too. Create your own and enjoy!


Tuesday, May 22, 2012

Tropical Smoothies

The temperatures are starting to climb here in the Deep South, so cool, refreshing smoothies are ideal for mid-afternoon snacks. I picked up some frozen pineapple chunks in the freezer section to use as my smoothie base. Then I considered what other flavors would go well with pineapple. Mango and coconut! I added a little sweetener and a yummy tropical smoothie recipe was born.

Here's what you need:

2 cups frozen pineapple chunks
(you could use canned or fresh pineapple chunks but freeze them first)
1 mango, peeled and diced
2 cups coconut milk (not the canned stuff, this is in a carton in the dairy section)
1-2 TBSP agave nectar, depending on how sweet you want it

Place the ingredients in a blender. Blend until smooth.


This recipe makes about 3 servings. The kids loved the smoothies and so did I!

Monday, May 21, 2012

Oven Baked Chicken Fajitas

Whenever we eat out at a Mexican place, Charles always gets fajitas. He's not fond of sauce-covered enchiladas or burritos like I am. This recipe is different because you put the meat and veggies in the oven to cook instead of standing over a stove or grill. And everyone liked it!

I started by marinating the chicken in the freezer. Yes, that's right. I bought chicken on sale, then sliced some up and froze it in a freezer bag with the marinade. After thawing in the fridge, the meat was infused with the Southwestern flavors and was delicious! I used the same marinade found in my Southwest Pepper Steak.

So here's what you need for the marinade:

1/2 cup water
1/4 cup olive oil
1-2 TBSP lime juice
1 teas each cumin, garlic powder and dried oregano
1/2 teas chili powder
1/2 teas sea salt


I mixed all these ingredients up in a freezer bag, then placed the chicken strips in. I kneaded the bag with my hands to get all the pieces coated, then sealed it and put it in the freezer. To thaw, I simply put it in the fridge the night before and it was perfectly marinated by the time I needed it!

If you don't want to freeze the chicken, just mix up all the marinade ingredients and let the chicken marinate for a few hours.

Now for the rest of the fajitas you need:

2 peppers, thinly sliced (I used one red, one green)
1 small onion, thinly sliced
2 Roma tomatoes, seeded and chopped
6-8 tortillas, depending on how big the tortillas are
Any additional toppings you want like cheese or sour cream

After the chicken has thawed, place it in a lightly greased 9x13 pan. Dump the marinade in with it. Place the peppers, onions and tomatoes in the pan. Stir to combine and coat with the marinade.


Bake at 350 degrees for 20-25 minutes until the chicken is cooked through.


Season with a little salt and pepper, if desired. Wrap in tortillas and top with any additional toppings you like.


I especially liked this recipe because the peppers and onions stayed crisp-tender. The chicken was moist and flavorful from the marinade and the tomatoes. Definitely a winner in my house!

Sunday, May 20, 2012

Menu Plan May 21-27

Last week I cleaned out my chest freezer in preparation for getting our half-cow meat order. We go to pick it up this Wednesday, and I can't wait! The meat will be hormone and antibiotic-free, which will be better for our health. So I've got some great beef recipes lined up this week.

Here's the plan:


Monday
Parmesan-crusted tilapia, cauliflower


Tuesday
Chicken corn chowder (crockpot)


Wednesday
Beef and wild rice casserole

Thursday
Chinese chicken, rice


Friday
Sandwiches/leftovers

Saturday
Cheeseburger rice, green beans


Sunday
Spaghetti and meatballs, garlic bread

For more meal planning inspiration, visit Organizing Junkie's Menu Plan Monday.

Thursday, May 17, 2012

Homemade Pizza Bagel Bites

Have you ever tried the Bagel Bites from the freezer section of the store? There are nine little bagels covered in pizza toppings per package. You reheat them in the oven or microwave. But looking at the ingredient list, there are also all kinds of yucky, unpronounceable ingredients.

I just couldn't bring myself to buy them for my kids not snack on, not when they are so easy to make at home. Not to mention cheaper.

Here's what you need:

Whole wheat mini bagels (I used the Thomas brand), I think there were 12-14 in the bag
1/2 a package of turkey pepperoni slices
2 cups shredded mozzarella cheese
1 1/2 cups pizza sauce

Split the mini bagels in half and place cut side up on a baking sheet or two. I lined my sheets with parchment paper so they didn't stick after being frozen.


In a food processor, combine the pepperoni slices and shredded cheese. Pulse a few times until the pieces are small and well-mixed.


Transfer to a bowl, then add the pizza sauce and mix well. Place a heaping tablespoon of the mixture on each bagel half. Go back and press the toppings down so they stick to the bagel. It is much easier and quicker to top the bagels this way, instead of spreading sauce on each one, then pepperoni and then cheese.


Place the baking sheets into the freezer until the bagels are frozen. Then remove them from the sheets and store in plastic freezer bags.


To serve, take the desired number of mini pizzas from the bag. Place on a baking sheet and bake at 425 degrees for 10-15 minutes until warm and melty.


I love that these are made with healthier ingredients than the store-bought ones. And they're so easy! I think it took me about 10 minutes from start to finish to get two dozen bagel bites in the freezer. And the results were delicious!


Mr. Lego certainly enjoyed them!

I'm linking this post to Miz Helen's Country Cottage and her Full Plate Thursday linky!

Tuesday, May 15, 2012

Chicken Spaghetti

If your family likes chicken and pasta, they'll love this yummy, comforting casserole. I tweaked a few different recipes, finally coming up with something we all liked. I used healthier ingredients than you'd usually find in this kind of dish. For instance, I made a double batch of homemade cream of mushroom soup to replace the canned soup. While it took a little extra time, the difference in quality and taste were noticeable.

Here's what you'll need:

1 (8 oz) pkg whole wheat spaghetti, broken into 2-inch pieces
2 cups shredded cooked chicken
1 cup cooked broccoli florets, chopped
2 cans cream of mushroom soup (my homemade version can be found here)
1 cup chicken broth
1 TBSP dried minced onion
1 teas garlic powder
1 teas seasoned salt
1/2 teas pepper
3 cups shredded cheddar cheese, divided

Cook the spaghetti for half of the time listed on the package. Mine said 6-8 minutes, so I cooked mine for 4 minutes. The pasta will soak up the liquids, so you don't want it completely cooked.

Combine the soup and broth together. Stir in the chicken, broccoli and seasonings. Add 2 cups of the cheddar cheese and mix well.

Transfer to a greased 9x13 pan and smooth out. Sprinkle with the remaining cheese. Bake at 350 degrees for 40-45 minutes until bubbly and the cheese is melted.


If you want to freeze this for later, don't bake right now. Place plastic wrap flat onto the surface so it's completely covered. Then cover tightly with a layer of foil.

When you're ready to serve, allow the casserole to thaw in the fridge overnight. Bake at 350 degrees as directed.

Monday, May 14, 2012

Provencal Peppers

When I saw this recipe over at Food Floozie, I knew I had to try it. I tweaked it just a little to suit our family's tastes. It is tangy and flavorful and goes well as a side dish with just about anything.

Provencal refers to the southern region of France where lavender is abundant. Using herbs de provence gives you a little taste of French cooking in your own kitchen. If you can't find herbs de provence in the grocery store, check out Mountain Rose Herbs. I use their blend and it's phenomenal!

Here's what you need:

2 TBSP olive oil
1 yellow pepper, cut into thin strips
1 orange or red pepper, cut into thin strips
1 teas minced garlic
1 pinch sea salt
1/4 cup white cooking wine
1/2 teas herbs de provence

In a saute pan, heat the olive oil over medium heat. Add the pepper strips and cook until they start to brown.


Add the minced garlic and sea salt. Then stir in the white wine and cook until the peppers are softened and most of the liquid has evaporated. Sprinkle on the herbs de provence and enjoy!


Sunday, May 13, 2012

Menu Plan May 14-20

What a weekend! On Saturday, I spent much of the day preparing food for the freezer - homemade chicken nuggets, chicken spaghetti, sausage and veggie calzones, chicken wraps and tortillas. Whew! It was a lot of work but it will pay off when I don't have to cook much this week.

We also spent some time at Mt. Cheaha, the highest point in Alabama. It's only about 20 minutes from our house, so it was a nice little get-out-of-the-house trip. And the views were pretty awesome, too.


And of course, today was Mother's Day. We placed a to-go order with Outback, then picked it up on our way home from church. No waiting for a table! Then Charles and the kids cleaned up, so I didn't have to lift a finger. What a nice treat!

Now on to this week's menu. I'm so excited to have a freezer full of healthy, homemade food waiting for me.

Monday
Chicken spaghetti (recipe to come), green beans

Tuesday
Sausage and veggie calzones (from the freezer)

Wednesday

Thursday
Lasagna, garlic bread

Friday
Oven baked chicken fajitas (recipe to come)

Saturday
Banquet at church for childrens' workers

Sunday
Hamburgers and hot dogs at church

For more meal-planning inspiration, visit Organizing Junkie's Menu Plan Monday.

Saturday, May 12, 2012

Happy Mother's Day!


This is a rose bush Charles got me for Mother's Day when the kids were very small. When we moved three years ago, it came with us. It gets bigger every year, as do my children. It will always be special to me.

Anyway, I wanted to wish all of you mothers a very Happy Mother's Day. It's a tough, often under-appreciated job, but there's nothing as rewarding and fulfilling as being a mom. For all that you do in raising the next generation, thank you.

And to my own mother, I can't say enough about how much I respect and appreciate you. You've shown me Jesus and covered me with prayer my whole life. I love you!


Thursday, May 10, 2012

Triple Berry Crisp

I've been experimenting with different kinds of natural sweeteners lately. I'm trying to get away from white sugar. In this recipe I used agave syrup and sucanat, but honey can be substituted. As with any kind of sweetener, moderation is the key.

Here's what you need:

2 cups mixed berries, fresh or frozen
1 TBSP agave syrup
1 TBSP white wheat flour (optional, used as a thickener)
1/2 cup oats
3 TBSP sucanat
3 TBSP white wheat flour
3 TBSP melted butter or coconut oil
1/2 teas cinnamon

I used a bag of frozen mixed berries I got at Aldi. It contained blueberries, blackberries and raspberries. You can use whatever mixture of berries you want.


Spread the berries in an 8x8 pan. Drizzle the agave syrup or honey over the top. Sprinkle with flour, if desired. Mix together. I used the flour, as you can see by the picture. The next time I make this, I'll probably omit it. I don't think it really contributed anything to the dessert.


In a small bowl, mix the remaining ingredients until crumbly. Sprinkle evenly over berry mixture.


Bake at 375 degrees for 20-25 minutes until bubbly around the edges and golden brown.


We all enjoyed this dessert very much. It was delicious and sweet with just a hint of crunch from the topping. The kids are already begging me to make more!


Monday, May 7, 2012

That Works for Me Mother's Day Sale

A couple of weeks ago I told you about a new e-book, That Works for Me from Kristen of We are THAT Family. Well, Kristen is offering the book for 1/2 off just in time for Mother's Day!

That's right! Half-off! You can get all of those handy tips for just $4 if you purchase the e-book on May 8th or 9th!


Click here to visit wearethatfamily.

Use the promotion code "works4mom" to receive your discount! Hurry because it's a limited time offer.


Disclosure: I am affiliate, so I will receive a small portion of the purchase price if you click the above link and make a purchase. Just wanted you to know.

Sunday, May 6, 2012

Menu Plan May 7-13

We had an interesting experience this weekend. A dear friend gave us tickets to the Saturday race at Talladega. We live nearby, so we decided to go as a family and experience it for ourselves.

Well, it was loud and hot and did I mention loud? We had fantastic seats right in front of pit row. The Princess was enthralled with watching the pit crews throwing tires around and making simple repairs. Mr. Lego didn't enjoy it nearly as much.


This week will be quieter, we hope. We'll be finishing up our school year and getting some work done around the house. Then we'll be getting our summer plans finalized.

Now on to this week's menu:

Monday
Tasty tilapia, broccoli

Tuesday
Chicken shawarma, flatbread

Wednesday
Spaghetti and meatballs

Thursday
Baked egg rolls, fried rice

Friday
Crockpot beef stroganoff, noodles, green beans


Saturday
Grilled hamburgers, roasted potatoes

Sunday
Mother's Day

For more meal-planning inspiration, visit Organizing Junkie's Menu Plan Monday.

Thursday, May 3, 2012

Frozen Pizza Experiment

I've been trying some freezer meals around here lately, and one of my experiments has been frozen pizza. I've eaten my share of Totino's cardboard pizzas in the past, but in recent years I've tried to avoid buying frozen pizza. I have a super simple pizza crust recipe, so I decided to use that as my base and experiment from there.

Here's what I did.

My first experiment consisted of prebaking the crust for about 10 minutes, then allowing it to cool completely. I topped it with homemade sauce, pepperoni and shredded cheese. I wrapped it with plastic wrap, followed by a layer of foil, then placed it back on the pizza pan which helped it remain flat as it froze.

When it was completely frozen, I removed the pan and put the pizza back in the freezer. All I had to do to serve it was remove it from the freezer, unwrap it and bake for about 15 minutes. I kept an eye on it to make sure the cheese didn't burn.

The advantage of topping the pizza before it's frozen is that nothing has to be done when it's time to bake it. The disadvantage was that it took longer to bake and so the crust was a little dry. Also, trying to find a completely flat spot in the freezer so the sauce and cheese didn't slide around was tricky. Just something to keep in mind when deciding if you should top your pizza or not before freezing.


For the second experiment, I prebaked the crust for about 8 minutes. I allowed it to cool completely, then wrapped it in layers of plastic wrap and foil. Again, I placed it back on the pizza pan while it froze so it wouldn't bend or fold.


I took this crust from the freezer about 30 minutes before I baked it. I did our usual toppings, then popped it into the oven at 425 degrees for 10 minutes. The crust on this one turned out much softer and chewier!

I made mini pizza crusts for the third experiment. This is something I thought would be easy to pull out for quick lunches. And I was right!

I made a batch of pizza dough, then divided it into 8 pieces. I rolled each one out into an oval (not a circle, because I'm circle impaired). I baked these crusts on a cookie sheet lined with parchment paper for about 6 minutes.


After letting them cool completely, I just slid them right into a freezer bag. To prepare, I pulled as many as I needed out of the freezer and let them sit on the counter for about 20 minutes. I topped them with our usual toppings, then into the oven for 6 more minutes.

Every experiment has to have a conclusion, right? Well, here's mine.

While I did like having the complete pizza frozen and ready to pop into the oven, it was harder to freeze because it had to stay flat. And the crust was drier.

So my preferred frozen pizza method is to prebake the crusts and top when I'm ready to bake. It was such a huge timesaver to have the crusts ready to go when I needed them. If you have never made frozen pizza, you need to try this.

A few tips:

Oil your pizza pans well before rolling out your crust. I spread a little olive oil over mine with a pastry brush. Sprinkle a little cornmeal over the pan to give your pizza a gourmet flair. After you've rolled out your crust, test it to be sure it doesn't stick to the pan. Once it's baked, it is very difficult to remove from the pan if it sticks.

Always prick the crust with a fork before prebaking. This allows steam to escape and prevents air bubbles in the crust. Air bubbles leads to the crust cracking, and when the crust cracks, your toppings might make it soggy.

Grate your own cheese. I know it will take a couple of extra minutes, but the difference in the meltiness (not a real word, I know, but you get my drift) of the cheese when it is baked is amazing! Packaged shredded cheese dries out and doesn't melt as nicely. So go with the block cheese and shred it yourself.

Mini pizzas allow more flexibility. Each family member can choose their own toppings. So while my family enjoys their boring pepperoni pizzas, I can have BBQ chicken! LOL

So, do you make your own frozen pizza? How do you do it? If you don't, try some of these tips to save yourself time later.