Showing posts with label crafts. Show all posts

Tuesday, October 14, 2014

Rustic Mason Jar Craft

I'm not a very crafty person. Most of our home decor I leave up to my husband. He has a great eye for color and design. And I don't.

He also is very detailed and meticulous about things. I'm not. That's why for years he has done all the Christmas present wrapping. He measures the paper out and finds just the right decorative touches to go with it - ribbons, handmade bows, flowers, snowflakes, you name it.

Slight hijack for a funny story: Last Christmas he said he was tired of being the one to wrap all the presents and asked me to do it. I said no problem. All of the presents were wrapped in gift bags - no measuring or planning required. Hubby was appalled! And this year he's back to wrapping the gifts. Heh, heh.

Since I'm not a perfectionist, shabby chic and distressed decor really appeals to me. It's supposed to look a little messy. When I saw this idea for painting mason jars floating around Pinterest, I knew it was something I could do!

Here's what you'll need to make this really easy rustic mason jar:

Quart size mason jar (I used a wide mouth jar)
Acrylic paint in your choice of colors
Foam brush
Sandpaper
Clear spray sealer
Jute string or twine
Flowers, fresh or fake

Wipe the jar clean of any dust. Use the foam brush to apply paint to the jar. Allow to dry completely.

Take the sandpaper and rub off the paint from the raised areas of the jar. Then randomly scrape a little paint from all sides, including the mouth. Spray the sealer all over the jar and allow to dry.

Wrap the jute string or twine around the top of the jar and fill with flowers.


Monday, March 11, 2013

Disney Journal Finally Complete!

And it's only been 13 months since our last trip to Disney World!

I've done scrapbook pages and even photo books in the past, but this time I wanted to incorporate some of the memorabilia and receipts we collected.

I started out with drawers full of stuff! Disney stickers, maps, scrapbooking papers and die cuts, you name it!
Not to mention Ziploc bags stuffed with papers and junk!
The above pictures were taken after I was finished, so there was tons more when I started!
I first thought of buying a travel journal and using that for pictures and stories. But then I realized I'd need a book that I could add pages to. So I purchased a regular photo album with rings at Target. I think it was on clearance, too. It already had all the photo page protectors I would need.
I cut my own strips for captions out of cardstock I had on hand instead of using the flimsy paper ones that came with the photo album.

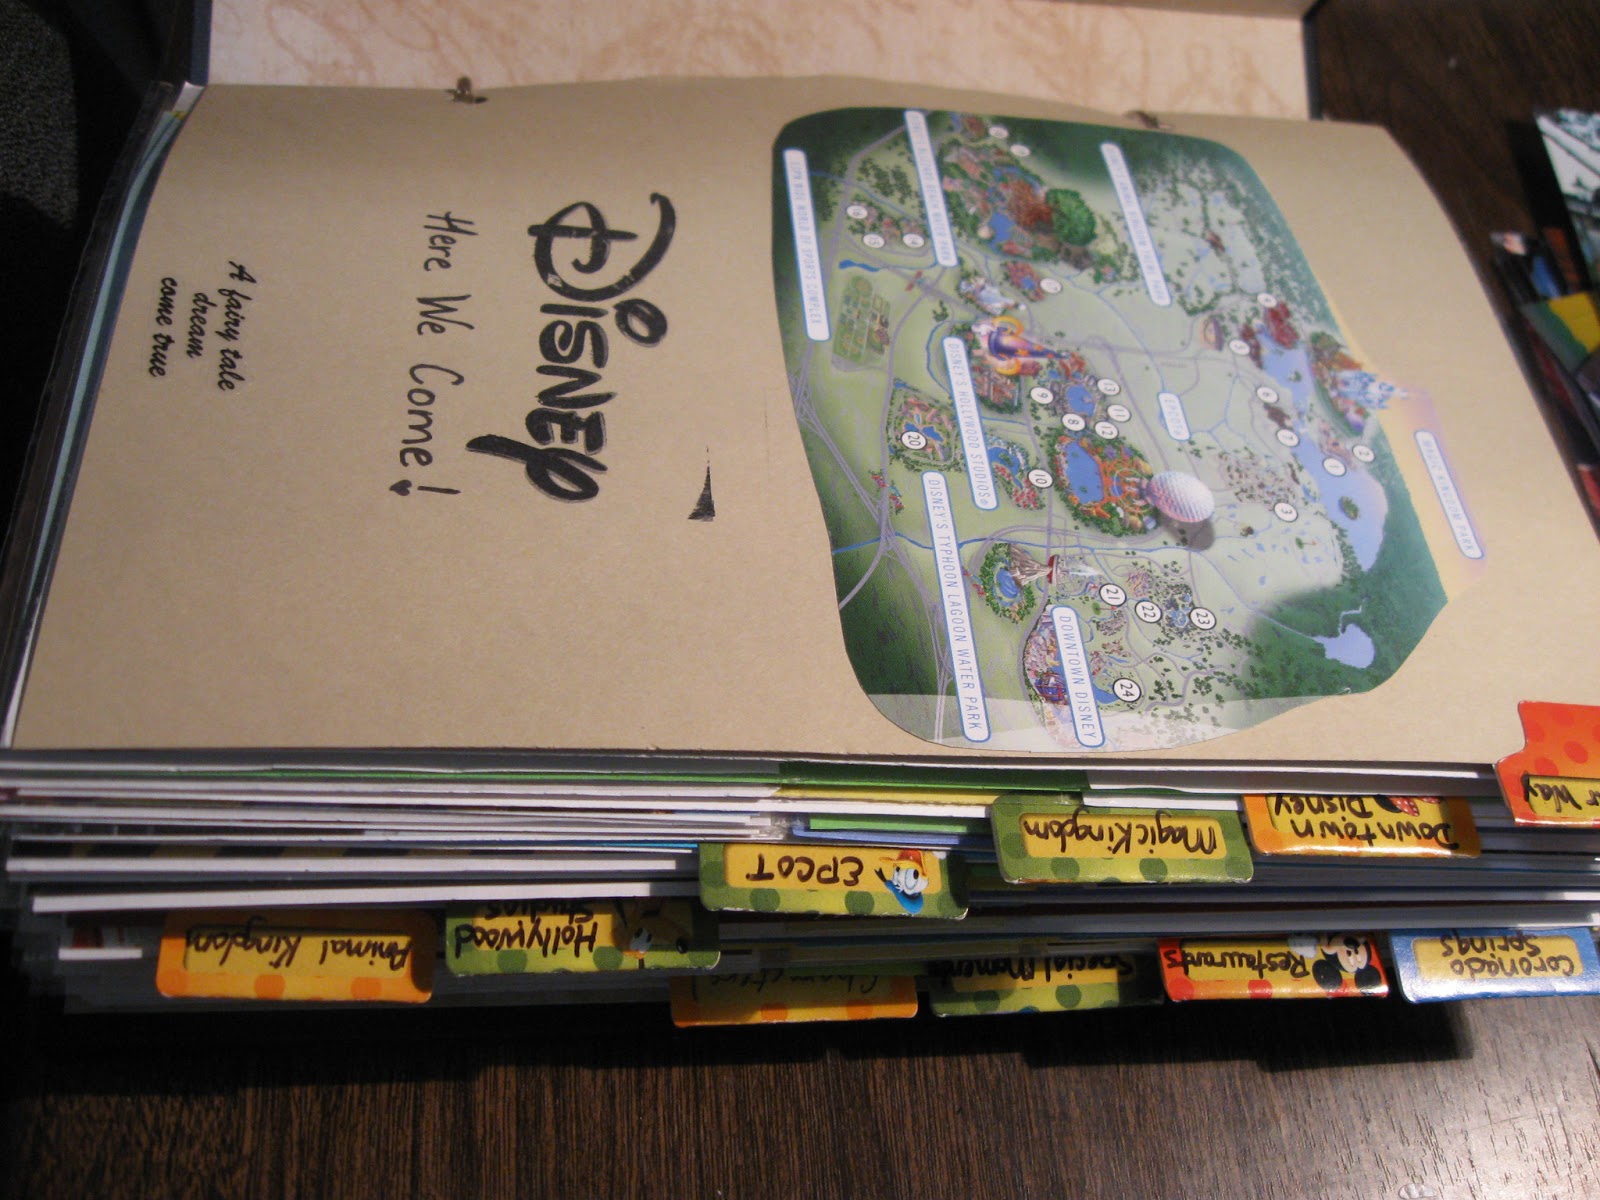
I made cardstock divider pages for each section of the book, using tabs I already had.
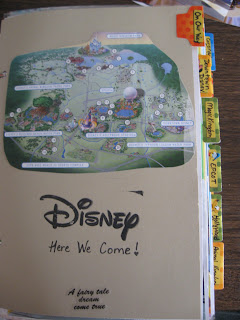
Maps, stamps, stickers - it all got used!
I divided my book into sections - On Our Way (to document our road trip), Downtown Disney, Magic Kingdom, Epcot, Hollywood Studios, Animal Kingdom, Our Resort, Restaurants, Special Moments, and Characters.

I think if I do a journal like this again, I'll divide it into Day One, Day Two, etc. Sometimes we went to two different parks on the same day, so I'd like to document that.

On each of the park divider pages, I made a pocket and included a park map. It's so handy to pull the maps out as we plan for our next trip!
I included leftover Fast Passes, our Key to the World cards (park tickets, room key, dining privilege and charge card all in one!), receipts, and even a special birthday card Mr. Lego received from the princesses at the Akershus restaurant.


 The dining plan is a big part the expenses for our Disney trips. I kept a brochure outlining what restaurants participated in the dining plan. And then I recorded where we ate, and in some cases how much it cost. See, we got the dining plan for free, and I wanted to keep track of how much we would have spent on sit-down meals.

Looks like we ate a lot in Epcot!
And of course I took pictures of the food!
Here are some other pages from the journal:


My advice if you want to make a journal commemorating a Disney trip (or any other trip, for that matter) is to keep everything - ticket stubs, brochures, maps, anything! And most of those items are free, so get several. You might want to cut them up later, like I did with the maps! If you have more than one of them, you can let your creativity flow and not worry about ruining a memento.

Also, take a little notebook and jot things down that you want to remember - cute things the kids said or funny things that happened. Believe me, after 13 months, those things will be hard to recall!
Monday, December 12, 2011

Easy Bird Treats

Our breakfast area has a floor-to-ceiling window that allows us wonderful access to nature. We love to watch the birds that visit our backyard regularly. It's one of our favorite things to do while we eat lunch.

So to encourage our visitors to stop by often, we made simple little bird feeders from toilet paper tubes, peanut butter, and bird seed. Easy peasy!


Spread peanut butter all over the toilet paper tube. I learned from experience that the peanut butter layer needs to be fairly thick. Now roll in bird seed until the tube is covered.


To hang, simply slide the tube over a branch on a tree or bush. The birds found ours within a few minutes. Here's one of our resident cardinals enjoying his treat.


The kids already have plans to make dozens more for every bush and tree we have! Because they're so easy, why not?

Saturday, April 2, 2011

Family Rules Canvas or how I spent my Saturday


I first stumbled across this idea about a year and a half ago at Mary Ostyn's blog, OwlHaven. I thought "What a neat idea! I'd like to do that someday!" And I promptly went on with my life and forgot all about it.

Until about a month ago, when a spurt of creativity descended upon me and I rediscovered this project in the far recesses of my mind. Scary place to be, I tell you.

I bought a 12x24 canvas and painted it green to go with our breakfast area walls. Then I printed off our family rules onto scrapbook paper, using different fonts for each one. I trimmed each piece and inked the edges to create more of a boundary between each one.

After much trial and error, I finally had the rules in the order I wanted them, so I adhered them to the canvas. I've seen some of the family rules canvases that use Mod Podge, but honestly, I'm a Mod Podge freak because I can never get the bubbles out. I simply used a scrapbook tape runner adhesive that I know is really strong.

I was going to seal the entire thing with an acrylic sealer, but the adhesive worked so well that I didn't think a sealer was necessary. If the edges start to come up at some point in the future, I'll seal it, but I like it the way it is.

We hung the canvas in the breakfast nook where it is easily visible.

Here's a view looking down into our den from the breakfast room. We have a coffee theme going on as you can see.

Here are the rules :

Follow God
Obey Dad and Mom
Love One Another
Use Words that Are true, kind, necessary
Forgive Freely
Express Gratitude
Clean Up After Yourself
Use Your Manners
No Whining
Be Helpful

I'm really happy with how this project turned out. The kids have already pointed out the ones that the other needs to work on! Ha ha!

Thursday, February 3, 2011

My Valentine Tree

Let me just start off by saying I'm no Martha Stewart. Or any kind of crafty person, for that matter. But sometimes I get the urge to create something, so I put my meager crafting skills to work. Though I rarely decorate for Valentine's Day, this year I had the creating urge. Hence the Valentine tree.

The first step was finding a branch with many, um, branches. That was easier said than done! Though we have a forest of trees in our backyard, none of their branches were low enough for me to reach. And before Christmas we had cleaned up the front yard and removed any fallen branches. All of that meant I couldn't find anything bigger than a twig to use for my Valentine tree.

My friend Suzanne came to the rescue! She lives out in the boonies and is surrounded by branches. She very kindly cut a fantastic branch off a scrub tree and presented me with it. She even supplied me with white spray paint to paint the branch with, too! Love that girl!

So I spray painted the branch and let it dry. I wasn't going for a snow-white look, so I left so some of the natural wood color showing through. Of course, if you want the branch to be eye-popping white, just keep adding more coats of paint until you get the look you want.

Charles anchored the now-white branch in a planter for me and filled it up with landscaping gravel. I had some river rocks from the craft store I was going to use, but I liked the tiny gravel better.

Then came the fun part, decorating the tree! I used sparkly foam hearts from the Dollar Tree, hand-stitched felt hearts I had made, and some vintage Valentines I had printed out and laminated. Oh, and some lips. Those were Charles' idea.


I'm not all that fond of sewing, but making the felt hearts and lips was fun and easy. I used a blanket stitch for some and a whipstitch for others. I wasn't going for perfect stitches, either, as you can see. I stuffed the hearts with cotton balls that I pulled apart to look like batting. And finally, I hand stitched ribbon to the backs of the felt decorations so I could hang them from the tree.


My lovely Valentine tree is sitting on the library table in our foyer now to welcome guests.


I love how it turned out! So how do you decorate for Valentine's Day?

Thursday, December 23, 2010

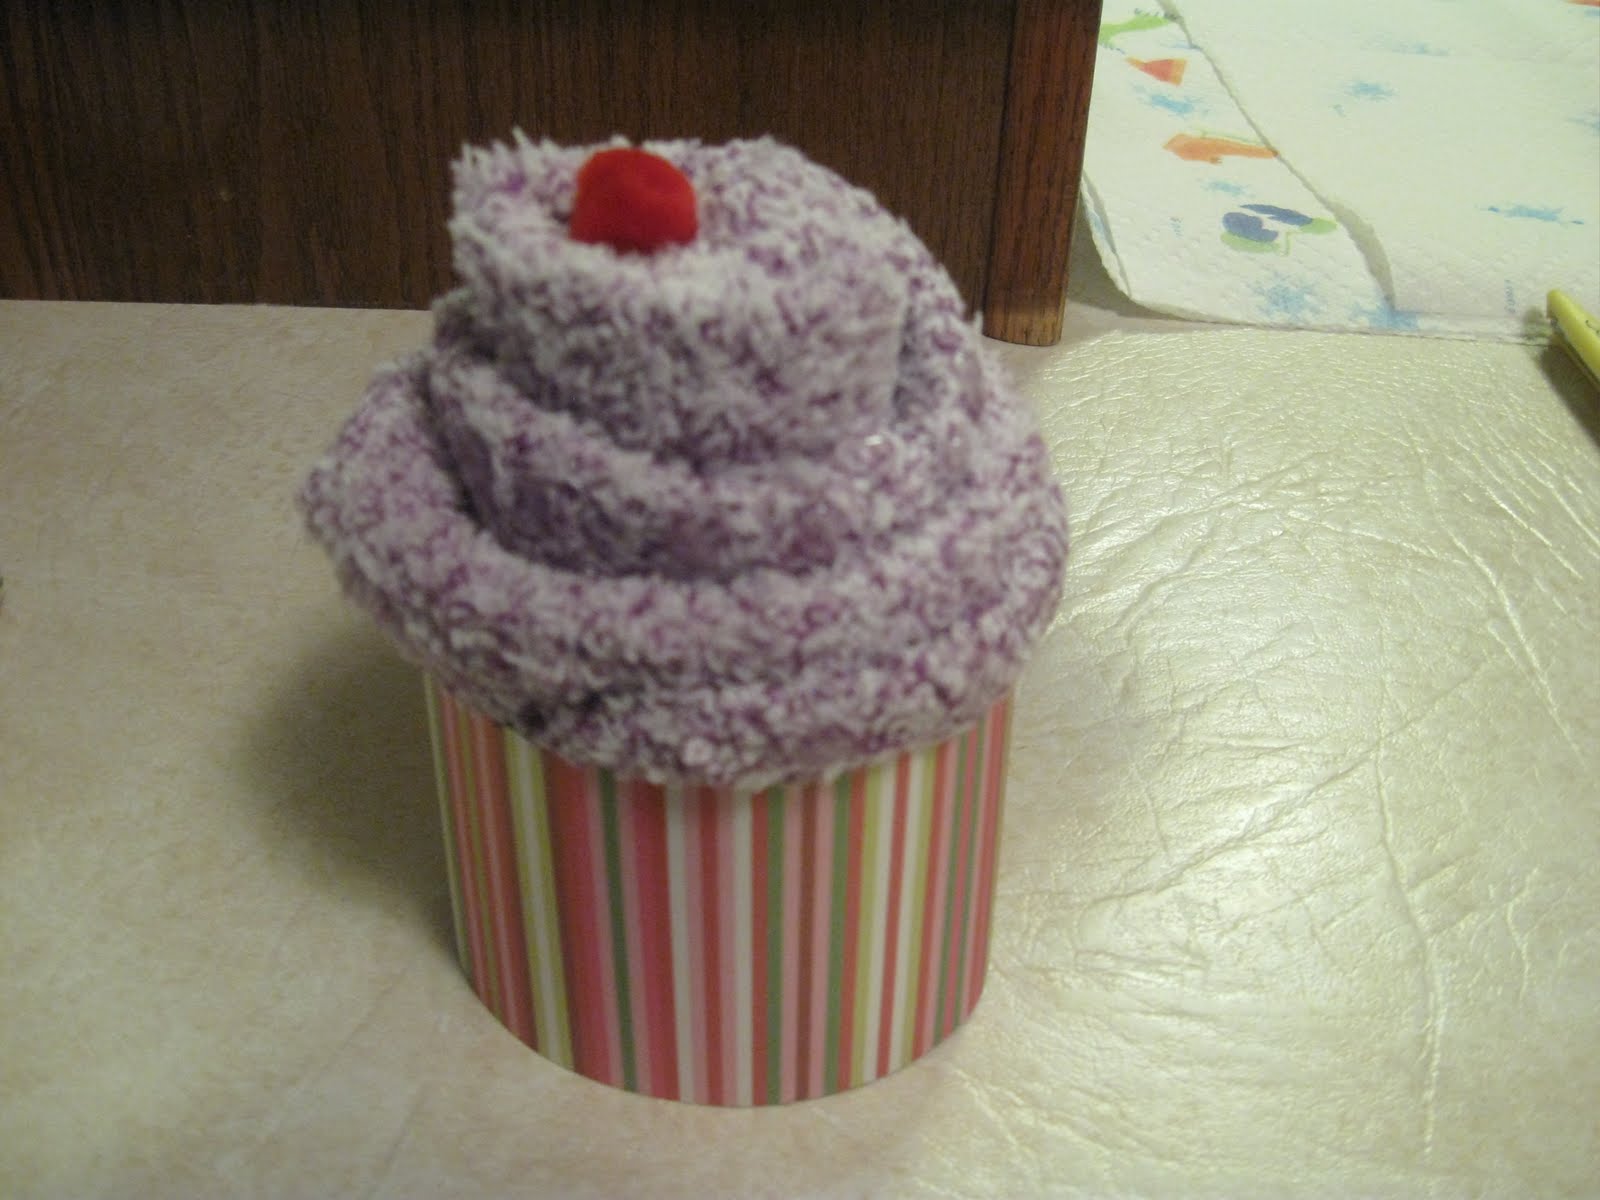
Cute Sock Cupcakes


These adorable little sock cupcakes make a simple, inexpensive gift for friends and family. Fuzzy socks work best, but you can use baby socks for a baby shower or athletic socks for the athlete in your life.

Here's what you need:
1 pair fuzzy socks
1 rubber band
1 pom pom for the cherry on top
1 paper cupcake wrapper - I used this template and some scrapbook paper
Wavy scissors or border punch
1 cellophane treat bag and ribbon to tie it
Scotch tape

Lay the socks flat and overlap a little.

Start with the top of the sock and roll tightly. Secure with a rubber band. Separate the layers slightly and fold over a couple of the edges to add some fullness.


Cut out the wrapper and use the wavy scissors or punch on one edge. Wrap around the cupcake and secure with tape. Push the pom pom down into the top of the cupcake and add a little piece of tape so it stays in place.


Slide the wrapped cupcake into the treat bag and tie up with a ribbon.


Could these cupcakes be any cuter? I can tell you they're simple and fun. I have plans to make more for a baby shower next month and for a spa gift set for a friend. Right after Christmas is a great time to stock up on fuzzy socks, too!

Friday, December 17, 2010

Easy Bottle Cap Necklaces


If you need a quick, easy, cheap gift for a little girl in your life, I have a great idea for you.

I bought bottle cap bezels with the vague intention of creating some kind of pendant for my daughter. I thought maybe I'd use her initial or perhaps a picture of a horse or ballerina, then fill in the bezel with Glossy Accents. I set the supplies aside and forgot about doing it.


Then the Princess asked to make something for her friends for Christmas. I was busy, busy, busy and we were pinching pennies. I frantically rummaged through my craft stuff and found the bezels. Aha!!! Inspiration struck and since that doesn't happen often, I jumped on it.

Along with the bezels, I found some tiny little marbles in my stash. I mean, these things are tiny! But oh so cute! I had royal blue and multi-colored. The Princess chose multi-colored.


Using a small paintbrush, I spread a thin layer of clear-drying glue in the bezel. A toothpick would work, too.

Then I poured in the tiny marbles, making sure the entire surface was covered. I let this dry for several minutes. I shook off the excess marbles that didn't adhere.

Starting around the outside, I filled in the bezel with the Glossy Accents. This stuff dries clear and shiny. You can see tiny air bubbles in this picture. Wait for them to come to the surface, then pop them with a straight pin or toothpick.


Allow the glaze to set overnight. Then apply another layer for more shine and dimension.


The bezels already had jump rings attached, so I simply strung them on black cord and knotted it.

I got the bezels for half price, so they cost 25 cents each. The tube of marbles was 99 cents and I used maybe 1/4 teaspoon for each one. It barely made a dent in the amount in the tube! The black cord was $2 and it was enough for 4 necklaces with enough left over to make at least one more. The cost of the Glossy Accents glaze was $5. It has lasted me a long time. So I estimate the cost of each necklace to be around 75 cents. Not bad for a cute gift!

Thursday, May 27, 2010

Make your own puzzles

I've been trying to come up with things to keep my children occupied this summer. I posted a couple of lists here and here if you're interested. Making puzzles was on the list. Here's what to do.

Cut up a cereal box as the backing for your puzzle. Let your children color a picture of their choosing. The Princess chose to color a dinosaur picture. No big surprise there.


Trim off any parts of the picture you don't want in the puzzle, like all that empty white space. Then glue the picture to the gray side of the cardboard from the cereal box. Press down firmly.


I use a Scotch craft stick, but you can use whatever kind of adhesive you desire. Chances are after your child has played with the puzzle a couple of times, you'll have to glue down the edges of each piece again anyway. The pressure from cutting the cardboard apart causes the picture to pull away. That's okay, just use a little more glue.


Trim away the excess cardboard with scissors or a craft knife.

Now comes the fun part! Cut the puzzle into pieces. Use all sorts of funny angles and shapes. Why is cutting things up so therapeutic for me?


Here's the Princess putting the pieces back together.


The puzzle Mr. Lego did - Bullet Bill from Super Mario Brothers.


A couple of hints and tricks for you - take a picture of the puzzle before you cut it up. Would you like to try to put a puzzle together without knowing what it's supposed to look like? Even though your child knows today what the picture looked like before it was severed into little pieces, he or she might forget by tomorrow!


Keep each puzzle in a separate Ziploc bag and label it. When you print the picture you took of each puzzle, slide it down in the bag with the pieces for future reference.

We all enjoyed creating these puzzles together. The kids liked exchanging puzzles and seeing if they could put together the other's creation. And it was great fun having Daddy put the puzzles together, too.

You can also use old calendar pages, cards or posters instead of coloring your own pictures. Anything printed on paper can be recycled into a puzzle.

For more money-saving ideas, visit Life as Mom's Frugal Friday blog carnival.

Monday, February 8, 2010

Sweetheart Bookmarks

I found a cute Valentine's Day idea in the February issue of Family Fun magazine and decided to give it a try. The best part was I had all the supplies on hand. This was quick and easy and so cute.

You'll need:

Felt, coordinating ribbon, clear-drying glue, and scissors. I used a pencil and ruler too, so I could get some straight lines.

First, cut a strip of felt about 1 1/2 to 2 inches wide and 6 inches long. I used a pencil to mark the lines. I am completely straight-line challenged.


Then cut a piece of ribbon a few inches longer than the felt strip. Glue it down the middle with the clear-drying glue.


Then cut a square from the felt and fold it in half.


Now cut half a heart shape, like you used to do in elementary school when cutting out paper hearts. Unfold and see the pretty heart!


Glue this to the top of your felt strip. How easy is that?


You've just completed a cute bookmark, so go grab and book and start reading!


Here are a couple more that I whipped out quickly in different colors. All three took maybe ten minutes total because I stopped and took pictures.


These would make sweet little gifts for your child's teacher or friends. Grandparents would love to receive one of these, too. Be sure to keep one for yourself and your little readers, too.