I love Middle Eastern dishes, especially easy ones. This recipe combines wonderful flavors with simple preparation, making it a perfect weeknight dinner. The rub can be applied to the chicken in the morning and then left in the fridge to marinate all day. It takes about 30 minutes to finish and cook in the evening.
I really like using chicken thighs here because of the added depth of flavor. But chicken breasts can also be used if that's your preference. You can even cube the chicken and grill as kebabs. But try the chicken thighs first. You'll be glad you did!
Here's the recipe:
2 lbs boneless skinless chicken thighs
2 teas cumin
2 teas paprika
2 teas dried parsley
1 teas garlic powder
1 teas sea salt
Trim as much fat from the chicken thighs as possible. Mix the seasonings together and rub all over the chicken pieces. Place in a Ziploc bag or covered dish and chill in the fridge for at least 2 hours. You can also freeze the chicken at this point.
Heat a little olive oil in an oven proof skillet until very hot. Add the chicken pieces and sear on both sides. It should take about a minute on each side. Transfer the skillet to a 350 degree oven and cook for 15-20 minutes, until the chicken is cooked through.
Serve with pita bread or naan and mint.
Showing posts with label freezer friendly. Show all posts
Thursday, April 9, 2015
Wednesday, January 22, 2014
Make Ahead Swedish Meatballs
I love having meals that I can make ahead and freeze for my family. This meal is actually only partially made ahead - the meatball part. The yummy spiced gravy is made at serving time, but it's really easy and only takes a few minutes.
The allspice and nutmeg are absolutely necessary for this recipe to be successful. There's just enough to give the meatballs and gravy a lovely zip. My family loves this comfort food, and I love how easy it is!
Here's what you need:
For the meatballs
1 lb ground beef
1 lb ground pork
1/2 cup dry bread crumbs
1/4 cup cream (you can sub milk)
1/4 cup minced onion (dry minced onion works fine here)
1 teas garlic powder
1 teas sea salt
1 teas dried parsley
1/2 teas black pepper
1/2 teas allspice
1/4 teas nutmeg
In a mixing bowl, combine the bread crumbs, cream, minced onion, seasonings and spices. Crumble the ground beef and ground pork over the top, then use your hands to mix well.
Pinch off a golf-ball sized portion and shape it into a ball. This will make about 16 large meatballs. If you want to serve these as appetizers, make them into ping-pong ball sized balls. You would get about 24 that way.
Place in a lightly greased baking dish and cover with foil. Bake at 350 degrees for forty minutes, or until meatballs are no longer pink inside. If you make smaller meatballs, it might not take as long.
Allow to cool completely, then freeze in a gallon size Ziploc bag. If you want to serve these immediately, go ahead and prepare the gravy. Otherwise, prepare the gravy on the day you want to serve your meatballs.
For the gravy
1/4 cup butter
1/4 cup flour
3 cups beef broth
1 teas dried parsley
1/2 teas allspice
1/2 teas sea salt
1/4 teas black pepper
1/2 cup sour cream
In a saucepan, melt the butter. Whisk in the flour and make sure there are no lumps. Cook until bubbly. Slowly whisk in the broth and stir until there are no lumps. Stirring constantly, bring to a boil and allow to thicken. Stir in the seasonings. Remove from heat and stir in the sour cream until completely incorporated.
If you're serving your meatballs the same day you make them, place them in a serving dish. Pour the gravy over the meatballs, making sure they're all coated. Serve warm.
If your meatballs have been made ahead, thaw them completely in the fridge. Place in a crockpot and pour the gravy over them. Heat on low for 2 hours, or until heated through. Alternately, you can place them in a saucepan, pour the gravy over them and heat on low until warmed through.
Serve over mashed potatoes, cooked noodles or rice.
The allspice and nutmeg are absolutely necessary for this recipe to be successful. There's just enough to give the meatballs and gravy a lovely zip. My family loves this comfort food, and I love how easy it is!
Here's what you need:
For the meatballs
1 lb ground beef
1 lb ground pork
1/2 cup dry bread crumbs
1/4 cup cream (you can sub milk)
1/4 cup minced onion (dry minced onion works fine here)
1 teas garlic powder
1 teas sea salt
1 teas dried parsley
1/2 teas black pepper
1/2 teas allspice
1/4 teas nutmeg
In a mixing bowl, combine the bread crumbs, cream, minced onion, seasonings and spices. Crumble the ground beef and ground pork over the top, then use your hands to mix well.
Pinch off a golf-ball sized portion and shape it into a ball. This will make about 16 large meatballs. If you want to serve these as appetizers, make them into ping-pong ball sized balls. You would get about 24 that way.
Place in a lightly greased baking dish and cover with foil. Bake at 350 degrees for forty minutes, or until meatballs are no longer pink inside. If you make smaller meatballs, it might not take as long.
Allow to cool completely, then freeze in a gallon size Ziploc bag. If you want to serve these immediately, go ahead and prepare the gravy. Otherwise, prepare the gravy on the day you want to serve your meatballs.
For the gravy
1/4 cup butter
1/4 cup flour
3 cups beef broth
1 teas dried parsley
1/2 teas allspice
1/2 teas sea salt
1/4 teas black pepper
1/2 cup sour cream
In a saucepan, melt the butter. Whisk in the flour and make sure there are no lumps. Cook until bubbly. Slowly whisk in the broth and stir until there are no lumps. Stirring constantly, bring to a boil and allow to thicken. Stir in the seasonings. Remove from heat and stir in the sour cream until completely incorporated.
If you're serving your meatballs the same day you make them, place them in a serving dish. Pour the gravy over the meatballs, making sure they're all coated. Serve warm.
If your meatballs have been made ahead, thaw them completely in the fridge. Place in a crockpot and pour the gravy over them. Heat on low for 2 hours, or until heated through. Alternately, you can place them in a saucepan, pour the gravy over them and heat on low until warmed through.
Serve over mashed potatoes, cooked noodles or rice.
Wednesday, December 5, 2012
Twice Baked Potatoes
When I was in Florida on my girls' weekend getaway, I had some marvelous twice baked potatoes at a seafood place. I wanted to recreate them at home, so I experimented a little. I came up with a pretty good version, I think. My family gobbled them up, so I did something right!
The beauty of these potatoes is that they can be frozen and baked for the second time at a later date. Such a convenient side dish to have on hand! These potatoes pair beautifully with steak, chicken, pork and seafood.
Here's what you need:
6 large potatoes
1 small onion, diced (about 1/2 cup)
2 teas sea salt
2 teas garlic powder
2 teas dried parsley
3/4 cup sour cream
2 cups shredded cheese (I used white cheddar)
Scrub the potatoes well and dry with a paper towel. Place directly on the oven rack to bake. I bake mine at 350 degrees for an hour and a half.
While the potatoes are baking, melt a little butter in a small pan. Add the diced onion and cook until soft and browned. Set aside.
Allow the baked potatoes to cool enough to handle. Slice each potato in half lengthwise. Using a spoon, scoop out the potato pulp from each half, leaving a 1/4-inch shell.
In a mixing bowl, combine the browned onions and potato pulp. Stir in the seasonings, herbs and sour cream. Feel free to add whatever seasonings your family likes here. Mix in 1 1/2 cups of the shredded cheese. Take a little taste and see if you need to add more seasonings. Spoon this filling back into the potato shells.
Sprinkle the remaining cheese over the tops of the stuffed potatoes.
If you're going to serve immediately, bake at 375 degrees for about 10 minutes, or until the cheese is melted.
To freeze for later, wrap each stuffed potato half in plastic wrap. Place in a Ziploc freezer bag. To serve, remove as many halves as you need from the freezer. Allow to thaw in the fridge for a few hours. Then bake as directed above, increasing the baking time a little.
The beauty of these potatoes is that they can be frozen and baked for the second time at a later date. Such a convenient side dish to have on hand! These potatoes pair beautifully with steak, chicken, pork and seafood.
Here's what you need:
6 large potatoes
1 small onion, diced (about 1/2 cup)
2 teas sea salt
2 teas garlic powder
2 teas dried parsley
3/4 cup sour cream
2 cups shredded cheese (I used white cheddar)
Scrub the potatoes well and dry with a paper towel. Place directly on the oven rack to bake. I bake mine at 350 degrees for an hour and a half.
While the potatoes are baking, melt a little butter in a small pan. Add the diced onion and cook until soft and browned. Set aside.
Allow the baked potatoes to cool enough to handle. Slice each potato in half lengthwise. Using a spoon, scoop out the potato pulp from each half, leaving a 1/4-inch shell.
In a mixing bowl, combine the browned onions and potato pulp. Stir in the seasonings, herbs and sour cream. Feel free to add whatever seasonings your family likes here. Mix in 1 1/2 cups of the shredded cheese. Take a little taste and see if you need to add more seasonings. Spoon this filling back into the potato shells.
Sprinkle the remaining cheese over the tops of the stuffed potatoes.
If you're going to serve immediately, bake at 375 degrees for about 10 minutes, or until the cheese is melted.
To freeze for later, wrap each stuffed potato half in plastic wrap. Place in a Ziploc freezer bag. To serve, remove as many halves as you need from the freezer. Allow to thaw in the fridge for a few hours. Then bake as directed above, increasing the baking time a little.
Wednesday, September 5, 2012
Homemade Chicken Patties
When I saw this recipe on Heavenly Homemakers, I knew I had to try it. Chicken patty sandwiches were a staple at our school cafeteria, but no one really knew for sure what was in them. Well, thanks to this recipe, you will know exactly what is in your chicken patties and be assured the ingredients are healthy!
The original recipe called for 6 eggs, but I experimented and dropped that amount down to 4, mainly for texture. Six eggs was too "eggy" in my opinion. My family agreed. They frequently ask for these chicken patties for lunch. Since I make them up ahead of time and freeze them, it only takes about 15 minutes to get lunch on the table.
Here's what you need:
3 chicken breasts, cut into chunks
1 small onion, coarsely chopped
1 cup shredded carrots
2 teas garlic powder
1 teas black pepper
1 teas sea salt
4 eggs
In a food processor, grind the chicken, onion, carrots and seasonings together until no big chunks remain. Add the eggs and mix well. The mixture will be gooey and orange. Don't worry, it will brown as the chicken cooks. Transfer from the food processor to a bowl. It will be much easier to scoop this way.
Heat coconut oil in a skillet until very hot. I used about 1/2 cup coconut oil. Using a 1/4 cup measuring spoon, scoop mixture into hot oil.
The mixture will spread a bit, so be careful not to overcrowd the pan. Brown on one side, then carefully turn over so the other side can cook. I had to use two spatulas to do this, otherwise the half-cooked patty would slide off and make a huge mess.
Because the chicken is not as dense, it won't take long to cook, maybe 3 or 4 minutes on each side. When the patties are cooked through, drain on paper towels. Use sandwich or hamburger buns to make chicken patty sandwiches.
I usually get about 12 patties from this recipe. If I'm not serving them right away, I freeze them in Ziploc bags after they've completely cooled. To reheat, remove from the freezer and bake at 425 degrees for 10-15 minutes until heated through.
The original recipe called for 6 eggs, but I experimented and dropped that amount down to 4, mainly for texture. Six eggs was too "eggy" in my opinion. My family agreed. They frequently ask for these chicken patties for lunch. Since I make them up ahead of time and freeze them, it only takes about 15 minutes to get lunch on the table.
Here's what you need:
3 chicken breasts, cut into chunks
1 small onion, coarsely chopped
1 cup shredded carrots
2 teas garlic powder
1 teas black pepper
1 teas sea salt
4 eggs
In a food processor, grind the chicken, onion, carrots and seasonings together until no big chunks remain. Add the eggs and mix well. The mixture will be gooey and orange. Don't worry, it will brown as the chicken cooks. Transfer from the food processor to a bowl. It will be much easier to scoop this way.
Heat coconut oil in a skillet until very hot. I used about 1/2 cup coconut oil. Using a 1/4 cup measuring spoon, scoop mixture into hot oil.
Because the chicken is not as dense, it won't take long to cook, maybe 3 or 4 minutes on each side. When the patties are cooked through, drain on paper towels. Use sandwich or hamburger buns to make chicken patty sandwiches.
I usually get about 12 patties from this recipe. If I'm not serving them right away, I freeze them in Ziploc bags after they've completely cooled. To reheat, remove from the freezer and bake at 425 degrees for 10-15 minutes until heated through.
Wednesday, May 30, 2012
Mom's Lasagna
My mom is famous for her lasagna. We requested it for nearly every birthday dinner as we were growing up. She makes it for families in her church who are bereaved or who have just had a baby. And it's the first meal she ever prepared for my husband when I brought him home to meet my parents. Even now, when we head there for a visit, it's often on the menu.
And even though I asked for her recipe and try to stick to it as much as possible, I have to say, she makes it better. Still, I try. And now you can, too! Not only that, but you can prepare it in the crockpot if you've a mind to. Look for instructions at the bottom of this post.
Here's what you need:
9 lasagna noodles
1 lb ground beef, browned and drained
5-6 cups spaghetti sauce (she uses Ragu)
2 TBSP dried oregano
1 TBSP each dried basil and Italian seasoning
1 (15 oz.) container Ricotta cheese
1 (24 oz) cottage cheese
4 cups shredded mozzarella cheese
1 cup grated Parmesan cheese
First, cook the lasagna noodles according to the package directions. I use whole wheat noodles, but any are fine. If you're planning to freeze it, only cook for half the recommended time. Also, I sometimes cook a few extra noodles, just in case.
In a large pan, combine the cooked ground beef with the spaghetti sauce. Add the seasonings and allow to simmer for 30 minutes or so to let the flavors blend.
In another bowl, mix the ricotta and cottage cheeses. Season with a little salt and pepper, if desired.
Now get ready to assemble your lasagna. I decided to make two at a time, one for dinner and one for the freezer.
Start by covering the bottom of the pan with a little sauce. This way the noodles don't stick to the bottom.
Place three noodles in the pan, trying to cover the whole thing. This is why I often cook a couple extra noodles, to cut them to fit in any leftover spaces. Then layer 1/3 of the meat sauce over the noodles.
Layer 1/3 of the cottage cheese mixture, then 1/3 of the mozzarella and Parmesan cheeses. Repeat layers two more times.
Bake at 350 degrees for 30- 40 minutes. The top should be bubbly and the cheese starting to brown.
Allow to rest for 15 minutes before cutting.
To freeze, skip the baking step. Cover the pan tightly with foil and freeze for up to three months. When ready to eat, thaw in the fridge for at least 24 hours. Bake as directed above.
If you want to prepare this in the crockpot, do all the prep work EXCEPT cooking the noodles. Believe it or not, you want raw, dry noodles because if they cook too long in the crockpot, you'll end up with mush. Not good. The moisture from the sauce will cook them, so don't worry about crunchy lasagna either.
Assemble as directed above - a little sauce in the bottom, then a layer of uncooked noodles. Break them gently to fit the shape of your crockpot. Then layer the meat and cheeses. Repeat until your crockpot is full.
Cover and cook on low for 3-4 hours. Much longer than four hours will result in mush, too. I love doing this on Sundays because it's ready when we get home from church right after noon.
And even though I asked for her recipe and try to stick to it as much as possible, I have to say, she makes it better. Still, I try. And now you can, too! Not only that, but you can prepare it in the crockpot if you've a mind to. Look for instructions at the bottom of this post.
Here's what you need:
9 lasagna noodles
1 lb ground beef, browned and drained
5-6 cups spaghetti sauce (she uses Ragu)
2 TBSP dried oregano
1 TBSP each dried basil and Italian seasoning
1 (15 oz.) container Ricotta cheese
1 (24 oz) cottage cheese
4 cups shredded mozzarella cheese
1 cup grated Parmesan cheese
First, cook the lasagna noodles according to the package directions. I use whole wheat noodles, but any are fine. If you're planning to freeze it, only cook for half the recommended time. Also, I sometimes cook a few extra noodles, just in case.
In a large pan, combine the cooked ground beef with the spaghetti sauce. Add the seasonings and allow to simmer for 30 minutes or so to let the flavors blend.
In another bowl, mix the ricotta and cottage cheeses. Season with a little salt and pepper, if desired.
Now get ready to assemble your lasagna. I decided to make two at a time, one for dinner and one for the freezer.
Start by covering the bottom of the pan with a little sauce. This way the noodles don't stick to the bottom.
Place three noodles in the pan, trying to cover the whole thing. This is why I often cook a couple extra noodles, to cut them to fit in any leftover spaces. Then layer 1/3 of the meat sauce over the noodles.
Layer 1/3 of the cottage cheese mixture, then 1/3 of the mozzarella and Parmesan cheeses. Repeat layers two more times.
Bake at 350 degrees for 30- 40 minutes. The top should be bubbly and the cheese starting to brown.
Allow to rest for 15 minutes before cutting.
To freeze, skip the baking step. Cover the pan tightly with foil and freeze for up to three months. When ready to eat, thaw in the fridge for at least 24 hours. Bake as directed above.
If you want to prepare this in the crockpot, do all the prep work EXCEPT cooking the noodles. Believe it or not, you want raw, dry noodles because if they cook too long in the crockpot, you'll end up with mush. Not good. The moisture from the sauce will cook them, so don't worry about crunchy lasagna either.
Assemble as directed above - a little sauce in the bottom, then a layer of uncooked noodles. Break them gently to fit the shape of your crockpot. Then layer the meat and cheeses. Repeat until your crockpot is full.
Cover and cook on low for 3-4 hours. Much longer than four hours will result in mush, too. I love doing this on Sundays because it's ready when we get home from church right after noon.
Monday, May 21, 2012
Oven Baked Chicken Fajitas
Whenever we eat out at a Mexican place, Charles always gets fajitas. He's not fond of sauce-covered enchiladas or burritos like I am. This recipe is different because you put the meat and veggies in the oven to cook instead of standing over a stove or grill. And everyone liked it!
I started by marinating the chicken in the freezer. Yes, that's right. I bought chicken on sale, then sliced some up and froze it in a freezer bag with the marinade. After thawing in the fridge, the meat was infused with the Southwestern flavors and was delicious! I used the same marinade found in my Southwest Pepper Steak.
So here's what you need for the marinade:
1/2 cup water
1/4 cup olive oil
1-2 TBSP lime juice
1 teas each cumin, garlic powder and dried oregano
1/2 teas chili powder
1/2 teas sea salt
I mixed all these ingredients up in a freezer bag, then placed the chicken strips in. I kneaded the bag with my hands to get all the pieces coated, then sealed it and put it in the freezer. To thaw, I simply put it in the fridge the night before and it was perfectly marinated by the time I needed it!
If you don't want to freeze the chicken, just mix up all the marinade ingredients and let the chicken marinate for a few hours.
Now for the rest of the fajitas you need:
2 peppers, thinly sliced (I used one red, one green)
1 small onion, thinly sliced
2 Roma tomatoes, seeded and chopped
6-8 tortillas, depending on how big the tortillas are
Any additional toppings you want like cheese or sour cream
After the chicken has thawed, place it in a lightly greased 9x13 pan. Dump the marinade in with it. Place the peppers, onions and tomatoes in the pan. Stir to combine and coat with the marinade.
Bake at 350 degrees for 20-25 minutes until the chicken is cooked through.
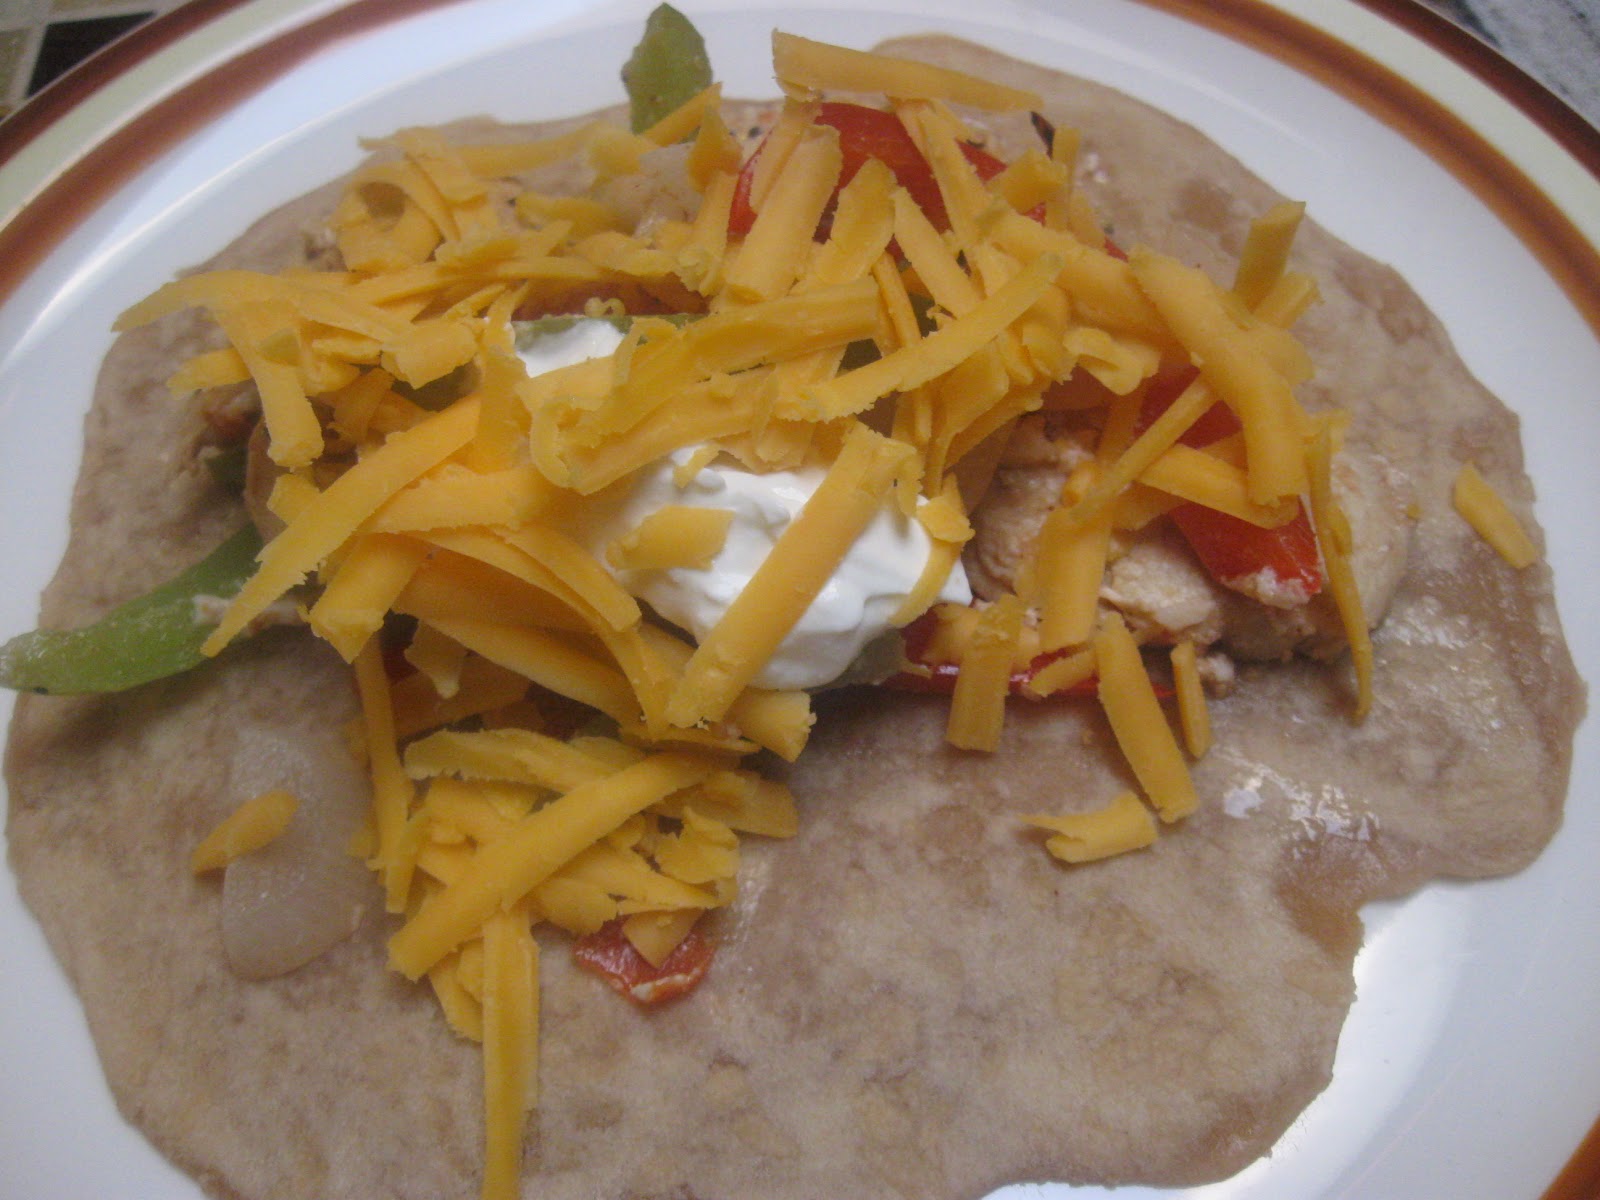
Season with a little salt and pepper, if desired. Wrap in tortillas and top with any additional toppings you like.
I especially liked this recipe because the peppers and onions stayed crisp-tender. The chicken was moist and flavorful from the marinade and the tomatoes. Definitely a winner in my house!
I started by marinating the chicken in the freezer. Yes, that's right. I bought chicken on sale, then sliced some up and froze it in a freezer bag with the marinade. After thawing in the fridge, the meat was infused with the Southwestern flavors and was delicious! I used the same marinade found in my Southwest Pepper Steak.
So here's what you need for the marinade:
1/2 cup water
1/4 cup olive oil
1-2 TBSP lime juice
1 teas each cumin, garlic powder and dried oregano
1/2 teas chili powder
1/2 teas sea salt
I mixed all these ingredients up in a freezer bag, then placed the chicken strips in. I kneaded the bag with my hands to get all the pieces coated, then sealed it and put it in the freezer. To thaw, I simply put it in the fridge the night before and it was perfectly marinated by the time I needed it!
If you don't want to freeze the chicken, just mix up all the marinade ingredients and let the chicken marinate for a few hours.
Now for the rest of the fajitas you need:
2 peppers, thinly sliced (I used one red, one green)
1 small onion, thinly sliced
2 Roma tomatoes, seeded and chopped
6-8 tortillas, depending on how big the tortillas are
Any additional toppings you want like cheese or sour cream
After the chicken has thawed, place it in a lightly greased 9x13 pan. Dump the marinade in with it. Place the peppers, onions and tomatoes in the pan. Stir to combine and coat with the marinade.
Bake at 350 degrees for 20-25 minutes until the chicken is cooked through.
Season with a little salt and pepper, if desired. Wrap in tortillas and top with any additional toppings you like.
I especially liked this recipe because the peppers and onions stayed crisp-tender. The chicken was moist and flavorful from the marinade and the tomatoes. Definitely a winner in my house!
Thursday, May 17, 2012
Homemade Pizza Bagel Bites
Have you ever tried the Bagel Bites from the freezer section of the store? There are nine little bagels covered in pizza toppings per package. You reheat them in the oven or microwave. But looking at the ingredient list, there are also all kinds of yucky, unpronounceable ingredients.
I just couldn't bring myself to buy them for my kids not snack on, not when they are so easy to make at home. Not to mention cheaper.
Here's what you need:
Whole wheat mini bagels (I used the Thomas brand), I think there were 12-14 in the bag
1/2 a package of turkey pepperoni slices
2 cups shredded mozzarella cheese
1 1/2 cups pizza sauce
Split the mini bagels in half and place cut side up on a baking sheet or two. I lined my sheets with parchment paper so they didn't stick after being frozen.
In a food processor, combine the pepperoni slices and shredded cheese. Pulse a few times until the pieces are small and well-mixed.
Transfer to a bowl, then add the pizza sauce and mix well. Place a heaping tablespoon of the mixture on each bagel half. Go back and press the toppings down so they stick to the bagel. It is much easier and quicker to top the bagels this way, instead of spreading sauce on each one, then pepperoni and then cheese.
Place the baking sheets into the freezer until the bagels are frozen. Then remove them from the sheets and store in plastic freezer bags.
To serve, take the desired number of mini pizzas from the bag. Place on a baking sheet and bake at 425 degrees for 10-15 minutes until warm and melty.
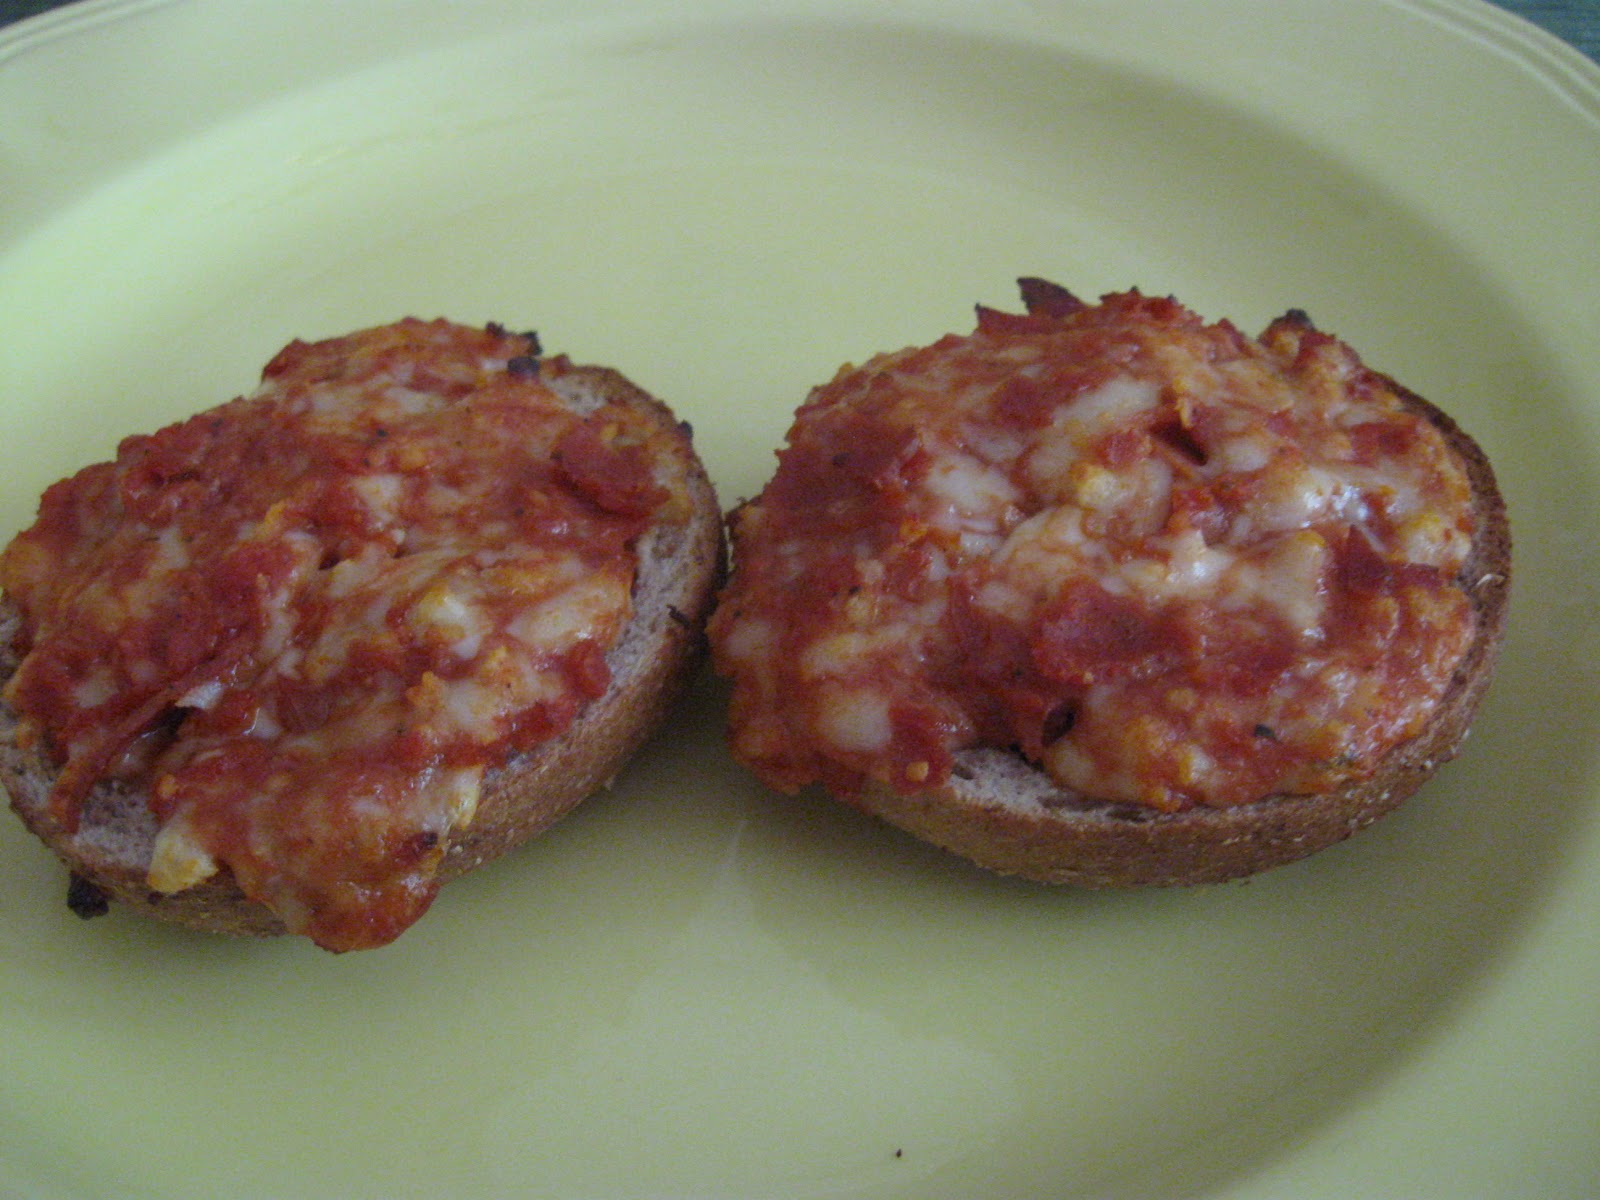
I love that these are made with healthier ingredients than the store-bought ones. And they're so easy! I think it took me about 10 minutes from start to finish to get two dozen bagel bites in the freezer. And the results were delicious!
Mr. Lego certainly enjoyed them!
I'm linking this post to Miz Helen's Country Cottage and her Full Plate Thursday linky!
I just couldn't bring myself to buy them for my kids not snack on, not when they are so easy to make at home. Not to mention cheaper.
Here's what you need:
Whole wheat mini bagels (I used the Thomas brand), I think there were 12-14 in the bag
1/2 a package of turkey pepperoni slices
2 cups shredded mozzarella cheese
1 1/2 cups pizza sauce
Split the mini bagels in half and place cut side up on a baking sheet or two. I lined my sheets with parchment paper so they didn't stick after being frozen.
In a food processor, combine the pepperoni slices and shredded cheese. Pulse a few times until the pieces are small and well-mixed.
Transfer to a bowl, then add the pizza sauce and mix well. Place a heaping tablespoon of the mixture on each bagel half. Go back and press the toppings down so they stick to the bagel. It is much easier and quicker to top the bagels this way, instead of spreading sauce on each one, then pepperoni and then cheese.
Place the baking sheets into the freezer until the bagels are frozen. Then remove them from the sheets and store in plastic freezer bags.
To serve, take the desired number of mini pizzas from the bag. Place on a baking sheet and bake at 425 degrees for 10-15 minutes until warm and melty.
I love that these are made with healthier ingredients than the store-bought ones. And they're so easy! I think it took me about 10 minutes from start to finish to get two dozen bagel bites in the freezer. And the results were delicious!
Mr. Lego certainly enjoyed them!
I'm linking this post to Miz Helen's Country Cottage and her Full Plate Thursday linky!
Tuesday, May 15, 2012
Chicken Spaghetti
If your family likes chicken and pasta, they'll love this yummy, comforting casserole. I tweaked a few different recipes, finally coming up with something we all liked. I used healthier ingredients than you'd usually find in this kind of dish. For instance, I made a double batch of homemade cream of mushroom soup to replace the canned soup. While it took a little extra time, the difference in quality and taste were noticeable.
Here's what you'll need:
1 (8 oz) pkg whole wheat spaghetti, broken into 2-inch pieces
2 cups shredded cooked chicken
1 cup cooked broccoli florets, chopped
2 cans cream of mushroom soup (my homemade version can be found here)
1 cup chicken broth
1 TBSP dried minced onion
1 teas garlic powder
1 teas seasoned salt
1/2 teas pepper
3 cups shredded cheddar cheese, divided
Cook the spaghetti for half of the time listed on the package. Mine said 6-8 minutes, so I cooked mine for 4 minutes. The pasta will soak up the liquids, so you don't want it completely cooked.
Combine the soup and broth together. Stir in the chicken, broccoli and seasonings. Add 2 cups of the cheddar cheese and mix well.
Transfer to a greased 9x13 pan and smooth out. Sprinkle with the remaining cheese. Bake at 350 degrees for 40-45 minutes until bubbly and the cheese is melted.
If you want to freeze this for later, don't bake right now. Place plastic wrap flat onto the surface so it's completely covered. Then cover tightly with a layer of foil.
When you're ready to serve, allow the casserole to thaw in the fridge overnight. Bake at 350 degrees as directed.
Here's what you'll need:
1 (8 oz) pkg whole wheat spaghetti, broken into 2-inch pieces
2 cups shredded cooked chicken
1 cup cooked broccoli florets, chopped
2 cans cream of mushroom soup (my homemade version can be found here)
1 cup chicken broth
1 TBSP dried minced onion
1 teas garlic powder
1 teas seasoned salt
1/2 teas pepper
3 cups shredded cheddar cheese, divided
Cook the spaghetti for half of the time listed on the package. Mine said 6-8 minutes, so I cooked mine for 4 minutes. The pasta will soak up the liquids, so you don't want it completely cooked.
Combine the soup and broth together. Stir in the chicken, broccoli and seasonings. Add 2 cups of the cheddar cheese and mix well.
Transfer to a greased 9x13 pan and smooth out. Sprinkle with the remaining cheese. Bake at 350 degrees for 40-45 minutes until bubbly and the cheese is melted.
If you want to freeze this for later, don't bake right now. Place plastic wrap flat onto the surface so it's completely covered. Then cover tightly with a layer of foil.
When you're ready to serve, allow the casserole to thaw in the fridge overnight. Bake at 350 degrees as directed.
Thursday, May 3, 2012
Frozen Pizza Experiment
I've been trying some freezer meals around here lately, and one of my experiments has been frozen pizza. I've eaten my share of Totino's cardboard pizzas in the past, but in recent years I've tried to avoid buying frozen pizza. I have a super simple pizza crust recipe, so I decided to use that as my base and experiment from there.
Here's what I did.
My first experiment consisted of prebaking the crust for about 10 minutes, then allowing it to cool completely. I topped it with homemade sauce, pepperoni and shredded cheese. I wrapped it with plastic wrap, followed by a layer of foil, then placed it back on the pizza pan which helped it remain flat as it froze.
When it was completely frozen, I removed the pan and put the pizza back in the freezer. All I had to do to serve it was remove it from the freezer, unwrap it and bake for about 15 minutes. I kept an eye on it to make sure the cheese didn't burn.
The advantage of topping the pizza before it's frozen is that nothing has to be done when it's time to bake it. The disadvantage was that it took longer to bake and so the crust was a little dry. Also, trying to find a completely flat spot in the freezer so the sauce and cheese didn't slide around was tricky. Just something to keep in mind when deciding if you should top your pizza or not before freezing.
For the second experiment, I prebaked the crust for about 8 minutes. I allowed it to cool completely, then wrapped it in layers of plastic wrap and foil. Again, I placed it back on the pizza pan while it froze so it wouldn't bend or fold.
Here's what I did.
My first experiment consisted of prebaking the crust for about 10 minutes, then allowing it to cool completely. I topped it with homemade sauce, pepperoni and shredded cheese. I wrapped it with plastic wrap, followed by a layer of foil, then placed it back on the pizza pan which helped it remain flat as it froze.
When it was completely frozen, I removed the pan and put the pizza back in the freezer. All I had to do to serve it was remove it from the freezer, unwrap it and bake for about 15 minutes. I kept an eye on it to make sure the cheese didn't burn.
The advantage of topping the pizza before it's frozen is that nothing has to be done when it's time to bake it. The disadvantage was that it took longer to bake and so the crust was a little dry. Also, trying to find a completely flat spot in the freezer so the sauce and cheese didn't slide around was tricky. Just something to keep in mind when deciding if you should top your pizza or not before freezing.
I took this crust from the freezer about 30 minutes before I baked it. I did our usual toppings, then popped it into the oven at 425 degrees for 10 minutes. The crust on this one turned out much softer and chewier!
I made mini pizza crusts for the third experiment. This is something I thought would be easy to pull out for quick lunches. And I was right!
I made a batch of pizza dough, then divided it into 8 pieces. I rolled each one out into an oval (not a circle, because I'm circle impaired). I baked these crusts on a cookie sheet lined with parchment paper for about 6 minutes.
After letting them cool completely, I just slid them right into a freezer bag. To prepare, I pulled as many as I needed out of the freezer and let them sit on the counter for about 20 minutes. I topped them with our usual toppings, then into the oven for 6 more minutes.
Every experiment has to have a conclusion, right? Well, here's mine.
While I did like having the complete pizza frozen and ready to pop into the oven, it was harder to freeze because it had to stay flat. And the crust was drier.
So my preferred frozen pizza method is to prebake the crusts and top when I'm ready to bake. It was such a huge timesaver to have the crusts ready to go when I needed them. If you have never made frozen pizza, you need to try this.
A few tips:
Oil your pizza pans well before rolling out your crust. I spread a little olive oil over mine with a pastry brush. Sprinkle a little cornmeal over the pan to give your pizza a gourmet flair. After you've rolled out your crust, test it to be sure it doesn't stick to the pan. Once it's baked, it is very difficult to remove from the pan if it sticks.
Always prick the crust with a fork before prebaking. This allows steam to escape and prevents air bubbles in the crust. Air bubbles leads to the crust cracking, and when the crust cracks, your toppings might make it soggy.
Grate your own cheese. I know it will take a couple of extra minutes, but the difference in the meltiness (not a real word, I know, but you get my drift) of the cheese when it is baked is amazing! Packaged shredded cheese dries out and doesn't melt as nicely. So go with the block cheese and shred it yourself.
Mini pizzas allow more flexibility. Each family member can choose their own toppings. So while my family enjoys their boring pepperoni pizzas, I can have BBQ chicken! LOL
So, do you make your own frozen pizza? How do you do it? If you don't, try some of these tips to save yourself time later.

Monday, April 30, 2012
Homemade Tortillas
I love the convenience of tortillas. You can roll up veggies and cheese for quick snacks or make easy quesadillas. Peanut butter and jelly spread onto a tortilla, then rolled up and sliced into spirals make wonderful afternoon snacks. And of course, you can't forget tacos, burritos, and enchiladas! Tortillas are fantastic!
But the ingredients in store-bought tortillas are not fantastic. They are loaded with preservatives and unhealthy ingredients. So I decided to try my hand at making my own. And I loved how they turned out. I adapted a recipe from Beautiful 2 God.
Let me just admit right off that I'm circle-impaired. Meaning I can't roll out a tortilla in a perfect circle to save my life! Maybe I'll get better with more practice, but right now my tortillas generally turn out egg-shaped. Not to worry, though. When you wrap them around yummy ingredients, the shape really isn't that important. To me, knowing that I've used better ingredients makes up for it!
Here's what you need:
3 cups flour (I use white wheat)
1 cup warm water (if you use any kind of wheat flour, you may need a little more)
1/4 teas baking powder
1 teas salt
1/4 cup olive oil
Mix the water, oil, baking powder and salt in the bowl of a stand mixer. If you don't have a mixer, just do this by hand. It's not hard at all. Using the paddle attachment, slowly add the flour. Mix on low speed until everything is incorporated. Switch to the dough hook and knead until the dough forms a smooth ball. Add a little more flour if the dough is too sticky, or a little more water if it is too dry.
Let the dough rest for about 10 minutes. Divide the dough into 8 pieces and shape into balls. Allow to rest for another 10 minutes.
When resting time is over, use a rolling pin to roll the dough balls into 10-inch circles. Make sure you do this on a floured surface so your circles come up easily. You want them to be very thin, but if they're too thin, they'll tear easily.
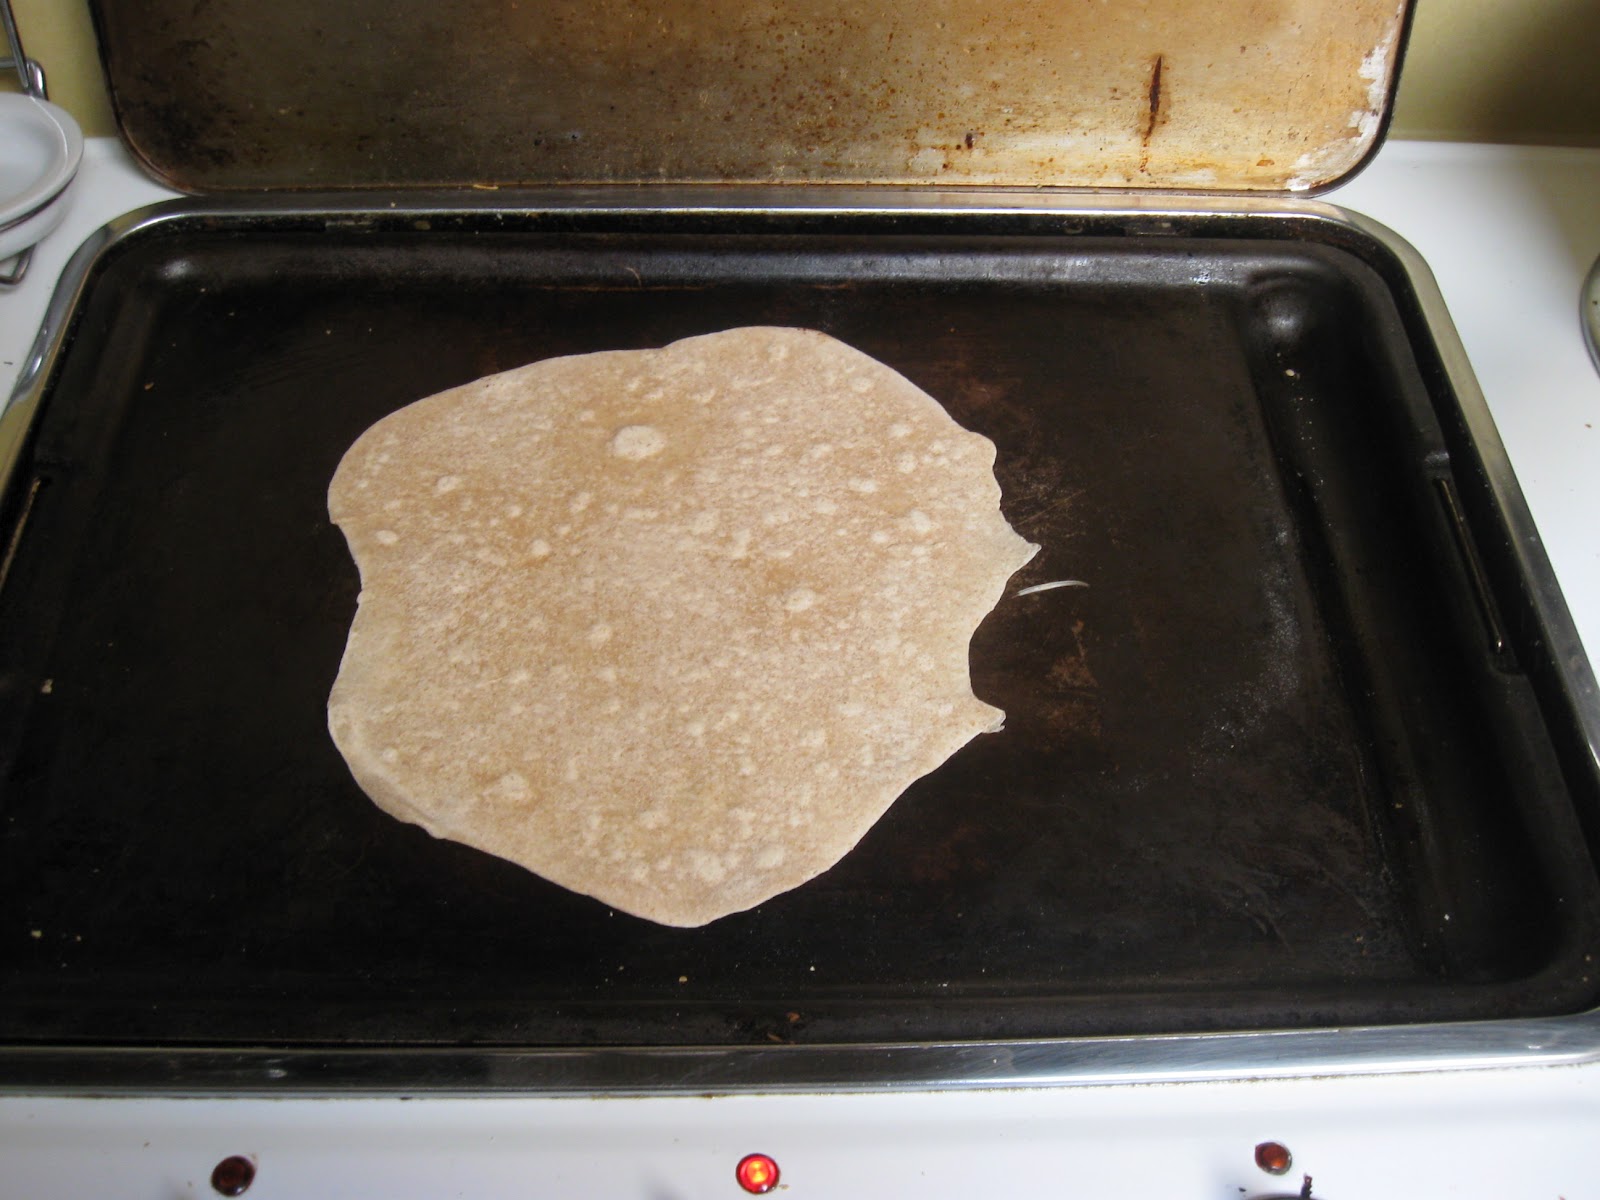
On a hot griddle, cook the tortillas on one side for a couple of minutes, then flip over. Both sides should be lightly browned.
But the ingredients in store-bought tortillas are not fantastic. They are loaded with preservatives and unhealthy ingredients. So I decided to try my hand at making my own. And I loved how they turned out. I adapted a recipe from Beautiful 2 God.
Let me just admit right off that I'm circle-impaired. Meaning I can't roll out a tortilla in a perfect circle to save my life! Maybe I'll get better with more practice, but right now my tortillas generally turn out egg-shaped. Not to worry, though. When you wrap them around yummy ingredients, the shape really isn't that important. To me, knowing that I've used better ingredients makes up for it!
Here's what you need:
3 cups flour (I use white wheat)
1 cup warm water (if you use any kind of wheat flour, you may need a little more)
1/4 teas baking powder
1 teas salt
1/4 cup olive oil
Let the dough rest for about 10 minutes. Divide the dough into 8 pieces and shape into balls. Allow to rest for another 10 minutes.
When resting time is over, use a rolling pin to roll the dough balls into 10-inch circles. Make sure you do this on a floured surface so your circles come up easily. You want them to be very thin, but if they're too thin, they'll tear easily.
On a hot griddle, cook the tortillas on one side for a couple of minutes, then flip over. Both sides should be lightly browned.
Continue with the process until all tortillas are cooked. Please note - if you want smaller tortillas for tacos or such, simply divide the dough up into smaller balls.
To freeze the tortillas for future use, stack them with waxed paper or parchment paper between each one. Slide into a freezer bag and remove as much air as possible before sealing. To thaw, place as many tortillas as you will need in the fridge overnight. If you forget to thaw them in the fridge, you can reheat them on the stove in a skillet. Be careful that they don't dry out, though.
Sunday, January 29, 2012
Chicken Taco Filling in the Crockpot
I often cook chicken breasts in my crockpot, then shred them up in my Kitchen Aid mixer. Then I divide the shredded meat up and freeze it for future use in soups, sandwiches and casseroles. It's so convenient to take a bag of cooked chicken out of the freezer and toss it into the soup pot when I need it.
So I thought, why not spice up the chicken a little for specific dishes? So here's a simple, simple way to get flavorful cooked chicken to use in a variety of recipes.
Here's what you need:
6 boneless skinless chicken breasts
1 packet taco seasoning (I use 2 TBSP of my homemade seasoning)
2 cups your favorite salsa (again, I use homemade)
Trim any excess fat from the chicken. Place it in a crockpot. Sprinkle the taco seasoning over the chicken, then pour salsa over all. Cook on low for 4-6 hours or until chicken is very tender.

Remove from the crockpot and shred. Separate into 2-cup portions for future use. Freeze in Ziploc bags or other freezer containers.

This chicken can be used in tacos, burritos, enchiladas, quesadillas and nachos. It's very versatile and yummy!
So I thought, why not spice up the chicken a little for specific dishes? So here's a simple, simple way to get flavorful cooked chicken to use in a variety of recipes.
Here's what you need:
6 boneless skinless chicken breasts
1 packet taco seasoning (I use 2 TBSP of my homemade seasoning)
2 cups your favorite salsa (again, I use homemade)
Trim any excess fat from the chicken. Place it in a crockpot. Sprinkle the taco seasoning over the chicken, then pour salsa over all. Cook on low for 4-6 hours or until chicken is very tender.
Remove from the crockpot and shred. Separate into 2-cup portions for future use. Freeze in Ziploc bags or other freezer containers.
This chicken can be used in tacos, burritos, enchiladas, quesadillas and nachos. It's very versatile and yummy!
Sunday, January 8, 2012
West Virginia Hot Dog Sauce
Where I grew up, hot dogs were always served with hot dog sauce - a mixture of ground beef, tomato sauce and spices. I'd never heard that kind of sauce called anything else until I moved to the Deep South. Down here hot dog sauce is called chili. But to my mind, chili is supposed to have beans. Hot dog sauce does not. Aren't regional names for the same thing fun?
Here's what you need:
1 lb ground beef or turkey
1/2 onion, chopped (or you can sub minced onion)
1 can(15 oz) tomato sauce
1 1/2 teas chili powder
1 teas salt
1 teas pepper
1 teas garlic powder
1 teas sugar
dash of cayenne pepper (more if you like a little heat)
Place the ground beef and onions in a sauce pan and cover with water.

Bring to a boil, breaking up the meat into small bits. The water helps break down the meat, too, so you end up with a finely ground meat. No big chunks allowed! Cook until the meat is no longer pink.

Drain the water from the pan. Add the remaining ingredients. Simmer for about an hour until thickened. It will cook down, so add a little water if it gets too thick. You don't want burned hot dog sauce!

It's best to make this sauce a day or so ahead. Just pop in the fridge. The spices have a chance to blend nicely and give a wonderful flavor to the sauce. You can easily freeze into smaller portions, too. Simply thaw in the fridge and heat up in a sauce pan.
Here's what you need:
1 lb ground beef or turkey
1/2 onion, chopped (or you can sub minced onion)
1 can(15 oz) tomato sauce
1 1/2 teas chili powder
1 teas salt
1 teas pepper
1 teas garlic powder
1 teas sugar
dash of cayenne pepper (more if you like a little heat)
Place the ground beef and onions in a sauce pan and cover with water.
Bring to a boil, breaking up the meat into small bits. The water helps break down the meat, too, so you end up with a finely ground meat. No big chunks allowed! Cook until the meat is no longer pink.
Drain the water from the pan. Add the remaining ingredients. Simmer for about an hour until thickened. It will cook down, so add a little water if it gets too thick. You don't want burned hot dog sauce!
It's best to make this sauce a day or so ahead. Just pop in the fridge. The spices have a chance to blend nicely and give a wonderful flavor to the sauce. You can easily freeze into smaller portions, too. Simply thaw in the fridge and heat up in a sauce pan.
Monday, February 14, 2011
West Virginia Pepperoni Rolls
I was born in and spent the first 26 years of my life in Fairmont, West Virginia. I grew up eating pepperoni rolls and thought everyone else in America did, too. My mom made them all the time and they were a lunch box staple for us. We always took them with us on road trips to eat in the car. They even showed up at my wedding reception, only in miniature form. You can buy them in every convenience store in the state, but the best ones are homemade.
These savory little bundles of goodness were invented in my hometown back in the early 1900's. They were created to cater to Italian immigrants who came to that part of the state to work in the coal mines. Thin strips of pepperoni were wrapped in dough and baked until golden. The meat required no refrigeration, so the rolls were perfect for miners who worked long shifts.
Nowadays people use sliced pepperoni instead of strips because of convenience. My family prefers to use thin strips cut from a long stick of pepperoni, so that's what I'll show you.
Here's what you need:

1 9-oz stick of pepperoni
Bread dough of your choice, enough for one loaf
Melted butter
I use my bread machine to mix up the dough, using this recipe and setting it on the dough cycle. While the machine is working, I slice the pepperoni into strips.
First I cut the long stick into 5 pieces. Each of these is sliced in half. Now it's time to peel the skin off the pepperoni. You don't want to chew on that, believe me.

Each half should be cut into four strips. By the time you're done, you should have 40 strips. You're going to need 3 strips for each roll. Since this recipe makes a dozen rolls, you'll have a couple of pepperoni pieces left over. Yum!

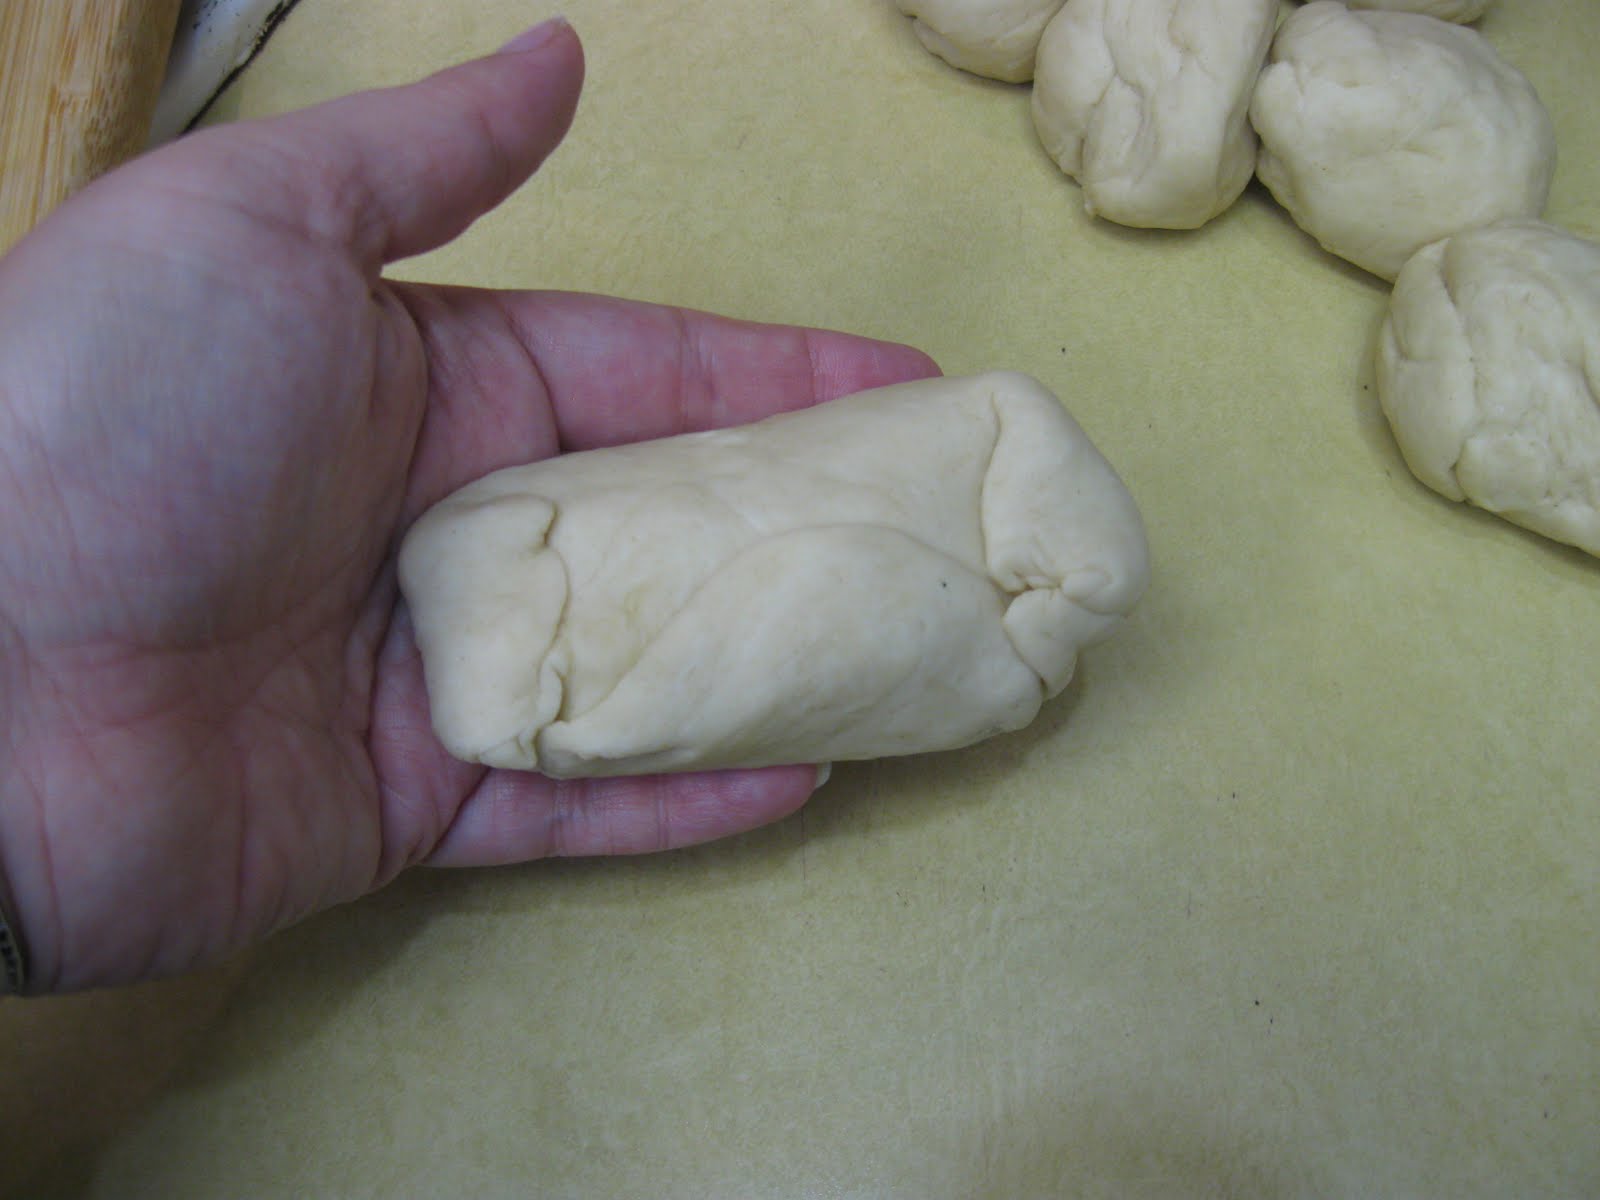
Now divide your dough into 12 pieces. Roll each piece out into an oval. On the short side, place on strip of pepperoni and fold the dough over it.

Put your second piece of pepperoni on the dough and roll it over, sealing the edges as you go.

Repeat this with the third strip of pepperoni.

Now pinch all the edges to make sure everything is sealed up tight.

Place seam side down in a greased 9x13 pan. You want three rows of four with the rolls barely touching.
Cover and let rise in a warm place until doubled in size. This will take about an hour and the rolls will be all squished together. That's how you want them.

Bake at 350 degrees for 25-30 minutes or until golden brown on top. Brush with melted butter immediately after you remove them from the oven.

Allow to rest in the pan for several minutes, then invert onto a cookie sheet and separate. The bottoms of the pepperoni rolls will look orange. That's from the pepperoni grease seeping through the dough. It makes the rolls super yummy!

One of my favorite ways to eat a pepperoni roll is to split it open while it's warm, slather on some jarred sweet peppers with sauce and layer on mozzarella cheese. If you can't find jarred sweet peppers, use some pizza sauce. But plain is good, too. Really, really good!
Note: if you can't find stick pepperoni or don't want to go to the trouble of slicing it into strips, you can use sliced pepperoni. Use 3 slices in place of each strip and fold up as directed above.
For more yummy recipes, visit Miz Helen's Full Plate Thursday.
These savory little bundles of goodness were invented in my hometown back in the early 1900's. They were created to cater to Italian immigrants who came to that part of the state to work in the coal mines. Thin strips of pepperoni were wrapped in dough and baked until golden. The meat required no refrigeration, so the rolls were perfect for miners who worked long shifts.
Nowadays people use sliced pepperoni instead of strips because of convenience. My family prefers to use thin strips cut from a long stick of pepperoni, so that's what I'll show you.
Here's what you need:
1 9-oz stick of pepperoni
Bread dough of your choice, enough for one loaf
Melted butter
I use my bread machine to mix up the dough, using this recipe and setting it on the dough cycle. While the machine is working, I slice the pepperoni into strips.
First I cut the long stick into 5 pieces. Each of these is sliced in half. Now it's time to peel the skin off the pepperoni. You don't want to chew on that, believe me.
Each half should be cut into four strips. By the time you're done, you should have 40 strips. You're going to need 3 strips for each roll. Since this recipe makes a dozen rolls, you'll have a couple of pepperoni pieces left over. Yum!
Now divide your dough into 12 pieces. Roll each piece out into an oval. On the short side, place on strip of pepperoni and fold the dough over it.
Put your second piece of pepperoni on the dough and roll it over, sealing the edges as you go.
Repeat this with the third strip of pepperoni.
Now pinch all the edges to make sure everything is sealed up tight.
Place seam side down in a greased 9x13 pan. You want three rows of four with the rolls barely touching.
Bake at 350 degrees for 25-30 minutes or until golden brown on top. Brush with melted butter immediately after you remove them from the oven.
Allow to rest in the pan for several minutes, then invert onto a cookie sheet and separate. The bottoms of the pepperoni rolls will look orange. That's from the pepperoni grease seeping through the dough. It makes the rolls super yummy!
One of my favorite ways to eat a pepperoni roll is to split it open while it's warm, slather on some jarred sweet peppers with sauce and layer on mozzarella cheese. If you can't find jarred sweet peppers, use some pizza sauce. But plain is good, too. Really, really good!
Note: if you can't find stick pepperoni or don't want to go to the trouble of slicing it into strips, you can use sliced pepperoni. Use 3 slices in place of each strip and fold up as directed above.
For more yummy recipes, visit Miz Helen's Full Plate Thursday.
Subscribe to:
Posts (Atom)