Showing posts with label snacks. Show all posts

Tuesday, February 3, 2015

Mango Smoothie with Spinach

A friend of mine got the NutriBullet from Magic Bullet a couple of months ago. When I saw how great it worked and how easy it was to clean, I wanted one, too.

Thankfully, my husband found one on sale at Sam's. I use it almost every day for something - blending smoothies, grinding nuts, liquefying tomatoes for homemade sauce. It's awesome!

One of my new favorite smoothies is this Mango Smoothie with Spinach. I've never been one to enjoy spinach in a smoothie. But the sweetness of the mango and pineapple in this recipe completely hides the taste of the spinach.

Here's what you need:

1 cup frozen mango chunks
1/2 cup frozen pineapple chunks
A handful of fresh spinach leaves (I know that's not a precise measurement, but I just eyeball it)
1 to 1 1/2 cups of water or almond milk

Place the ingredients in a blender. I love using my NutriBullet! Blend until smooth.

I went from this:
to this:
in about 20 seconds.

Even if you don't have a NutriBullet, you can enjoy this naturally sweet smoothie by using your blender. It's so delicious you have to give it a try!


Monday, December 15, 2014

Saltine Toffee

Great news!

My oven has been given a second chance at life! The repair guy showed up today and diagnosed the heating element as the problem. He replaced it, adjusted some temperature controls and we were back in business!

I made this easy recipe for saltine toffee to celebrate.

If you're looking for a quick, cheap and easy treat to share this holiday season, look no more. It combines the saltiness of saltine crackers with the sweetness of a toffee layer and chocolate.

And it's so simple. I've made toffee before and had to use a candy thermometer while standing over a hot stove, stirring constantly for what seemed like an eternity. Not with this recipe! You get the buttery goodness of toffee with very little effort.

Okay, so here's what you need:

Saltine crackers (I used a little more than one sleeve of saltines)
2 sticks of butter
1 cup packed brown sugar
2 cups chocolate chips
Additional garnishes, like finely chopped nuts or crushed Heath bars, if desired

Line a baking sheet with foil and spray with olive oil. Line up the saltine crackers on the sheet without overlapping. Set aside.

In a medium saucepan, melt the butter over medium heat. Stir in the brown sugar until combined. Stir until the mixture comes together completely and starts to boil. Pour over the saltines and spread evenly so they are all covered.

Bake at 350 degrees for 8 minutes. The toffee mixture will be bubbling. Immediately sprinkle the chocolate chips over the toffee. I use a mixture of semisweet and milk chocolate chips.

Return to the oven for a couple of minutes until the chips have softened. With a butter knife, spread the softened chocolate over the toffee layer. Allow to cool, then place in the fridge so it hardens completely.

Once it hardens, flips the toffee over and remove the foil. Break into pieces.

Friday, May 23, 2014

BLT Roll-Ups

Graduation season is in full swing, meaning graduation parties are being held regularly. If you're looking for an easy appetizer/finger food for your grad's party, this simple yet delicious recipe is just the thing.

I've always liked serving roll-ups, or pinwheels as some people call them. You spread yummy fillings over tortillas, roll them up and chill, then slice them into individual servings. What could be easier?

This version combines the classic flavors of a BLT sandwich. You're going to love them!

Here's what you need:

8 oz cream cheese, softened
1/3 cup mayonnaise
8 slices bacon, cooked and crumbled (you can also use store bought real bacon bits or pieces)
2 tomatoes, diced small
1/2 cup shredded cheddar cheese
finely shredded lettuce
8 burrito sized tortillas

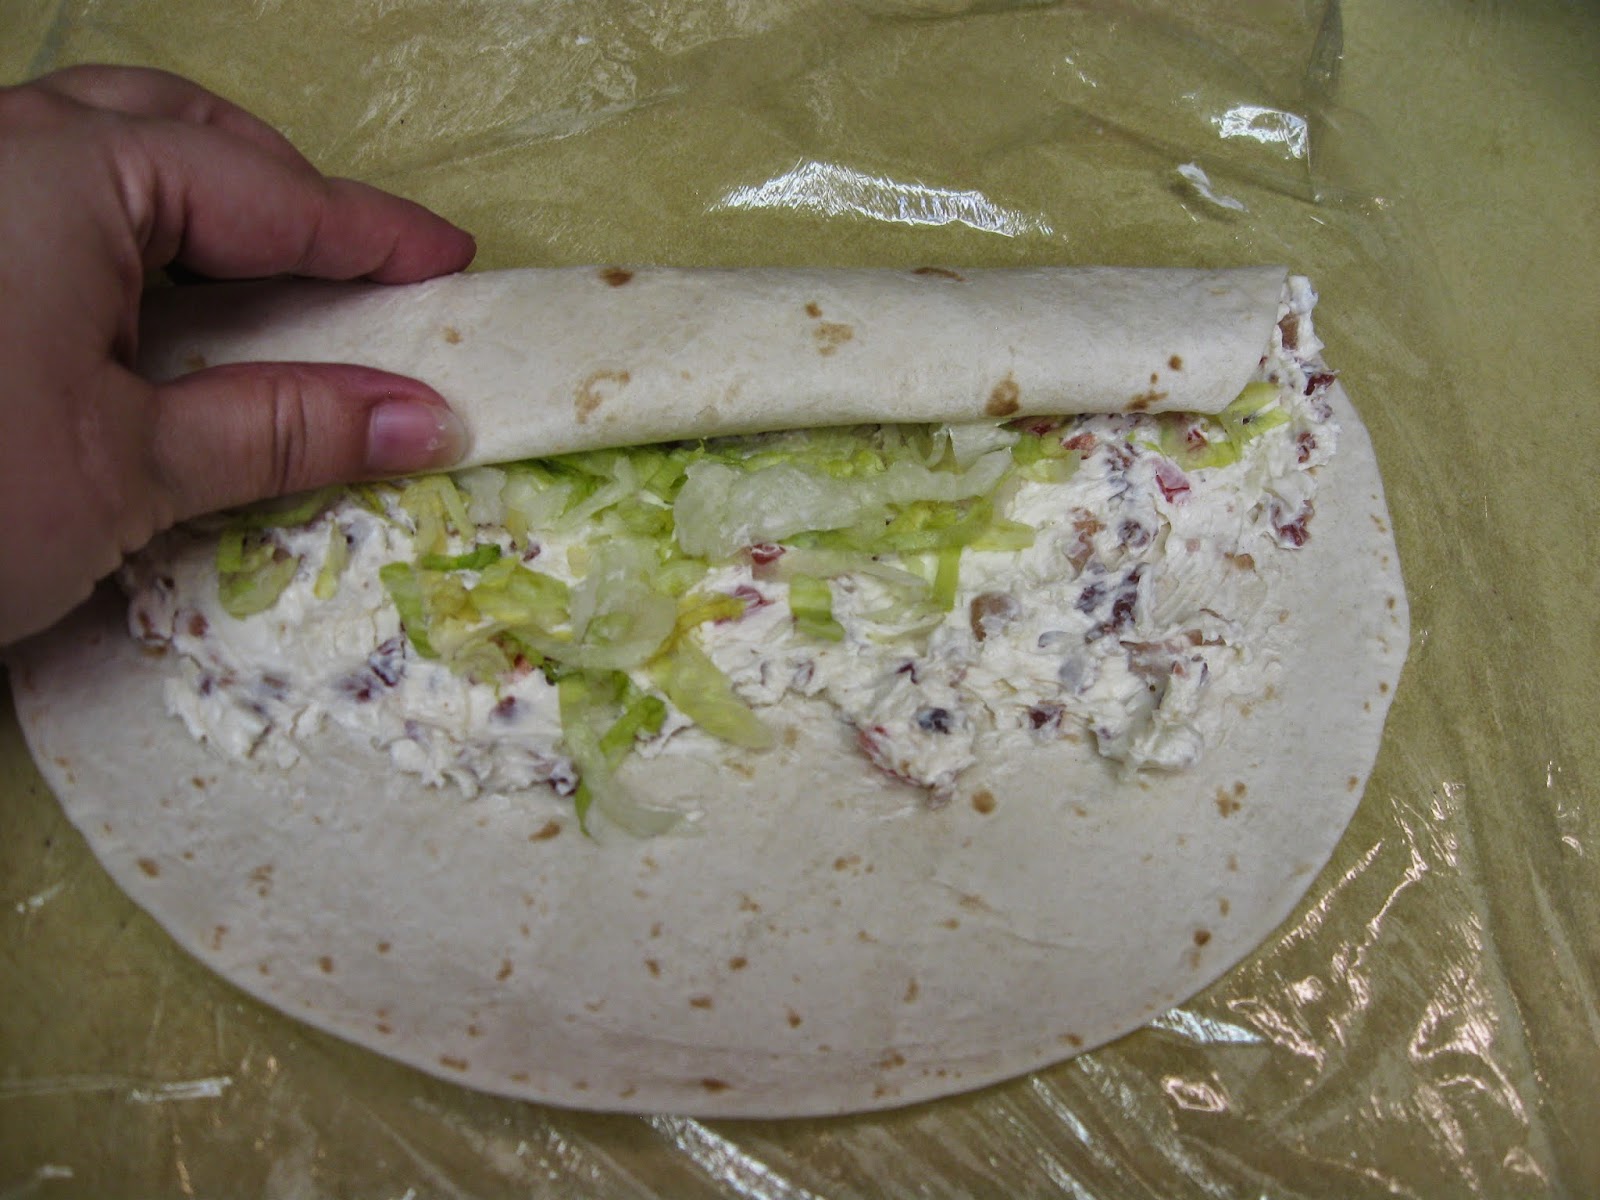
Beat the cream cheese and mayo together in a mixing bowl. Stir in the bacon, tomatoes and cheese. Spread about 1/4 cup over each tortilla. Honestly, I don't really measure here, I just eyeball it. Leave the bottom part of the tortilla filling-less. Is that even a word?
Add some of the finely shredded lettuce and press down into the cream cheese mixture.
Now starting with the side furthest from you, roll the tortilla up tightly. You don't want any gaps later when you slice them. I always place sheets of plastic wrap under the tortillas before I fill them so after I've rolled them, I can very easily wrap them up. The key is to keep everything tightly rolled up.


Place the wrapped roll ups in the fridge and chill for a couple of hours, or even overnight. When you're ready to serve them, unwrap them from the plastic wrap and slice into 8-10 pieces.

Don't they look yummy? They would look fabulous on your party table, too!


Variation: You can serve these as wraps, too. Just slice each roll into 2 pieces and serve as a light lunch or supper.


Thursday, March 27, 2014

Beefy Three Cheese Dip

Since we homeschool and hubby works from home, we eat lunch together as a family nearly every day. How many families get to enjoy that? I try to keep lunch simple. Usually I serve leftovers from the night before. But sometimes we have no leftovers, thanks to the growing appetite of a particular teenage boy in our house!

This yummy dip serves as a fantastic lunch or snack. It's something different from our usual lunch fare, which makes it a huge hit with the family. And it's easy.

Here's what you need:

1 lb ground beef, cooked and drained
2 TBSP taco seasoning
1 cup salsa, your preference for spicy
1 cup heavy cream
1 cup shredded sharp Cheddar cheese
1 cup shredded white Cheddar or Monterey Jack cheese
3 oz. cream cheese

In a large skillet, combine the cooked ground beef, taco seasoning and salsa; heat through. Stir in the heavy cream, but don't allow the mixture to boil. Stir in the shredded cheese and stir until completely melted. Cut the cream cheese into smaller pieces, then stir into the mixture until melted. Resist the impulse to just throw everything into the pan at once. Adding a little bit at a time really helps all the cheese to melt and not glop up. Enjoy!

Saturday, March 8, 2014

Pretzel Dogs

Recently our local Walmart added an Auntie Anne's pretzel shop to the front of the store. Right by the exit. So you have to walk past it. Unless you try to avoid temptation and walk all the way over to the other side to exit, like I have been doing.

One of the popular items on Auntie Anne's menu is their pretzel dog, a hot dog all wrapped up in a pretzel. Like the pigs in a blanket we used to eat as kids. Only with a pretzel crust, these are WAYYYY better. But at $4 a hot dog, it's a little too pricy for my budget. I already have a pretzel bread recipe, so I just decided to halve that recipe for the pretzel crust.

I learned a couple of things in making these for my family. One, do not leave both ends of the crust open. Your hot dogs will become a little slippery as they bake and the dough won't stick well. And your hot dogs just might slip out of their pretzel-y shell and land on the floor, where your real-life furry dog is waiting for just such an occurrence. While he or she might be thrilled by such a turn of events, you will not be. You will be disappointed and offer to eat the empty hot-dog flavored pretzel shell.

Second, don't use bun length hot dogs. You won't have enough dough to wrap the dog completely AND enclose one end. I don't think I need to explain why you want one side enclosed again, do I?

So, here's what you need:

3/4 cup warm water
1 and 1/8 teas yeast
1 teas sugar
2 to 2 1/4 cups unbleached flour
2 TBSP melted butter or olive oil
1 teas sea salt
1/4 cup baking soda
1 egg white
coarse salt for sprinkling
Pkg of 8 hot dogs

In a mixing bowl, combine the water, yeast and sugar. Allow to stand for about 5 minutes, until foamy. Stir in the flour, melted butter, and salt. Start with two cups of flour, then add more (up to 1/4 cup) if the dough is too sticky. I use my stand mixer for this but you can do it by hand too. Cover and let rise for about an hour until doubled.

Turn the dough out onto a lightly floured surface. Divide into 8 equal pieces. Roll or twist each piece of dough into a long rope about 12 inches long. Wrap the dough around a hot dog, making sure one end is enclosed. Alternately, you can roll out each piece into a circle, then wrap it completely around the hot dog, enclosing both ends. It's up to you!

Bring a large pot of water to a boil. Reduce the heat to a low simmer, then add the baking soda. It will foam up at first, but that's okay. Drop two wrapped hot dogs into the water and allow to simmer for 30 seconds. Remove to a baking sheet lined with parchment paper. I use a slotted spoon and spatula to do this.

Brush each pretzel dog with egg white, then sprinkle on some coarse salt. Bake at 425 degrees for 15 minutes, or until browned.

Thursday, July 18, 2013

Roasted Red Pepper Dip

Whenever I have guests over for dinner, I like to offer a few pre-dinner snacks so we can fellowship a little before the meal. Typically I serve some sort of salsa or dip and tortilla chips. So I'm always looking out for yummy new dip recipes. I found this one over at Finding Joy in My Kitchen and it's become an easy favorite.

Here's what you need:

1 (8oz) pkg cream cheese, room temperature
1 can (15 oz) white beans (I use cannellini)
1 teas garlic powder
1 jar roasted red peppers
salt and pepper, to taste

In a food processor, combine the cream cheese, beans, and garlic powder. Pulse until smooth. Add the red peppers and pulse again until it's reached the desired consistency. Add salt and pepper to taste. Serve with chips, crackers or pretzels.
I've also added crumbled feta cheese after I'm done processing so it was a little chunky. That was amazing, too!

Friday, June 21, 2013

Refrigerator Pickles

My daughter loves pickles. She'd eat an entire jar at one time if I'd let her. Store bought pickles are loaded with sodium, though, so I try to limit her pickle passion to just a few at a time.

This easy recipe eliminates a lot of the salt found in most jarred pickles but still provides a zippy, crisp pickle taste. Honestly, I prefer these cukes to regular pickles.

Here's what you need:

A large jar (I reused a 2.5 quart Mt. Olive giant pickle jar)
3-4 cucumbers, peeled and sliced
1 white onion, sliced
sea salt
minced garlic
dried dill weed
white vingar

Place a layer of onion slices in the jar. Top with some cucumber slices. Then sprinkle a little salt, minced garlic and dill weed over all.
Continue layering until all the cucumbers and onions are used up, adding the seasonings in between each layer.

Pour in enough vinegar to cover the layers. Then top off with some water until the jar is completely full.

Seal and refrigerate for a week or two before enjoying!

When the jar get low on pickles, slice up a few more cucumbers and add to the jar. I have been able to use the same jar for about 3 months before starting completely over.


Friday, May 31, 2013

Banana Bread Snack Cake with Frosting

If you're like me, you can never seem to finish a bunch of bananas off before some of them get a little over ripe. Well, that's why recipes like this one were invented - to take advantage of those few remaining bananas that no one wants to eat!

This cake tastes exactly like banana bread without the long baking time. And with frosting! Yummy!

Here's what you need:

1/2 cup brown sugar
1/2 cup sugar
1/2 cup (1 stick) butter, softened
2 eggs
3 or 4 ripe bananas, mashed (should equal about 1 1/2 cups)
2 teas vanilla
2 cups flour (I used half unbleached all-purpose and half white-wheat)
1 teas baking soda
1/2 teas salt
1/2 cup chopped nuts (pecans or walnuts will do)

For the frosting
1/2 cup butter, melted
3-4 cups powdered sugar, depending on how thick you want it
2 teas vanilla
3 TBSP milk

Cream the butter and sugar together until fluffy (I do this in a stand mixer). Beat in the eggs, one at a time. Stir in the mashed bananas and vanilla. In another bowl, sift the flour, baking soda and salt. Add to the wet ingredients and stir until well blended. Stir in the nuts.

Spread the batter in a greased and floured 10x15 jelly roll pan. Bake at 375 degrees for 20-25 minutes or until a toothpick inserted in the center comes out clean.

Mix the frosting ingredients together until you reach your desired consistency. I like mine a little thicker, not like a glaze, so I add one cup of powdered sugar at a time until it's just like I want it.

While the cake is still slightly warm, spread the frosting over the top. It will be much easier to spread if the cake is warm.

Friday, May 24, 2013

Cucumber Avocado Dip

For years I didn't like avocados. I had eaten guacamole in a restaurant and it wasn't a very good batch - very bitter and bland. I swore off avocados then and there. But everywhere on food blogs and recipe sites, I found tons of people who loved them. I just didn't get it.

Then I tasted some wonderful guacamole made by a friend and decided to give avocados another try. I'm so glad I did! I love them now and find ways to include them in salads and sandwiches. And dips.

This dip isn't like guacamole. It's cheesy and tangy. And the cucumbers add a taste of freshness that's fantastic! My friend Kris sent me the recipe, but I've tweaked it until she may not recognize it now!

Here's what you need:

2 avocados, pitted and diced
4 oz. cream cheese
1 cup Greek yogurt or sour cream
1/2 cup shredded Parmesan cheese
1/2 cup shredded sharp Cheddar cheese
2  TBSP finely diced onion (this helps keep the avocado from quickly turning brown)
1 teas garlic powder
1/2 teas ground mustard
 salt and pepper to taste
1/2 cup finely diced cucumber (this was about 1/2 a large cuke for me)

In a food processor, combine all the ingredients but the cucumber. Process until creamy. Stir in the cucumber. Serve with tortilla chips or crackers.
 This is the dip before I added the cucumbers. Don't know why I forgot to do this!
A close up of the dip WITH the cucumbers. Very tasty!

Monday, February 25, 2013

Peanut Butter Banana Smoothie

Every morning for the past few years, I've used protein powder to make a breakfast shake for an extra boost to start my day. Good quality protein powder is pricy, though, so I began to think about using real food ingredients instead of powder. I've been amazed at how much more satisfying my breakfasts are now!

Here's what I use:

1 banana, broken into small chunks and frozen
1/4 cup natural, no sugar added peanut butter
1 TBSP coconut oil
1 cup almond milk (I use unsweetened vanilla)
honey to taste - I use just a squeeze

Place all the ingredients into a blender and turn on the smoothie setting - if you have one. Otherwise, high will do. Blend until you reach your desired smoothness.

The frozen banana chunks make this smoothie nice and thick. If you don't like your smoothies as thick, just add some more almond milk.

The natural peanut butter lends a little graininess and texture. Occasionally I will throw in some ground flax meal for a little fiber which also adds a gritty texture.
I drink this smoothie around 9:00 am and it keeps me going until lunch time. This is a great afternoon pick-me-up snack, too. No matter what time of day, I like knowing that I'm getting my protein from real food ingredients instead of processed powder.

Monday, September 3, 2012

Cinni-Mini Muffins

I recently went through some recipe files and found this old gem of a mini muffin recipe. I've used this recipe for breakfasts, treats for school, and gifts for neighbors. It's simple but delicious!

Here's what you need:

1 1/2 cups unbleached flour
1/2 cup sugar
2 teas baking powder
1/2 teas salt
1/2 teas cinnamon
1/2 teas nutmeg
1 egg, lightly beaten
1/2 cup buttermilk (see note below if you don't have buttermilk on hand)
5 TBSP butter, melted

In a large bowl, combine the dry ingredients. In another bowl, blend the egg, buttermilk and melted butter together. Stir into the dry ingredients just until moistened. Spoon into paper lined mini-muffin cups. Bake at 400 degrees for 10-12 minutes or until a toothpick inserted into the center of a muffin comes out clean.

Melt another 2 TBSP of butter. Combine 2 TBSP sugar and 1/4 teas cinnamon. While the muffins are still warm, dip the tops of each one into the melted butter, then into the cinnamon sugar mixture.


Enjoy with a cup of coffee!


*Note: If you don't keep buttermilk on hand, as I usually don't, simply place 1/2 TBSP vinegar into a measuring cup. Add enough milk to equal 1/2 cup. Allow to stand for 10 minutes.

I'm sharing this recipe with Tempt My Tummy Tuesday over at Blessed with Grace. 

Wednesday, August 8, 2012

Make Your Own Trail Mix

My son is 11 and has just hit a growth spurt. He is eating us out of house and home! I'm not kidding, either. He is in constant much mode, even after eating a complete meal.

I'm trying to keep healthy homemade snacks on hand to keep him filled up. Last week was a setback because I couldn't use my oven - long story dealing with air conditioning repairs not done in a timely manner, it's all fixed now. So I made some trail mix because all it required was a bowl for mixing and snack-sized baggies for storing.

I used nuts and fruits that I had on hand. It's very easy to change this recipe to suit your family's tastes. My basic formula was 3 cups nuts, 1 cup dried fruit, 1/2 cup seeds, and 1/2 cup chocolate chips.

Here's what I used:

2 cups whole almonds, roasted but unsalted
1 cup dry roasted peanuts
1 cup dried cherries
1/2 cup unsalted sunflower seeds
1/2 cup chocolate chips


After mixing everything in a large bowl (the kids helped!), I divided the mix up into snack sized baggies for portion control.


The kids were able to grab a snack when they wanted one, and I didn't worry about them eating a lot of unhealthy ingredients. This was better than any trail mix I've ever purchased at a store.

So, what do you feed your growing boys to keep them filled up?


Wednesday, August 1, 2012

Applesauce Oatmeal Cookies

When I first found this recipe, I wasn't sure how it would hold together. I mean, don't cookies need flour? What about sugar?

Well, the oats in the recipe act as a binder. The sweetness of the bananas and dried cranberries weren't as sweet as sugar but still made the cookies yummy. The applesauce provides plenty of moistness, too.

I didn't think the kids would go for them, to be honest. But boy, was I wrong! They gobbled them up and wanted more. I liked the cookies better when they were slightly warm, but the kids didn't care. Warm or not, they are good!

Here's what you need:

1 1/2 cups old-fashioned (not quick) oats
3 bananas, mashed
1 cup unsweetened applesauce
1/2 cup dried cranberries
1/2 teas cinnamon

In a bowl, combine all the ingredients and mix well. The batter will be very moist.


With an ice cream scoop or large spoon, drop the batter onto a cookie sheet lined with parchment paper. I got 12 good-sized mounds out of the batter.


Bake at 350 degrees for 20-25 minutes, or until golden brown and set.


Feel free to substitute raisins or any other dried fruit for the cranberries. Chopped nuts make a nice crunchy addition, too. These cookies also freeze very well and are perfect for a quick breakfast or snack.

Tuesday, July 10, 2012

Popcorn Cupcakes and other Carnival Party Food

This past weekend the Princess celebrated her 10th birthday with her two cousins (one who is 8 and one who is also 10) at a carnival party. My lovely sister-in-law did most of the planning since it was held in her backyard. I did help with some of the food prep and game prizes, though.

We made popcorn cupcakes that were a huge hit. I say "we" because she baked 'em and I decorated 'em. If you only knew how "outside the comfort zone" decorating a cupcake is for me. But this was so easy, even Marsha can do it!


You'll need 20-24 cupcakes, depending on how many your recipe makes. Let them cool completely before trying to decorate them.

Frost with plain white icing of your choice. To speed things along, we used Duncan Hines frosting in a can, but you can make some from scratch if you choose. We were in a hurry, so we took all the shortcuts we could.

Now here comes the fun (as in messy) part. Take a bag of mini marshmallows and snip each one with kitchen shears. If you don't have kitchen shears, use a sharp knife. Don't cut them in half, just about midway through.


Pinch the uncut ends between your fingers. They will burst open, just like popcorn kernels.


Set aside and repeat with the remaining marshmallows. You can store in a Ziploc bag until ready to use.

Now frost the cupcakes with the plain white icing. Dip the tops into a bowl of the popped marshmallows. Press down lightly. This is so much easier than trying to individually place each marshmallow on the cupcake.


To give the appearance of butter, dilute a few drops of yellow food coloring with water. With a paint brush, lightly dab the color onto the marshmallows.


Digging in!

In addition to the popcorn cupcakes, my sister-in-law made flavored popcorn.

The pink is watermelon, the blue is berry blue, and the red is strawberry


To make the flavored popcorn you need:

10 cups popped corn
1 box (3oz) flavored Jello - we used watermelon, berry blue, and strawberry
1/2 cup butter
3/4 cup sugar
1 TBSP corn syrup
3 TBSP water

Place the popped corn on a greased baking sheet - very important because the flavored syrup you're about to make will stick to everything if the pan isn't greased or buttered!

Melt the butter in a saucepan. Add the Jello and remaining ingredients. Bring to a boil and cook for 4 minutes, stirring constantly. Pour over popcorn and stir to coat. Bake at 250 degrees for 10-15 minutes. Check often to make sure it's not burning.

The strawberry and berry blue flavors tasted just like crunchberries from Cap'n Crunch cereal. I'm not kidding. It was like a sweet blast from the past since that was one of my favorite cereals growing up.

We placed the popcorn, along with some regular buttered popcorn, on a snack table alongside roasted peanuts in the shell and a jar of large pickles. We were trying to keep the carnival theme going.

So, have you ever hosted a carnival? What kinds of foods did you serve?

Tuesday, June 26, 2012

Strawberry Muffins

Muffins are a sweet way to start the day. These strawberry muffins are moist and delicious. Even though the recipe calls for a mashed banana, the taste is barely discernible. The strawberries shine in this recipe!

Here's what you need:

2 cups chopped fresh strawberries
1/2 cup sugar
1/4 cup butter, softened
An additional 1/4 cup sugar
2 eggs
1 teas vanilla
1 mashed banana
1 3/4 cups white wheat flour
1/2 teas baking soda
1/2 teas baking powder
1/4 teas salt
1/4 teas nutmeg

In a small bowl, combine the strawberries and 1/2 cup sugar in a bowl. The sugar draws out the juices so the muffins stay moist. This process is called maceration.


Let the berries sit for about an hour. There should be lots of liquid by this time.


In a mixing bowl, cream together the butter and additional 1/4 cup sugar until light and fluffy. Beat in the eggs, one at a time. Stir in the vanilla and mashed banana.

In another bowl, combine the flour, baking soda, baking powder, salt and nutmeg. Add to the creamed mixture and mix well.


Gently stir in the berries with their juices. I didn't think this looked like enough batter for 12 muffins, but it was.


Spoon batter in muffin tin cups lined with paper liners. Bake at 400 degrees for 15-18 minutes or until a toothpick inserted into a muffin comes out clean.


Cool on a wire rack, then remove muffins from the pan and enjoy.


Thursday, May 17, 2012

Homemade Pizza Bagel Bites

Have you ever tried the Bagel Bites from the freezer section of the store? There are nine little bagels covered in pizza toppings per package. You reheat them in the oven or microwave. But looking at the ingredient list, there are also all kinds of yucky, unpronounceable ingredients.

I just couldn't bring myself to buy them for my kids not snack on, not when they are so easy to make at home. Not to mention cheaper.

Here's what you need:

Whole wheat mini bagels (I used the Thomas brand), I think there were 12-14 in the bag
1/2 a package of turkey pepperoni slices
2 cups shredded mozzarella cheese
1 1/2 cups pizza sauce

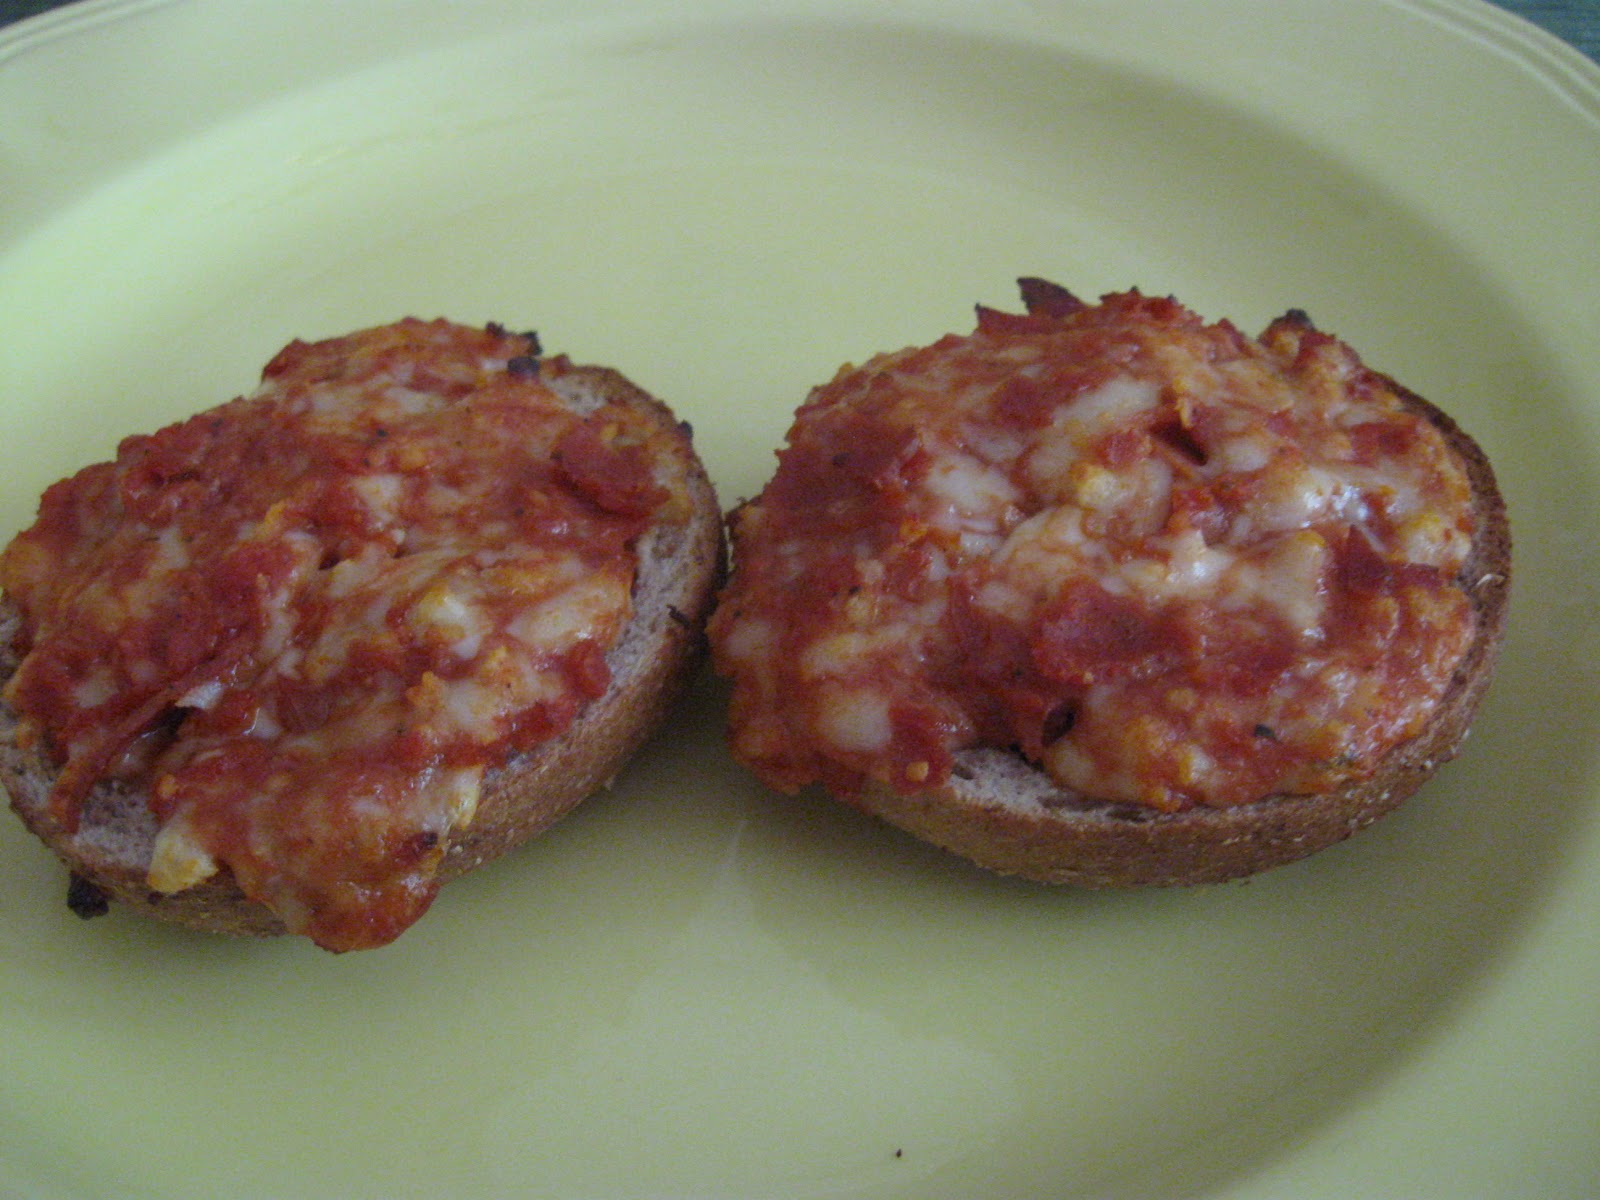
Split the mini bagels in half and place cut side up on a baking sheet or two. I lined my sheets with parchment paper so they didn't stick after being frozen.


In a food processor, combine the pepperoni slices and shredded cheese. Pulse a few times until the pieces are small and well-mixed.


Transfer to a bowl, then add the pizza sauce and mix well. Place a heaping tablespoon of the mixture on each bagel half. Go back and press the toppings down so they stick to the bagel. It is much easier and quicker to top the bagels this way, instead of spreading sauce on each one, then pepperoni and then cheese.


Place the baking sheets into the freezer until the bagels are frozen. Then remove them from the sheets and store in plastic freezer bags.


To serve, take the desired number of mini pizzas from the bag. Place on a baking sheet and bake at 425 degrees for 10-15 minutes until warm and melty.


I love that these are made with healthier ingredients than the store-bought ones. And they're so easy! I think it took me about 10 minutes from start to finish to get two dozen bagel bites in the freezer. And the results were delicious!


Mr. Lego certainly enjoyed them!

I'm linking this post to Miz Helen's Country Cottage and her Full Plate Thursday linky!