Showing posts with label beef. Show all posts

Wednesday, September 17, 2014

Mini Cheddar Meatloaves

Well, y'all, I did it! Earlier this week I posted about using what was in my pantry to save some money at the grocery store. I stayed under my goal of $60!

And believe me, it wasn't easy. I had hubby and one child with me. I tend to spend more when I'm not alone because the extra people add extra items to the cart! But I managed to stick to my list and keep the grocery bill down. Yay!

This is one of the family's favorite recipes and I usually have the ingredients already on hand. We like meatloaf and I make it often. The only thing about fixing it that I don't like is the amount of time it takes to cook. A full size meatloaf is going to take about an hour in the oven to be thoroughly cooked. Who has time for that?

These miniature meatloaves are the answer to the long cooking time. Because they're smaller, they cook up in about 25 minutes - less than half the cooking time of a full size loaf!

If you have a family favorite meatloaf recipe, it's easy to convert into mini loaves. Once you've mixed up your ingredients, divide it into four portions per each pound of meat. So a recipe that calls for one pound of ground meat will make four mini loaves. If your recipe uses 1 1/2 pounds of ground meat, then you'll get six mini meatloaves. Two pound of meat? Make eight mini loaves. Easy!

Here's what you'll need for these yummy cheddar filled mini meatloaves:

1 lb ground beef
1 egg
1/4 cup steak sauce or barbecue sauce, plus more for basting
1/4 cup panko crumbs
2 TBSP dried minced onion
1 teas sea salt
1/2 teas pepper
2 oz cheddar cheese, cut into little cubes (I take an 8 oz block of cheddar cheese, then cut off 1/4 of it to get 2 oz)

In a mixing bowl, beat the egg, then stir in the steak sauce, panko crumbs and seasonings. Crumble the ground beef over this mixture, then dump in the cheese cubes. Using your hands, mix together.

Shape the mixture into 4 separate loaves and place on a foil-lined pan. I try to shove any visible cheese cubes deeper into the meat so they don't melt off onto the pan, but they will leak at some point. Like this.
Bake at 400 degrees for 20-25 minutes or until the meat is no longer pink in the center. About halfway through baking, brush the loaves with a little more steak sauce or barbecue sauce.
Look at that gooey, stringy cheese!

Yummy!


Friday, August 29, 2014

Zucchini Casserole


A year ago I could barely get my family to eat zucchini. They all turned their noses up at it, even my husband. Now we eat zucchini at least once a week, especially when it's in season. My mom sent me this yummy recipe and we love it!

This casserole takes zucchini to a new, tasty level. Combined with ground beef or sausage (or a mixture of both) and potatoes, it's hearty and satisfying. The ground beef version seems to be more filling, while the sausage version is a bit more flavorful. Using a little of both is definitely a winning combination!

 And we never have leftovers. It gets gobbled up in the blink of an eye.

Here's what you need:

1 lb ground beef or sausage, cooked and drained (or 1/2 lb of each)
1 large zucchini, shredded ( I use my cheese grater)
3 potatoes, scrubbed, peeled and grated
1 small onion, diced
2 teas seasoned salt
1/2 teas garlic powder
1/4 teas black pepper
1 cup shredded cheese (I use white or yellow cheddar)
1-2 tomatoes, sliced

In a large bowl, combine all the ingredients except the tomatoes. Spread into a lightly greased 9x13 baking pan. Top with the tomato slices. You can see I only used one tomato and only covered half the casserole. My kids don't care for the tomatoes. I think the tomatoes give the casserole a great flavor.

Bake at 350 degrees for 40-50 minutes, until slightly crisp around the edges. Allow to stand for 15 minutes before serving.

Wednesday, June 25, 2014

Big Macs at Home

We've been trying to eat healthy around here, and one of the things we're trying to cut out is fast food. We really didn't eat it often, but when we did, the Princess and I headed straight for the Big Macs.

I remember in elementary school music class learning the Big Mac sales pitch as part of a lesson on rhythm. Over 35 years later, I still remember it - "Two all-beef patties, special sauce, lettuce, cheese, pickles, onions on a sesame seed bun." Know what I'm talking about?

So I tried to recreate those toppings here at home, though I added my own little twist. On my "Big Mac," I leave off the pickles. I always just picked them off the fast-food version anyway. And I don't use two beef patties. Although one of my burgers would definitely equal the two tiny flat ones McDonald's uses on their Big Macs!

My first step is to carmelize some onions. I can't stand the taste and crunch of raw onions. Usually I scraped them off if I could. But cook onions up in a pan, softening and sweetening them up, and I'm all over that!

I thinly slice two onions, then heat up 2 tablespoons of butter in a skillet. Over low to medium heat, cook the onions for 20 to 30 minutes, stirring often. You don't want them to burn, just to brown nicely.

Then I make the special sauce. It's really very simple. I take 2 tablespoons of mayonnaise and add about 1 1/2 tablespoons of ketchup. Then I stir in two teaspoons of dill pickle relish. It's very similar to Thousand Island dressing, so you could use that if you don't want to make the homemade sauce.

After grilling up some burgers on my George Foreman grill, I assemble the homemade Big Macs.

First comes the whole wheat bun. Mine didn't have any sesame seeds, but it's okay. Layer the cooked burger and cheese, then pile on some carmelized onions.
Now if you're going to add pickles, do so now. Everyone else in my family does. Spread some special sauce over the top bun and stack up some lettuce on the burger.

Now enjoy your Big Mac, knowing it's healthier and more satisfying than what you'd buy at the drive-thru!

Thursday, May 15, 2014

One Pot Cheeseburger Macaroni

I posted about my experiments with one pot meals lately, and I'm happy to say I have another success! This dish was so easy and delicious! We didn't even have leftovers, as both kids and hubby had seconds. I'd say that was a thumbs up from the family!

Here's what you need:

1 lb ground beef
1/2 cup diced onion
2 cups uncooked macaroni
3 cups beef broth
1/2 cup milk
3 TBSP ketchup
1 teas mustard (I just used one squirt, it looked like a teaspoon to me)
2 teas Montreal steak seasoning
1 cup shredded cheddar cheese

In a large skillet or sauce pan, cook the beef together with the onions until the beef is no longer pink. Drain.

To the pot add the macaroni, beef broth, milk, ketchup, mustard and steak seasoning. Give it a good stir. Bring to a boil, then reduce heat and simmer for 10-15 minutes until the pasta is tender. Stir it a couple of times while cooking so the macaroni doesn't stick to the bottom of the pan.

Remove from heat and stir in the cheese until it's melted.

Thursday, March 27, 2014

Beefy Three Cheese Dip

Since we homeschool and hubby works from home, we eat lunch together as a family nearly every day. How many families get to enjoy that? I try to keep lunch simple. Usually I serve leftovers from the night before. But sometimes we have no leftovers, thanks to the growing appetite of a particular teenage boy in our house!

This yummy dip serves as a fantastic lunch or snack. It's something different from our usual lunch fare, which makes it a huge hit with the family. And it's easy.

Here's what you need:

1 lb ground beef, cooked and drained
2 TBSP taco seasoning
1 cup salsa, your preference for spicy
1 cup heavy cream
1 cup shredded sharp Cheddar cheese
1 cup shredded white Cheddar or Monterey Jack cheese
3 oz. cream cheese

In a large skillet, combine the cooked ground beef, taco seasoning and salsa; heat through. Stir in the heavy cream, but don't allow the mixture to boil. Stir in the shredded cheese and stir until completely melted. Cut the cream cheese into smaller pieces, then stir into the mixture until melted. Resist the impulse to just throw everything into the pan at once. Adding a little bit at a time really helps all the cheese to melt and not glop up. Enjoy!

Friday, February 28, 2014

Crockpot Cheesy Cowboy Casserole

I adore using my crockpot on busy weekdays. I adore using my crockpot on busy weekends, too. It is one of my most-used appliances ever.

This recipe is one of the reasons I love using my crockpot. I can prep the ingredients in 15 minutes, throw it all into the pot, turn it on, and forget about it until it's time to serve. There are no fancy ingredients here - just plain, old-fashioned, hearty stuff that fills you up.

Here's what you need:

1 lb ground beef, browned and drained
4-5 small potatoes, thinly sliced (I used Yukon gold)
1 (15 oz) can beans, rinsed and drained (I prefer pintos, but kidney or black beans work just as well)
1 (15 oz) can diced tomatoes (I used fire-roasted tomatoes)
1 can cream of mushroom soup (I used homemade)
1 small onion, diced
1 teas seasoned salt
1 teas garlic powder
1/2 teas black pepper
1 cup shredded Cheddar cheese

Place all the ingredients except the cheese in a lightly greased crockpot.
Give it a good stir.
Cover and cook on low for 4-6 hours or until the potatoes are tender. About 20 minutes before serving, sprinkle the cheese over the top and turn the crockpot off. It shouldn't take long for the cheese to melt.


Wednesday, January 22, 2014

Make Ahead Swedish Meatballs

I love having meals that I can make ahead and freeze for my family. This meal is actually only partially made ahead - the meatball part. The yummy spiced gravy is made at serving time, but it's really easy and only takes a few minutes.

The allspice and nutmeg are absolutely necessary for this recipe to be successful. There's just enough to give the meatballs and gravy a lovely zip. My family loves this comfort food, and I love how easy it is!

Here's what you need:

For the meatballs
1 lb ground beef
1 lb ground pork
1/2 cup dry bread crumbs
1/4 cup cream (you can sub milk)
1/4 cup minced onion (dry minced onion works fine here)
1 teas garlic powder
1 teas sea salt
1 teas dried parsley
1/2 teas black pepper
1/2 teas allspice
1/4 teas nutmeg

In a mixing bowl, combine the bread crumbs, cream, minced onion, seasonings and spices. Crumble the ground beef and ground pork over the top, then use your hands to mix well.

Pinch off a golf-ball sized portion and shape it into a ball. This will make about 16 large meatballs. If you want to serve these as appetizers, make them into ping-pong ball sized balls. You would get about 24 that way.

Place in a lightly greased baking dish and cover with foil. Bake at 350 degrees for forty minutes, or until meatballs are no longer pink inside. If you make smaller meatballs, it might not take as long.

Allow to cool completely, then freeze in a gallon size Ziploc bag. If you want to serve these immediately, go ahead and prepare the gravy. Otherwise, prepare the gravy on the day you want to serve your meatballs.

For the gravy
1/4 cup butter
1/4 cup flour
3 cups beef broth
1 teas dried parsley
1/2 teas allspice
1/2 teas sea salt
1/4 teas black pepper
1/2 cup sour cream

In a saucepan, melt the butter. Whisk in the flour and make sure there are no lumps. Cook until bubbly. Slowly whisk in the broth and stir until there are no lumps. Stirring constantly, bring to a boil and allow to thicken. Stir in the seasonings. Remove from heat and stir in the sour cream until completely incorporated.

If you're serving your meatballs the same day you make them, place them in a serving dish. Pour the gravy over the meatballs, making sure they're all coated. Serve warm.

If your meatballs have been made ahead, thaw them completely in the fridge. Place in a crockpot and pour the gravy over them. Heat on low for 2 hours, or until heated through. Alternately, you can place them in a saucepan, pour the gravy over them and heat on low until warmed through.

Serve over mashed potatoes, cooked noodles or rice.

Thursday, October 24, 2013

Beef and Bean Burritos

Frozen burritos were once a staple in my freezer. It was so easy to pop them into the oven or microwave for a quick meal. But the list of ingredients was a mile long. And frankly, the texture was a little scary at times.

These burritos are simple - just 5 ingredients, plus the tortillas. And they can be customized to suit your family's tastes. But best of all, they freeze wonderfully and taste delicious!

Here's what you need:

1 lb ground beef
2 cups refried beans (or one 15 oz can)
1 cup salsa - here's where you can adjust the heat if you like spicy
2 TBSP taco seasoning
1 cup shredded cheese
8 burrito sized tortillas

In a large skillet, brown the ground beef and drain. Stir in the refried beans, salsa and taco seasoning until well blended.

Spread 1/3 cup of the mixture on the lower half of a tortilla. Sprinkle with cheese.
Fold in both sides, then roll up tightly.

Wrap the burrito in aluminum foil to bake immediately or to freeze for later. I have found it easiest to place the tortilla on the foil, then fill and roll up. Then it's a snap to wrap!

If you're serving these immediately, heat the oven to 400 degrees. Bake for 15 minutes.

If freezing for later, place the foil-wrapped burritos in a freezer bag. These will keep in the freezer for up to 6 months. You have some options for reheating them. Pick the one that is easiest for you!

You can thaw them completely in the fridge overnight. Pop them into a 400 degree oven for 15 minutes.

Unwrap from the foil, then put them into the microwave to defrost. Heat in the oven as directed above.

Or, if you want to reheat them from their frozen state, put them in the oven for about an hour. This method with ensure that you get some crispy goodness on the outside.

Wednesday, July 24, 2013

Chinese 5-Spice Beef and Broccoli

I love trying out new herbs and spices in my cooking. Recently I got some Chinese 5-spice, a blend of cinnamon, star anise, anise seed, ginger and cloves. I looked around for a recipe to highlight its unique flavor but didn't find any that fit my criteria - quick, cheap and easy!

So I came up with this one myself, combining a stir-fry sauce with ground beef and broccoli. Served over rice, it's a delicious, flavorful, satisfying dish. My family loves it and requests it often. I'm happy to oblige since it's so simple to make.

Here's what you need:

1 lb ground beef
1 small onion, diced
1 bag frozen broccoli

In a large skillet, cook the ground beef and onion together until the meat is no longer pink; drain. While the beef is cooking, prepare the sauce and steam the broccoli according to package directions.

For the sauce:
1/2 cup low sodium chicken broth
1/3 cup soy sauce
1/3 cup rice wine vinegar
1 TBSP sesame oil
2 teas brown sugar
1/2 teas garlic powder
1/2 teas ground ginger
1/4 teas Chinese 5-spice powder
1/4 cup water
2 TBSP cornstarch or arrowroot powder

In a small saucepan combine the broth, soy sauce, vinegar, sesame oil, garlic, ginger and 5-spice powder. In another small bowl, combine the water and cornstarch, making sure there are no lumps. Bring the soy sauce mixture to a boil. Reduce the heat and stir in the cornstarch mixture. Simmer until the mixture thickens a bit.

Add the broccoli to the skillet with the beef. Pour the sauce over all, making sure everything is coated. Serve over rice.


Wednesday, April 17, 2013

Calico Beans

This beef and bean recipe is simple and delicious. Not to mention it's frugal. I also love that it's full of protein. Oh, and it's colorful, too.

There, have I gushed about it enough? Let's get on to the recipe!


Here's what you need:

1 lb ground beef
1 small onion, chopped
1 small green pepper, chopped
2 cans baked beans, undrained (I use Eden Organic or Walnut Creek Organic, available at Publix)
1 can dark red kidney beans, drained
6 slices bacon, cooked and chopped (you can substitute real bacon bits)
1/2 cup barbecue sauce, your choice
1 TBSP balsamic vinegar
1/2 teas sea salt
1/2 teas black pepper

In a large skillet, brown the ground beef with the onion and green pepper until the meat is no longer pink. Drain.

Mix in the remaining ingredients. Transfer to a baking dish and bake, covered, at 350 degrees for about an hour. Or just toss it all into a crockpot and cook on low for 4-6 hours.
See how pretty that is?

Wednesday, March 27, 2013

Homemade Chili Mac

Back in the day, I bought a lot of Hamburger Helper. I figured it was quick, cheap and easy. Then I started taking an interest in what we were really eating - all the processed stuff. And the list of ingredients on a box of HH was as long as my arm, it seemed. So out went the boxed dinners.

This version of Chili Mac - one of our favorite HH varieties - is just as quick and easy as the boxed stuff. It's pretty inexpensive, too. Since I almost always have the ingredients on hand, it's a go-to meal for lunch or dinner.

Here's what you need:

2 cups dry elbow macaroni
1 lb ground beef
1/2 small onion, chopped
1 can (15 oz.) tomato sauce
1/2 cup sour cream or plain yogurt
1 TBSP taco seasoning
1-2 cups shredded Cheddar cheese

Cook the macaroni according to the directions on the package and drain. Meanwhile, cook the ground beef and onion together until the meat is no longer pink. Drain.

Stir in the cooked macaroni into the skillet with the beef. Then add the tomato sauce, sour cream, taco seasoning and half the shredded cheese. Stir until well blended. Heat on low until warmed through.

Top the chili mac with the remaining cheese and allow to melt a little.
Homemade chili mac beats the boxed stuff all to pieces!

Monday, February 11, 2013

Steak Bites

All of us love a good steak around here. When Mr. Lego was just learning to read, we went to a restaurant he wanted to order "steek." We have laughed about that for years!

I adore this recipe because even though I do most of the meat-cutting, cooking time is minimal and everyone is happy, happy, happy! There is no great secret to the seasoning, either - just butter, salt and pepper. Sometimes simpler is better!

Here's what you need:

1-2 lbs. sirloin steak, cut into bite-sized pieces (you can ask your butcher to do this for you)
sea salt and pepper to taste
3 TBSP butter

Season the steak bites liberally with sea salt. Allow to sit for about 10 minutes. The salt helps break down the fibers in the meat and makes for a more tender end result. Then sprinkle with pepper to taste.

Heat a skillet very hot. Melt about half the butter in the skillet. Add half of the steak bites at a time. Cook on one side without disturbing the pan. Flip the bites over after a minute and cook for another minute. You still want the meat to be a little pink, like a medium cooked steak. Remove from the skillet and add the remaining butter. Allow it to melt and heat up, then cook the second batch of meat.

When all of the meat is cooked to your liking, pour the pan juices over the entire batch.

Thursday, January 31, 2013

Oven Baked Tacos

I guess I have a taco theme going on here this week. Earlier I posted a recipe for Beef and Bean Taco Casserole. It's one of my family's favorite casseroles, so I hope you'll give it a try.

These oven-baked tacos, served in a hard shell, are more traditional. I got the idea from Jillee over at One Good Thing by Jillee. I had baking racks for the tacos, so I skipped her hard taco shell instructions.
I ended up with a nice pile of hard shells in no time.
So you can bake your own shells or you can buy hard shells from the store, whichever works best for you. When I'm serving a large crowd, I use store-bought shells for convenience.

Now here's what you need:

16-20 hard taco shells
2 lbs ground beef or turkey
1 can (16 oz) refried beans (If you use homemade, about 2 cups)
1 cup salsa
2 TBSP taco seasoning
2 cups shredded cheese - I use sharp cheddar but Monterey Jack would be a good choice, too
Your favorite taco toppings


In a large skillet, brown the ground beef or turkey. Drain well. Stir in the refried beans, salsa and taco seasoning until well blended.
Divide the meat mixture among the taco shells. Place side by side in a large baking pan.
Top with the shredded cheese.
Bake at 400 degrees for about 10 minutes, or until the cheese is melted.
Now let each family member load 'em up with their favorite toppings. I prefer lettuce, tomatoes and sour cream.
My family and friends loved these! Yes, they took a little more prep time than regular tacos. But they are so much easier to serve!

The beans and cheese combined with the meat make for a whole lot less mess when eating them. Everything kind of sticks together - no little bits and pieces of taco meat falling out of the shell. And it's so much quicker than letting everyone load up their own tacos, especially if you're serving a crowd. You've already done most of the work for them.

Also, the baking process keeps the tops of the shells hard, but bottoms get a little chewy. That means less breakage, my number one pet peeve of eating hard shell tacos!

If your family loves tacos, you really need to give these a try. You'll like them!

Tuesday, January 29, 2013

Beef and Bean Taco Casserole

Adapted from Love Grows Wild
 
This hearty casserole has become one of my favorites to prepare. It's also one of my family's favorites to eat! So I guess that works out well, huh? It has all the flavors of tacos with a little less mess. My kids call it Tacos You Can Eat with a Fork!

You can customize the toppings based on your family's preferences. And you can easily double the recipe if you've got a large group to feed. 

Here's what you need:

1 lb ground beef
1 can (16 oz) refried beans (you can use homemade, about 2 cups)
1 cup salsa
Tortilla chips, coarsely crushed, about 2 cups
Shredded cheddar cheese, about 2 cups
Your favorite taco toppings

In a large skillet, brown the ground beef. Drain. Stir in the refried beans, salsa and taco seasoning until everything is well mixed.

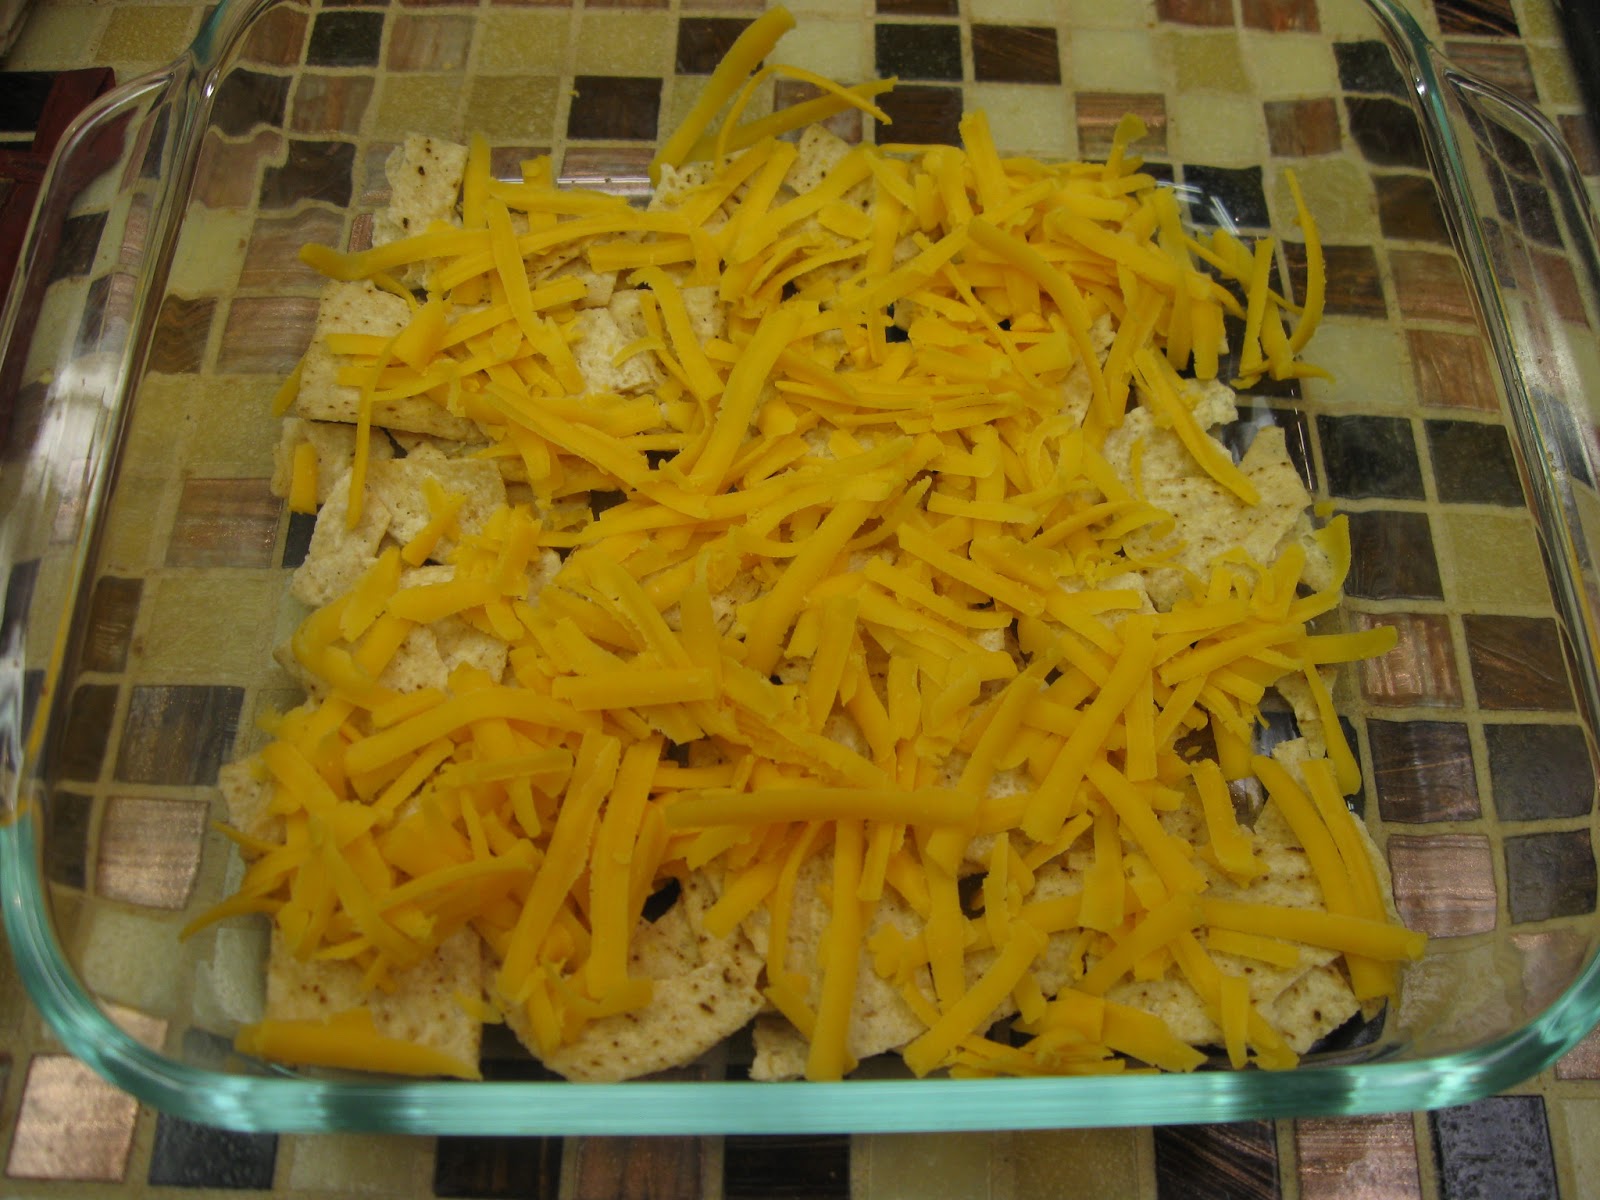
In a 8x8 dish, layer half the crushed chips, then half the cheese.
Spread the meat and bean mixture evenly over the cheese.
Repeat the chips and cheese layer.
Bake at 350 degrees until the cheese is melted, maybe about 10-15 minutes.
Scoop out onto a plate and top with your favorite taco toppings. I like lettuce, tomatoes and sour cream.
I prefer to let everyone choose their own toppings instead of topping the entire casserole like the original recipe called for. That way everyone is happy and eats up!


Friday, January 4, 2013

Philly Cheesesteak Sloppy Joes

Nothing beats a drippy Philly cheesesteak sandwich. It's my absolute favorite! But when I'm pinching pennies and trying to save on groceries, I turn to this cheaper version of my fave.

It has all the flavor of savory meat, zippy onions and melty cheese but a little less expense. Oh, you'll still get the messiness of a Philly cheesesteak. It's a sloppy joe, after all. But my kids actually like this better - maybe the meat is less chewy?

Here's what you'll need:

1 lb ground beef
1 small onion, chopped
1/2 green pepper, chopped
3 TBSP steak sauce
1/4 cup beef broth
Sliced provolone cheese
Crusty sandwich buns

In a skillet, brown the ground beef. Add the onion and green pepper while the meat is still cooking so they soften. Drain.

Stir in the steak sauce and beef broth. Simmer for 10 minutes until the liquids reduce a little.

Slice the sandwich buns in half. Spoon the meat mixture on to the bottom buns, then top with a slice of provolone cheese. Lay on a baking sheet and pop into a 400 degree oven for a few minutes until the cheese melts. Put the bun tops back on and enjoy!

Monday, November 19, 2012

3 Bean and Beef Chili with Hominy

I had never used hominy in a recipe until this one. I really didn't even know what it was. Hominy is made from the kernels of corn that have been soaked in an alkali solution. The kernels puff up to twice their normal size. I got canned hominy, so it had already been cooked, but you can purchase it dried as well.

The taste of hominy is very much like corn tortillas. I think I was expecting more of a sweet corn taste. It was such a great addition to a basic chili recipe that I'll probably use this as my go-to chili from now on.

Here's what you need:

1 lb ground beef, browned and drained
1 can black beans, rinsed and drained
1 can pinto beans, rinsed and drained
1 can kidney beans, rinsed and drained
1 can hominy, drained
1 can (15 oz) tomato sauce
1 can (10 oz) enchilada sauce
2 cups beef broth or water
1 TBSP dried minced onion
2 teas chili powder
1 teas cumin
1 teas powdered garlic
1 teas salt
1/2 teas black pepper

In a large pot, combine all the ingredients. Allow to simmer for about 20 minutes. If the chili is too thick, add a little more broth or water to thin until it reaches the desired consistency.

Garnish with sour cream and cheese, if desired.

See the light-colored bean-looking things? That's the hominy.


Thursday, November 8, 2012

Mexican Pasta

If you're looking for a quick meal you can have on the table in 30 minutes or less, look no further. This ground beef and pasta dish is simple, hearty and flavorful. Think of it as a healthier alternative to Hamburger Helper.

Even my pickiest eater, the Princess, will gobble this up. Usually she prefers her pasta with no sauce. That's right, no sauce. Nada. Nothing. Except maybe a sprinkling of Parmesan cheese, if she's in the mood. But this stuff - she devours it! Try it and you'll see why.

Here's what you need:

2 cups small pasta, uncooked - I use shell pasta
1 lb ground beef
1 can (15 oz) tomato sauce
1 cup salsa
2 TBSP taco seasoning
1/2 teas black pepper
shredded cheese, optional

Cook the pasta according to the package directions and drain. While the pasta is cooking, brown the ground beef in a large skillet, then drain.

To the ground beef, add the tomato sauce, salsa, taco seasoning and pepper. The kind of salsa you use allows you to control the heat and spiciness of the dish. I generally use homemade if I have it on hand. Allow this to simmer for 10 minutes.

Stir in the drained pasta. This is why I like to use the shell pasta. The yummy sauce gets into the shell shape and all that flavor seems to linger there. Silly, I know.
Top individual servings with shredded cheese, if desired.


I'm linking this recipe up to Full Plate Thursday over at Miz Helen's Country Cottage.

Monday, September 24, 2012

Skillet Lasagna

We love lasagna around here. It's one of Mr. Lego's favorite meals. This skillet version has all the wonderful Italian flavors but gets on the table faster than traditionally prepared lasagna.

Here's what you need:

1/2 lb pasta, cooked and drained according to the package directions
  (I used bowtie pasta because the ruffly edges resemble lasagna noodles. Penne
     would work just fine, too.)
1 lb ground beef, cooked and drained
29 ounce can tomato puree or sauce
2 TBSP dried oregano
1 TBSP each Italian seasoning and dried basil
1 TBSP minced onion
1 teas garlic powder
salt and pepper to taste
1/2 cup ricotta cheese
1-2 cups shredded mozzarella cheese (I used mozzarella and Parmesan)

In a large skillet, combine the cooked ground beef with the tomato puree. Stir in the herbs and spices. Sprinkle with salt and pepper to taste. Allow to simmer for about 10 minutes. If the sauce mixture appears to be too saucy, don't worry. The pasta will soak up some of the moisture.
Stir the cooked pasta into the sauce, making sure all the pasta gets coated. Drop the ricotta cheese by spoonfuls over the entire skillet.
Sprinkle the shredded cheese over all. Remove from the heat and cover to allow the cheese to melt. Alternately, if you have an oven-proof skillet, you can pop the whole thing into the oven for a few minutes to let the cheese melt.

From start to finish, this dish took about 30 minutes. Considering that a traditional lasagna bakes at least 45 minutes in the oven after all the prep work, this is a huge time savings for me!
The entire family declared this quick, yummy dinner to be delicious. It will show up on our menus regularly.


I'm linking up this recipe to Tempt My Tummy Tuesday over at Blessed with Grace.

Tuesday, August 21, 2012

Meatball Sliders

When I make Italian meatballs, I like using leftovers for meatball subs. The downside for me is that the long hoagie bun often gets soggy before I can finish eating it. And I don't like soggy buns. I know. I'm weird.

The perfect solution is taking the concept of a meatball sub and turning it into individual sandwiches that can be eaten in a few bites - sliders! I use my Italian meatball recipe, but I make them slightly bigger to fit the sandwich roll. Nobody likes meatballs rolling around and slipping off their sandwiches! You can purchase dinner rolls at the grocery store or make your own small sandwich buns. Either way is delicious!

Now, here's what you need for the meatballs:

1 lb ground beef
1/2 cup dry breadcrumbs
1/4 cup finely chopped green pepper
1/4 cup finely chopped onion
1 TBSP Italian seasoning
1 teas garlic powder
1 teas sea salt
1/2 teas black pepper
1 egg, slightly beaten

You'll also need:

Small sandwich buns like dinner roll size
Spaghetti or marinara sauce
Fresh mozzarella cheese, thinly sliced

In a large mixing bowl, combine the meatball ingredients. Form into large balls. I got 9 meatballs from this recipe. Place on a broiler pan.

Slightly flatten the meatballs with your hand. This will help them fit the bun better.


Bake at 400 degrees for 15-20 minutes. Heat up the spaghetti sauce in a large pan. Nestle the meatballs (though technically by now they're meat patties) into the sauce. Simmer for 30 minutes.
When you're ready to make the sliders, split and toast the sandwich rolls. These are the rolls I used. Next time I will make my own.


Scoop out a meatball along with some sauce and place on a roll. Top with a slice of cheese. You can pop them under a broiler for a few minutes if you want the cheese to be gooey and melty, but we liked ours this way.

Just the right size and no soggy buns!