Showing posts with label main dish. Show all posts

Thursday, February 26, 2015

Chicken Sausage and Veggie Hash

I'm always searching for new recipes for quick lunches for the family. Since we're all home every day (I homeschool the kids and hubby works from home), I have to come up with lunch. Every day.

I used to rely on leftovers for next day lunches, but with a growing teenage boy in the house, leftovers are a rare occurrence these days.

This recipe has protein and lots of yummy veggies. The original recipe called for sweet potatoes, but I leave them out because no one likes them but me. The beauty of this dish is that is easily customizable to suit your family's likes. Often, I just use whatever veggies I have on hand, but here's what my family likes best.

You'll need:

1 pkg. fully cooked chicken sausage links
1 small onion, diced
2 teas minced garlic
1 red or green pepper, seeded and diced
1 zucchini, diced
8 oz. mushrooms, chopped
2 cups fresh spinach or kale
sea salt and pepper to taste
Optional : crumbled feta or shredded Parmesan cheese

Slice the sausage links into bite sized pieces. I use this brand of sausage that I find at Publix.
I like the short ingredient list.
Heat a little olive oil in a large skillet. Add the sausage pieces and cook until browned.

Add the onions and garlic to the skillet. Cook until the onions are almost translucent. Then add the pepper and zucchini. Cook for another 5 minutes.

The mushrooms are next and they won't take long to get softened. When they are soft, add the spinach or kale. Cook and stir until wilted.

Season with salt and pepper. If desired, sprinkle with a little feta or Parmesan cheese for a little tang.


Wednesday, September 17, 2014

Mini Cheddar Meatloaves

Well, y'all, I did it! Earlier this week I posted about using what was in my pantry to save some money at the grocery store. I stayed under my goal of $60!

And believe me, it wasn't easy. I had hubby and one child with me. I tend to spend more when I'm not alone because the extra people add extra items to the cart! But I managed to stick to my list and keep the grocery bill down. Yay!

This is one of the family's favorite recipes and I usually have the ingredients already on hand. We like meatloaf and I make it often. The only thing about fixing it that I don't like is the amount of time it takes to cook. A full size meatloaf is going to take about an hour in the oven to be thoroughly cooked. Who has time for that?

These miniature meatloaves are the answer to the long cooking time. Because they're smaller, they cook up in about 25 minutes - less than half the cooking time of a full size loaf!

If you have a family favorite meatloaf recipe, it's easy to convert into mini loaves. Once you've mixed up your ingredients, divide it into four portions per each pound of meat. So a recipe that calls for one pound of ground meat will make four mini loaves. If your recipe uses 1 1/2 pounds of ground meat, then you'll get six mini meatloaves. Two pound of meat? Make eight mini loaves. Easy!

Here's what you'll need for these yummy cheddar filled mini meatloaves:

1 lb ground beef
1 egg
1/4 cup steak sauce or barbecue sauce, plus more for basting
1/4 cup panko crumbs
2 TBSP dried minced onion
1 teas sea salt
1/2 teas pepper
2 oz cheddar cheese, cut into little cubes (I take an 8 oz block of cheddar cheese, then cut off 1/4 of it to get 2 oz)

In a mixing bowl, beat the egg, then stir in the steak sauce, panko crumbs and seasonings. Crumble the ground beef over this mixture, then dump in the cheese cubes. Using your hands, mix together.

Shape the mixture into 4 separate loaves and place on a foil-lined pan. I try to shove any visible cheese cubes deeper into the meat so they don't melt off onto the pan, but they will leak at some point. Like this.
Bake at 400 degrees for 20-25 minutes or until the meat is no longer pink in the center. About halfway through baking, brush the loaves with a little more steak sauce or barbecue sauce.
Look at that gooey, stringy cheese!

Yummy!


Friday, August 29, 2014

Zucchini Casserole


A year ago I could barely get my family to eat zucchini. They all turned their noses up at it, even my husband. Now we eat zucchini at least once a week, especially when it's in season. My mom sent me this yummy recipe and we love it!

This casserole takes zucchini to a new, tasty level. Combined with ground beef or sausage (or a mixture of both) and potatoes, it's hearty and satisfying. The ground beef version seems to be more filling, while the sausage version is a bit more flavorful. Using a little of both is definitely a winning combination!

 And we never have leftovers. It gets gobbled up in the blink of an eye.

Here's what you need:

1 lb ground beef or sausage, cooked and drained (or 1/2 lb of each)
1 large zucchini, shredded ( I use my cheese grater)
3 potatoes, scrubbed, peeled and grated
1 small onion, diced
2 teas seasoned salt
1/2 teas garlic powder
1/4 teas black pepper
1 cup shredded cheese (I use white or yellow cheddar)
1-2 tomatoes, sliced

In a large bowl, combine all the ingredients except the tomatoes. Spread into a lightly greased 9x13 baking pan. Top with the tomato slices. You can see I only used one tomato and only covered half the casserole. My kids don't care for the tomatoes. I think the tomatoes give the casserole a great flavor.

Bake at 350 degrees for 40-50 minutes, until slightly crisp around the edges. Allow to stand for 15 minutes before serving.

Wednesday, June 25, 2014

Big Macs at Home

We've been trying to eat healthy around here, and one of the things we're trying to cut out is fast food. We really didn't eat it often, but when we did, the Princess and I headed straight for the Big Macs.

I remember in elementary school music class learning the Big Mac sales pitch as part of a lesson on rhythm. Over 35 years later, I still remember it - "Two all-beef patties, special sauce, lettuce, cheese, pickles, onions on a sesame seed bun." Know what I'm talking about?

So I tried to recreate those toppings here at home, though I added my own little twist. On my "Big Mac," I leave off the pickles. I always just picked them off the fast-food version anyway. And I don't use two beef patties. Although one of my burgers would definitely equal the two tiny flat ones McDonald's uses on their Big Macs!

My first step is to carmelize some onions. I can't stand the taste and crunch of raw onions. Usually I scraped them off if I could. But cook onions up in a pan, softening and sweetening them up, and I'm all over that!

I thinly slice two onions, then heat up 2 tablespoons of butter in a skillet. Over low to medium heat, cook the onions for 20 to 30 minutes, stirring often. You don't want them to burn, just to brown nicely.

Then I make the special sauce. It's really very simple. I take 2 tablespoons of mayonnaise and add about 1 1/2 tablespoons of ketchup. Then I stir in two teaspoons of dill pickle relish. It's very similar to Thousand Island dressing, so you could use that if you don't want to make the homemade sauce.

After grilling up some burgers on my George Foreman grill, I assemble the homemade Big Macs.

First comes the whole wheat bun. Mine didn't have any sesame seeds, but it's okay. Layer the cooked burger and cheese, then pile on some carmelized onions.
Now if you're going to add pickles, do so now. Everyone else in my family does. Spread some special sauce over the top bun and stack up some lettuce on the burger.

Now enjoy your Big Mac, knowing it's healthier and more satisfying than what you'd buy at the drive-thru!

Friday, April 18, 2014

One Pot Sausage and Tortellini

Recently I've been experimenting with one pot meals. Usually they consist of a meat/protein along with a starch like pasta, rice or potatoes. Only one pan is used in cooking the dish, hence the one pot name.

I have to say, I resisted this idea for awhile. I've always cooked pasta separately, then added it to the dish I'm making. It's just the way it was done. At least, in my house. But I decided to give this new method a try. I'm glad I did. Clean up is a breeze, and the pasta had a very rich flavor from simmering in the sauce.

Here's what you need:

1 lb Italian sausage links, casings removed
2 teas minced garlic
1 cup chicken broth
1 can (15 oz) tomato sauce
1/2 cup heavy cream
1 (19 oz) pkg frozen tortellini

In a large saucepan, heat a little olive oil. Cook the sausages, breaking them up into smaller chunks. Add the minced garlic and cook for another minute. Drain any excess grease from the pan.

Stir in the broth, tomato sauce and heavy cream. Bring to a low boil, stirring often. Add the frozen tortellini and stir to make sure all of it is coated with the liquid. Cover and simmer for 12 minutes, or until the tortellini is tender.


Saturday, March 8, 2014

Pretzel Dogs

Recently our local Walmart added an Auntie Anne's pretzel shop to the front of the store. Right by the exit. So you have to walk past it. Unless you try to avoid temptation and walk all the way over to the other side to exit, like I have been doing.

One of the popular items on Auntie Anne's menu is their pretzel dog, a hot dog all wrapped up in a pretzel. Like the pigs in a blanket we used to eat as kids. Only with a pretzel crust, these are WAYYYY better. But at $4 a hot dog, it's a little too pricy for my budget. I already have a pretzel bread recipe, so I just decided to halve that recipe for the pretzel crust.

I learned a couple of things in making these for my family. One, do not leave both ends of the crust open. Your hot dogs will become a little slippery as they bake and the dough won't stick well. And your hot dogs just might slip out of their pretzel-y shell and land on the floor, where your real-life furry dog is waiting for just such an occurrence. While he or she might be thrilled by such a turn of events, you will not be. You will be disappointed and offer to eat the empty hot-dog flavored pretzel shell.

Second, don't use bun length hot dogs. You won't have enough dough to wrap the dog completely AND enclose one end. I don't think I need to explain why you want one side enclosed again, do I?

So, here's what you need:

3/4 cup warm water
1 and 1/8 teas yeast
1 teas sugar
2 to 2 1/4 cups unbleached flour
2 TBSP melted butter or olive oil
1 teas sea salt
1/4 cup baking soda
1 egg white
coarse salt for sprinkling
Pkg of 8 hot dogs

In a mixing bowl, combine the water, yeast and sugar. Allow to stand for about 5 minutes, until foamy. Stir in the flour, melted butter, and salt. Start with two cups of flour, then add more (up to 1/4 cup) if the dough is too sticky. I use my stand mixer for this but you can do it by hand too. Cover and let rise for about an hour until doubled.

Turn the dough out onto a lightly floured surface. Divide into 8 equal pieces. Roll or twist each piece of dough into a long rope about 12 inches long. Wrap the dough around a hot dog, making sure one end is enclosed. Alternately, you can roll out each piece into a circle, then wrap it completely around the hot dog, enclosing both ends. It's up to you!

Bring a large pot of water to a boil. Reduce the heat to a low simmer, then add the baking soda. It will foam up at first, but that's okay. Drop two wrapped hot dogs into the water and allow to simmer for 30 seconds. Remove to a baking sheet lined with parchment paper. I use a slotted spoon and spatula to do this.

Brush each pretzel dog with egg white, then sprinkle on some coarse salt. Bake at 425 degrees for 15 minutes, or until browned.

Wednesday, February 5, 2014

Baked Chicken Provencal

Herbs de Provence is one of my favorite spice blends to use with chicken. Most herbs de Provence blends consist of thyme, rosemary, marjoram and lavender. The lavender gives such a nice, fresh flavor to the entire dish, in my opinion. The basic ingredients are common to southern France, where the blend originated.

This is so simple to prepare, yet tastes so elegant. Plan ahead so your chicken can marinate for a few hours or overnight, allowing the marinade to soften and add flavor to the meat.

Here's what you need:

4-6 boneless, skinless chicken breasts
1/2 cup olive oil
1/4 cup lemon juice
2 TBSP herbs de Provence

In a large resealable bag, mix the olive oil, lemon juice and herbs de Provence. Add the chicken breasts and squish around until all the meat is covered. You can also do this is a glass dish, if you prefer. You might have to turn the chicken to make sure all of it gets marinated, as the liquid might not cover it all in a dish. Refrigerate for a couple of hours, or even better, overnight.
About an hour before cooking, remove the chicken from the fridge. The olive oil tends to solidify when it's refrigerated, so this will give it some time to liquefy again.

Pour the chicken and marinade into a baking dish. Bake at 350 degrees for 30 minutes or until the chicken is no longer pink and the juices runs clear. About halfway through the cooking time, turn the chicken over and baste with some of the liquid. I usually give it a good soaking when I take it out of the oven, too. Do not overbake or the chicken will be dry.

Monday, September 30, 2013

Easy Ramen Noodle Stir Fry

Who doesn't love a quick and easy meal on busy weeknights? This stir fry is so delicious and can be on the table in less than 30 minutes. And it's versatile. You can choose the veggies your family likes. You can incorporate whatever meat you have available - chicken, beef, pork, even ground meat.

For ease of preparation, I used a bag of frozen stir-fry vegetables. Then I noticed the blend had snow peas in it. And I hate peas! I thought, since the pods were still intact, I could just easily pick them out. Uh, no. As they heated, the pea pods popped open and little peas spread throughout the skillet! Fortunately, I was able to separate most of them from my portion and donate them to my husband who adores peas. Next time, I'll chop up my own veggies! No peas!

Here's what you need:

2 pkgs ramen noodles
1 lb meat - I used cube steak, thinly sliced
4 cups veggies or 1 pkg frozen stir-fry veggies
1/2 cup water
1/3 cup low-sodium soy sauce
2 TBSP brown sugar
1 TBSP corn starch or arrowroot powder
1 teas ground ginger

Before you start cooking the meat and veggies, prepare the stir fry sauce. In a small saucepan, combine the water, soy sauce, brown sugar, corn starch and ginger. Whisk until there are no lumps. Bring to a boil and cook for one minute. Set aside. This will thicken as it stands.

Break the ramen noodles up a little. Cook according to the package directions but discard the seasoning packets. You won't need them for this recipe. Drain the noodles.

While the noodles are cooking, pour a little oil into a skillet or wok. Cook the meat until it reaches your level of desired doneness. Add the veggies and cook until crisp-tender.

Turn off the heat and add the noodles to the skillet. Pour the stir-fry sauce over all and make sure everything is coated.

Monday, August 26, 2013

Sausage Stuffed Zucchini

Or how to take a perfectly healthy vegetable and make it less so!

My kids have never been fond of zucchini. Nor has my husband. I, on the other hand, could it eat it all the time! So I've struggled finding zucchini recipes that they'll like. Well, at least that they'd eat without groaning too much.

This recipe fits the bill. The sausage adds so much flavor. You can use chicken sausage or turkey sausage to cut down on the fat.

Here's what you need:

2 large zucchini (I've been having a hard time finding large ones this year)
1/2 pound sausage, browned and drained
2 TBSP sour cream
1 teas dried parsley
1/2 teas garlic powder
1/4 curry powder
1/2 cup shredded cheese (I used Parmesan, but cheddar is great, too!)

Slice the zucchini in half lengthwise.
With a spoon or melon baller, scoop out the flesh of the zucchini.
Chop up the zucchini into small pieces. The smaller they are, the easier it is to stuff them back into the zucchini.
Combine with the remaining ingredients. Fill the hollowed-out zucchini with the sausage mixture. Bake at 375 degrees for 20-30 minutes, or until zucchini shells are tender.
I will warn you, the zucchini has a lot of moisture, so your filling might be a little runny. This does not affect the deliciousness in any way. My kids gobble these up and ask for more!

Substitute other herbs or spices to suit your family's tastes. You could even use bacon in place of the sausage if you like. Make some stuffed zucchini today!

Friday, August 9, 2013

Quinoa Burrito Bowls

I've been trying to incorporate more meatless meals into my menu planning, and this is one of my family's favorites. It's simple and quick to prepare, so of course, I love it. And with quinoa as the base, I'm happy we're getting a complete protein even though there's no meat in the dish. Though I have been known to toss in some leftover grilled chicken or steak, just to use it up.

Here's what you need:

1 cup quinoa, rinsed
2 cups liquid (I use chicken stock and water)

For the sauce:
1/2 cup sour cream
1 TBSP milk
1-2 teas taco seasoning

For the seasoning (not the same as the taco seasoning in the sauce)
1 teas. each garlic powder, smoked paprika, curry powder, celery seed and sea salt

Toppings of your choice : chopped lettuce or cabbage, diced tomatoes, chopped avocado, black beans, corn, salsa, onions, shredded cheese, cilantro - anything you'd like on a taco or burrito

 Combine the quinoa and liquid in a saucepan. Bring to a boil, then reduce heat and simmer covered for 15 minutes or until the liquid is absorbed and quinoa is tender.

While the quinoa is cooking, blend the sauce ingredients. You could do this earlier in the day if you wanted to.

In a small bowl, combine the seasoning ingredients.

When the quinoa is cooked, start building your burrito bowl. I really like that every family member can customize this to his/her own tastes.
Start with the quinoa in a large bowl or on a plate. Add several dollops of the sauce. Then layer on the toppings and sprinkle about 1/2 teas of the seasoning over all.
Using a fork, mix the burrito bowl together.
How yummy does that look?

Variations :
If you don't like quinoa, brown rice is a great substitute!

For unique flavor twists, use different flavors of salsa like peach mango or green salsa.

Mrs. Dash seasonings are great to use if you don't have the ingredients for the seasoning blend.

Wednesday, April 17, 2013

Calico Beans

This beef and bean recipe is simple and delicious. Not to mention it's frugal. I also love that it's full of protein. Oh, and it's colorful, too.

There, have I gushed about it enough? Let's get on to the recipe!


Here's what you need:

1 lb ground beef
1 small onion, chopped
1 small green pepper, chopped
2 cans baked beans, undrained (I use Eden Organic or Walnut Creek Organic, available at Publix)
1 can dark red kidney beans, drained
6 slices bacon, cooked and chopped (you can substitute real bacon bits)
1/2 cup barbecue sauce, your choice
1 TBSP balsamic vinegar
1/2 teas sea salt
1/2 teas black pepper

In a large skillet, brown the ground beef with the onion and green pepper until the meat is no longer pink. Drain.

Mix in the remaining ingredients. Transfer to a baking dish and bake, covered, at 350 degrees for about an hour. Or just toss it all into a crockpot and cook on low for 4-6 hours.
See how pretty that is?

Monday, February 11, 2013

Steak Bites

All of us love a good steak around here. When Mr. Lego was just learning to read, we went to a restaurant he wanted to order "steek." We have laughed about that for years!

I adore this recipe because even though I do most of the meat-cutting, cooking time is minimal and everyone is happy, happy, happy! There is no great secret to the seasoning, either - just butter, salt and pepper. Sometimes simpler is better!

Here's what you need:

1-2 lbs. sirloin steak, cut into bite-sized pieces (you can ask your butcher to do this for you)
sea salt and pepper to taste
3 TBSP butter

Season the steak bites liberally with sea salt. Allow to sit for about 10 minutes. The salt helps break down the fibers in the meat and makes for a more tender end result. Then sprinkle with pepper to taste.

Heat a skillet very hot. Melt about half the butter in the skillet. Add half of the steak bites at a time. Cook on one side without disturbing the pan. Flip the bites over after a minute and cook for another minute. You still want the meat to be a little pink, like a medium cooked steak. Remove from the skillet and add the remaining butter. Allow it to melt and heat up, then cook the second batch of meat.

When all of the meat is cooked to your liking, pour the pan juices over the entire batch.

Tuesday, January 29, 2013

Beef and Bean Taco Casserole

Adapted from Love Grows Wild
 
This hearty casserole has become one of my favorites to prepare. It's also one of my family's favorites to eat! So I guess that works out well, huh? It has all the flavors of tacos with a little less mess. My kids call it Tacos You Can Eat with a Fork!

You can customize the toppings based on your family's preferences. And you can easily double the recipe if you've got a large group to feed. 

Here's what you need:

1 lb ground beef
1 can (16 oz) refried beans (you can use homemade, about 2 cups)
1 cup salsa
Tortilla chips, coarsely crushed, about 2 cups
Shredded cheddar cheese, about 2 cups
Your favorite taco toppings

In a large skillet, brown the ground beef. Drain. Stir in the refried beans, salsa and taco seasoning until everything is well mixed.

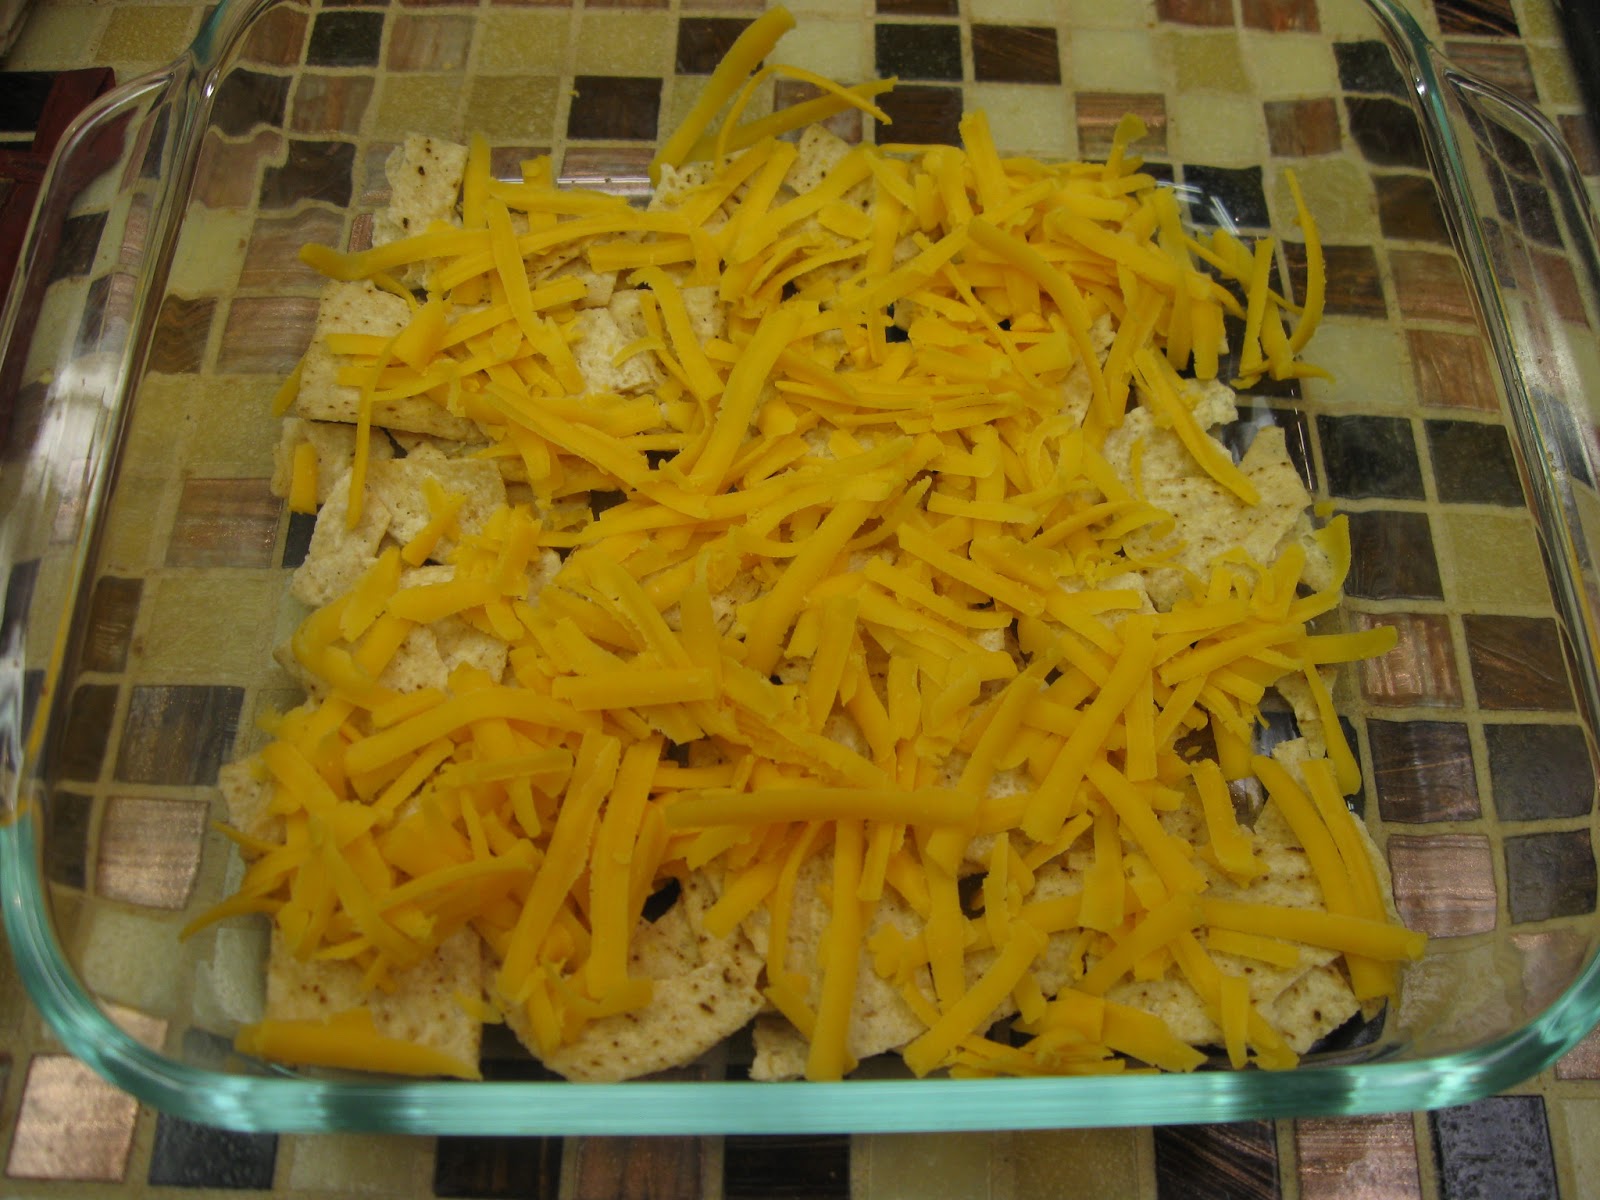
In a 8x8 dish, layer half the crushed chips, then half the cheese.
Spread the meat and bean mixture evenly over the cheese.
Repeat the chips and cheese layer.
Bake at 350 degrees until the cheese is melted, maybe about 10-15 minutes.
Scoop out onto a plate and top with your favorite taco toppings. I like lettuce, tomatoes and sour cream.
I prefer to let everyone choose their own toppings instead of topping the entire casserole like the original recipe called for. That way everyone is happy and eats up!


Monday, September 17, 2012

Sausage, Red Beans & Rice in the Crockpot!

I love crockpot meals. It's so convenient to toss a few ingredients together and let the appliance do the cooking. This is one of those meals that is so simple, you can hardly consider it cooking! When I found the recipe at Freezing Your Way Fit, I knew I had to try it. Of course, I tweaked it a bit. But it's a very hearty, satisfying dish that even my kids loved.

Here's what you need:

1 1/2 cups uncooked brown rice
3 cups chicken broth (I use low sodium)
1 can kidney beans, rinsed and drained
1 lb smoked sausage or kielbasa
1 small onion, diced
1 small green pepper, diced
1 teas Creole seasoning
1 teas dried oregano
1 teas garlic powder
1 teas sea salt
1/4 teas black pepper
1/4 teas dried thyme
a pinch of cayenne pepper (or more if you like it spicy)

Stir all the ingredients together in a lightly greased crockpot. Avoid stirring during the cooking process to avoid excess gumminess. A little sticky is okay and perfectly normal. But you don't want mush.

Cover and cook on low for 6 hours. All of the liquid should be absorbed.


I'm sharing this recipe at Blessed with Grace's Tempt My Tummy Tuesday.

Monday, June 11, 2012

Smoked Sausage and Pepper Skillet

With the heat of summer upon us, I dread turning the oven on in the afternoon to prepare something for dinner. My kitchen is extremely warm, since we have a skylight right in the middle of it. We get direct sunlight for several hours in the afternoon during the summer. So I'm always looking for stove-top meals that don't heat up the kitchen as much as baked meals do.

This quick and easy skillet dish fits the bill. I like to chop up the meat and veggies in the morning before things get hectic. Then all I have to do is heat the skillet and we're on our way to a simple, yummy meal. Alternately, you can grill this as kebabs or in a grill basket. It's delicious either way.

Here's what you need:

1 lb, smoked sausage or kielbasa, cut into 1-inch slices (I usually halve the slices since I have kids who need to take smaller bites)
2 bell peppers, any color, cut into 1-inch pieces
1 onion, chopped
2 TBSP balsamic vinegar
1 TBSP olive oil
1 teas Italian seasoning
salt and pepper to taste

Place the cut-up meat and veggies into a Ziploc bag. Combine the remaining ingredients in a small bowl and pour over the bag contents. Refrigerate for up to 8 hours. You can skip the refrigeration step if you're in a hurry. Just add the vinegar, oil and seasonings to the pan when you cook the rest of it.


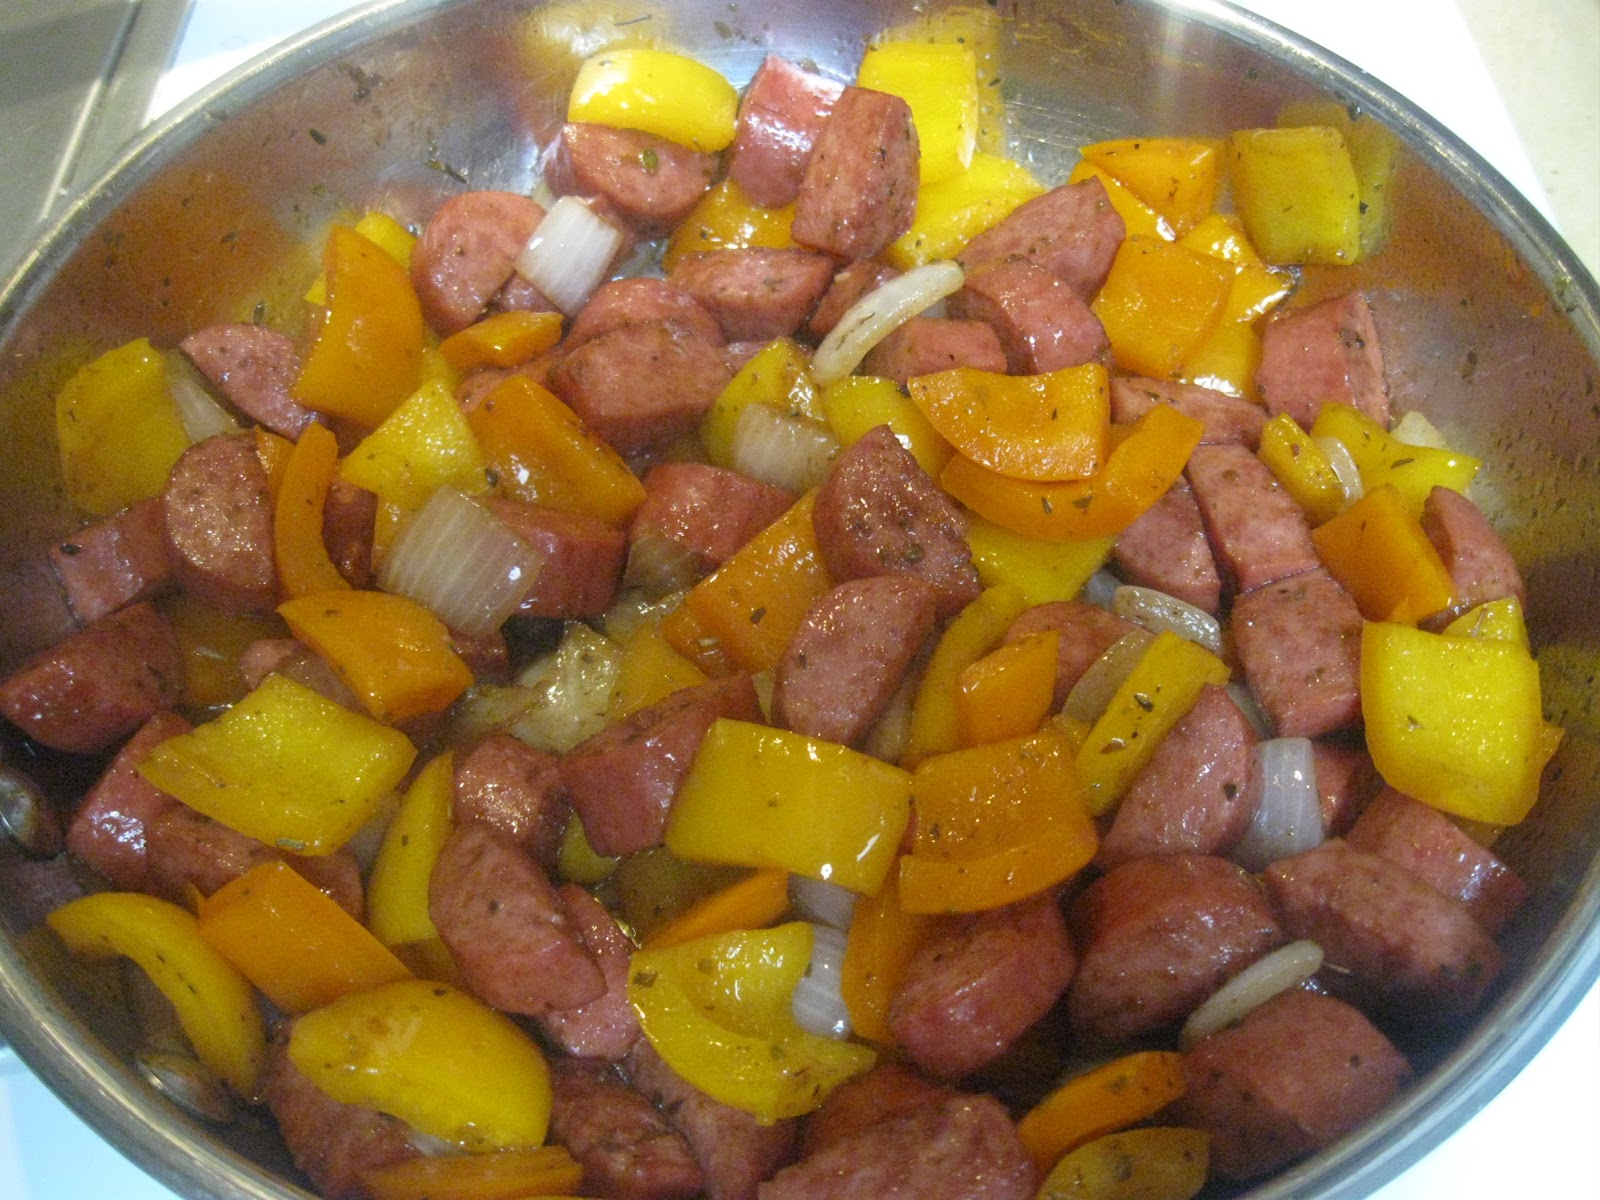
Heat a little olive oil in a pan over medium heat. When the pan is hot, dump in the meat, veggies and seasonings.


Cook until the peppers and onions are tender, stirring once in a while. You want a nice brown color to the meat and veggies so don't stir too often. It will take about 10 minutes.


 The balsamic vinegar gives this dish a nice tang without overpowering it. I usually serve it with potatoes or over rice.

Thursday, March 29, 2012

Beefy Spanish Rice

Before I got married, I wasn't much of a cook. Actually, after I got married, I wasn't much of a cook for many years! But a dear friend gave me a wedding shower gift of a cooking magazine subscription along with a recipe box full of her family's favorite recipes. This recipe for Spanish rice was the first one I tried from her collection. Over the years it's become one of our family favorites, too. It's so easy and delicious, what's not to like about it?

Here's what you need:

1/4 cup olive oil
1 cup uncooked white rice
1 medium onion, diced
1 medium green pepper, diced
1 lb ground beef
1 can (15 oz) tomato sauce
1 teas dry mustard
1 teas chili powder
1/2 teas cumin
1/2 teas salt
1/4 teas pepper
2 cups very hot water

Heat the olive oil in a large pan. Add the rice and cook for a couple of minutes until the rice starts to brown.


Add the diced onion and green pepper. Cook until slightly soft. Add the ground beef and cook until no longer pink. Drain off some of the grease. I do this by tilting the pan to one side and pushing all the food to the other side. Then I use a turkey baster to suck up the grease. Real fancy, huh?


Stir in the tomato sauce, seasonings and hot water. Bring to a boil.


Cover and simmer over low for 25-30 minutes or until the liquid is absorbed and the rice is tender.


Sprinkle individual servings with shredded cheese if desired. Around here, it's always desired!

Tuesday, May 10, 2011

Tasty Meatloaf

I was never a lover of meatloaf growing up. I don't know why. But my husband liked it, so I tried making it. And it turned out okay. I used a very simple recipe that included a packet of onion soup mix, so there was a lot of flavor. Unfortunately, there was a lot of MSG and other unpronounceable ingredients, too!

So I started trying to recreate the flavors of the onion soup mix without the yucky stuff. This recipe is the closest I've come to it.

Here's what you need:

1 small onion, diced
1 egg, beaten
1/2 cup Italian bread crumbs
1/3 cup milk
1 teas garlic salt
1/2 teas sea salt
1/2 teas black pepper
1 TBSP worchestershire sauce or steak sauce
1 lb ground beef
1 lb ground turkey

For the glaze:
1/3 cup ketchup
2 TBSP mustard
1 TBSP honey

In a skillet, melt about a tablespoon of butter. You can use olive oil instead. Fry the onions until brown and soft. While the onions are frying, mix the egg, breadcrumbs, milk, seasonings and worchestershire sauce in a large bowl. Add the fried onions.


Crumble the ground beef and turkey over the crumb mixture. Using your hands, combine everything until well mixed.


Pat into a greased loaf pan.


Bake at 350 degrees for 30 minutes. Combine the glaze ingredients while the meatloaf bakes.

After 30 minutes, remove from the oven. Using a turkey baster, drain off as much grease as possible. Spread the glaze over the top of the meatloaf and return to the oven for another 30 minutes.


Remove from the oven and let stand for 10 minutes. Carefully remove from the loaf pan onto a serving plate. I do this by using two spatulas, one at either end.

Use a serrated knife to slice.


It might seem strange to bake the meatloaf for 30 minutes, then put the glaze on top. I do this because I found if I glazed it and left it in the oven for an hour, the fat bubbling up from the meatloaf made the glaze runny and it slid off the top. By draining some of the grease halfway through baking and then glazing, the yummy stuff stays on the top where it belongs!

If your crew doesn't like ketchup or mustard, you can use barbecue sauce or steak sauce as a glaze. It's equally tasty! Customize it to fit your family's preferences.

Wednesday, March 23, 2011

Fiesta Chicken and Rice

This recipe comes from my dear friend Shannon. Back in the mid-nineties when we were both single, Shannon and I used to hang out. She has an extraordinary cooking talent that is still unmatched. Right now she's in Malaysia going through an adoption process that could take months. I know she'd appreciate any prayers you could spare for her and her husband.

Anyway, I knew when she posted this recipe I wanted to try it. But in typical Marsha fashion, I tweaked it a little. And I loved it! So did the family. This one's a keeper!

Here's what you need:

3 boneless, skinless chicken breasts, cut into bite-sized chunks
salt and pepper, to taste
1/4 cup olive oil
1 cup long grain rice
1 small onion, finely chopped
1 TBSP minced garlic
1 teas dried oregano
1 teas chili powder
dash cayenne pepper
1 can diced tomatoes, drained (I use petite)
1/2 cup chopped green pepper
2 cups chicken broth
shredded cheese to sprinkle on after cooking (I use sharp cheddar)

Season the chicken chunks with salt and pepper. Heat the olive oil in a large pan over medium heat. Cook the chicken chunks until mostly done.


Scoot the chicken over to one side of the pan and add the rice and onion. Cook and stir until the rice starts to brown. Stir in the garlic and spices until the chicken pieces are coated.


Then add the tomatoes, green pepper and chicken broth. Bring to a boil.


Reduce heat, cover and simmer for 10 minutes. Give the entire pot a good stir, then put the lid back on and simmer until the rice is tender and all the liquid is absorbed. That will probably take another 10 minutes or so.

You could stir the cheese into the entire pot, or you can do what I did - top individual servings with the cheese. Some children in my family don't like cheese sprinkled on top of anything. Weird, huh?


I was so happy that the kids gobbled this up. I loved that it took only one pot! Yay! And we took the small amount of leftovers the next day and added them to quesadillas. Super yum!

Thank you, sweet Shannon, for the inspiration!