Thursday, January 31, 2013

Oven Baked Tacos

I guess I have a taco theme going on here this week. Earlier I posted a recipe for Beef and Bean Taco Casserole. It's one of my family's favorite casseroles, so I hope you'll give it a try.

These oven-baked tacos, served in a hard shell, are more traditional. I got the idea from Jillee over at One Good Thing by Jillee. I had baking racks for the tacos, so I skipped her hard taco shell instructions.
I ended up with a nice pile of hard shells in no time.
So you can bake your own shells or you can buy hard shells from the store, whichever works best for you. When I'm serving a large crowd, I use store-bought shells for convenience.

Now here's what you need:

16-20 hard taco shells
2 lbs ground beef or turkey
1 can (16 oz) refried beans (If you use homemade, about 2 cups)
1 cup salsa
2 TBSP taco seasoning
2 cups shredded cheese - I use sharp cheddar but Monterey Jack would be a good choice, too
Your favorite taco toppings


In a large skillet, brown the ground beef or turkey. Drain well. Stir in the refried beans, salsa and taco seasoning until well blended.
Divide the meat mixture among the taco shells. Place side by side in a large baking pan.
Top with the shredded cheese.
Bake at 400 degrees for about 10 minutes, or until the cheese is melted.
Now let each family member load 'em up with their favorite toppings. I prefer lettuce, tomatoes and sour cream.
My family and friends loved these! Yes, they took a little more prep time than regular tacos. But they are so much easier to serve!

The beans and cheese combined with the meat make for a whole lot less mess when eating them. Everything kind of sticks together - no little bits and pieces of taco meat falling out of the shell. And it's so much quicker than letting everyone load up their own tacos, especially if you're serving a crowd. You've already done most of the work for them.

Also, the baking process keeps the tops of the shells hard, but bottoms get a little chewy. That means less breakage, my number one pet peeve of eating hard shell tacos!

If your family loves tacos, you really need to give these a try. You'll like them!

Tuesday, January 29, 2013

Beef and Bean Taco Casserole

Adapted from Love Grows Wild
 
This hearty casserole has become one of my favorites to prepare. It's also one of my family's favorites to eat! So I guess that works out well, huh? It has all the flavors of tacos with a little less mess. My kids call it Tacos You Can Eat with a Fork!

You can customize the toppings based on your family's preferences. And you can easily double the recipe if you've got a large group to feed. 

Here's what you need:

1 lb ground beef
1 can (16 oz) refried beans (you can use homemade, about 2 cups)
1 cup salsa
Tortilla chips, coarsely crushed, about 2 cups
Shredded cheddar cheese, about 2 cups
Your favorite taco toppings

In a large skillet, brown the ground beef. Drain. Stir in the refried beans, salsa and taco seasoning until everything is well mixed.

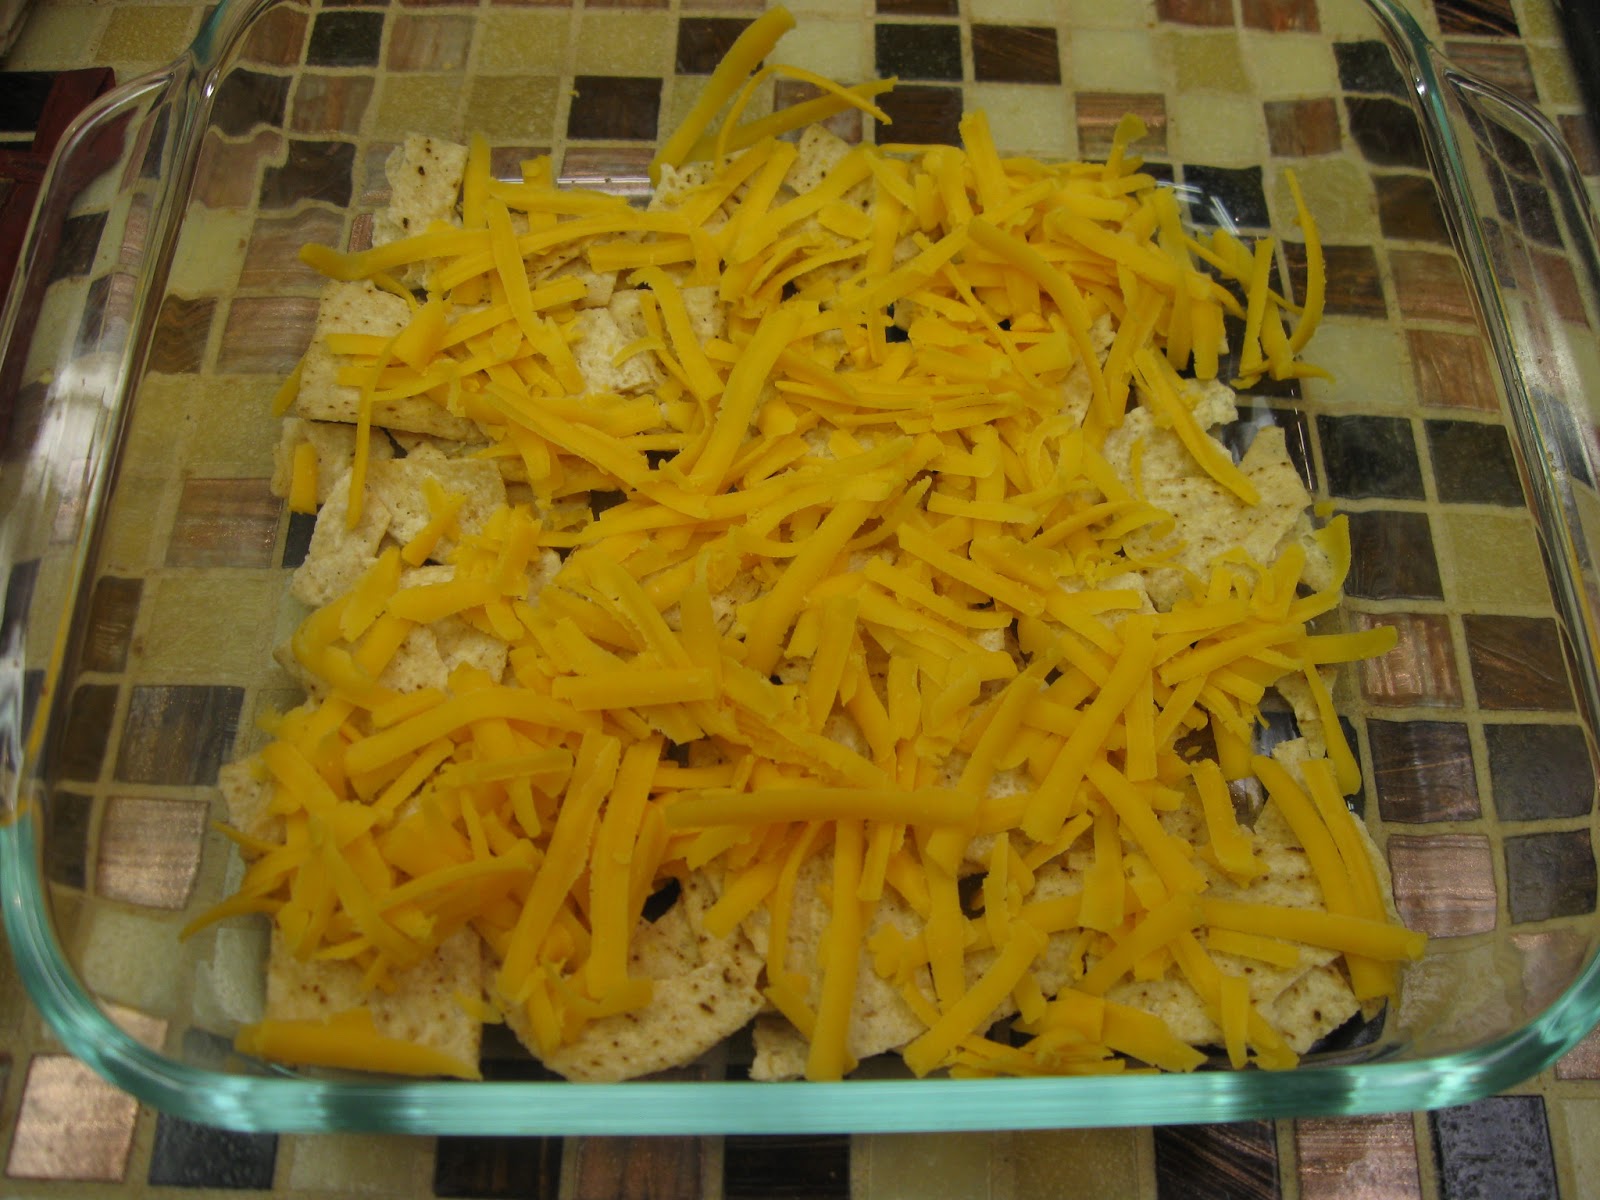
In a 8x8 dish, layer half the crushed chips, then half the cheese.
Spread the meat and bean mixture evenly over the cheese.
Repeat the chips and cheese layer.
Bake at 350 degrees until the cheese is melted, maybe about 10-15 minutes.
Scoop out onto a plate and top with your favorite taco toppings. I like lettuce, tomatoes and sour cream.
I prefer to let everyone choose their own toppings instead of topping the entire casserole like the original recipe called for. That way everyone is happy and eats up!


Sunday, January 27, 2013

Menu Plan January 28-February 3

Almost finished with first month of 2013! Can you believe it?

We've had some wacky weather here in the Deep South this month. A couple of weeks ago it was in the low 70's, the week before last it snowed! And this week, we're supposed to have both extremes! What in the world?

I love spending these winter months in the kitchen. It's warm and cozy when I'm cooking or baking. I haven't done as much cooking ahead and freezing as I would have liked, so I'll try to work in a little more next month.

Now on to this week's menu:

Monday
Chicken tikka masala (crockpot), fabulous flatbread

Tuesday
Five spice Asian beef (recipe to come), cabbage stir-fry

Wednesday
Rigatoni, green beans, garlic breadsticks

Thursday
Fish tacos, Parmesan couscous

Friday
Philly cheesesteak sloppy joes, fries

Saturday
Feel Better Chicken Stew, homemade bread

Sunday
Leftovers


For more meal planning inspiration, visit Organizing Junkie's Menu Plan Monday.

Thursday, January 24, 2013

Pretzel Bread

Over a year ago, I started making pretzel rolls for my family. We all love them. The salty, chewy outside. The soft, tender inside. I mean, what's not to like?

Well, I'll be honest. These delicious rolls are time-consuming to make. That would be the only thing NOT to like about them.

So I thought, why not just make pretzel loaves instead of pretzel rolls? As long as I had a pot big enough in which to poach the loaves, adapting this recipe to make two small loaves instead of more than a dozen little rolls was pretty simple. I'm all about taking shortcuts to make my life easier!

And my family loves the bread form just as much as the roll form, if not a little more. I'm making this bread at least once a week now. And they're eating it as quickly as I can make it.

The recipe and method are almost exactly the same as the original recipe. But this version saves time, so that's even more reason to love it!
Click here for a printable recipe.

Here's what you need:

1 1/2 cups warm water
1 pkg (or 2 1/4 teas) yeast
2 teas sugar
4 to 4 1/2 cups flour (I used King Arthur unbleached)
2 teas coarse salt
1/4 cup oil or melted butter
1/4 cup baking soda
1 egg, lightly beaten
Additional coarse salt for sprinkling on top

In a mixing bowl, combine the water, yeast and sugar. Allow to stand for 5 minutes, or until foamy. Add the flour, salt and oil or butter. I always start with 4 cups of flour and add more if the dough seems too sticky. Combine well (I use my stand mixer and dough hook for this) and then cover with a towel. Allow to rise in a warm place for about an hour or until doubled.

Remove the dough from the bowl and shape into two small, oval loaves. Place on a baking sheet lined with parchment paper. Cover with a towel and allow to rise for about 30 minutes.

Bring a large pot of water to boil. Be sure not to fill the pot too full. The weight of the loaves will displace too much water if the pot's too full. When the water starts boiling, add the baking soda. Reduce the heat to a simmer, then carefully place one loaf in the pot. Allow to poach for 30 seconds, then gently turn. I use two spatulas to do this, one under each end of the loaf. Poach for another 30 seconds, then remove and put back on the baking sheet. Repeat with the other loaf.

With a sharp knife, slash the top of each loaf a couple of times or make an X. Use a pastry brush to glaze the loaves with the beaten egg, making sure all sides are covered. Sprinkle with coarse salt.

Bake at 425 degrees for 15-20 minutes, until browned.
It's much easier to slice this bread with an electric knife than a regular bread knife. The outside isn't crusty like a normal loaf of bread. It's more chewy and flexible. You might end up smashing the bread with a regular bread knife because you have to exert a little more effort.
Doesn't that look scrumptious? (It is!)
Monday, January 21, 2013

Pasta Fagioli

 Last week was wet and dreary, but this soup seemed to perk us right up. It's a satisfying blend of veggies, beans and pasta in a flavorful tomato-based broth. It's so easy, too. I had this simmering away in less than 10 minutes, and in just 20 minutes more, it was on the table.

This is excellent the next day, too, but the pasta will absorb a great deal of liquid. You will need to add more broth or some water to thin it out. Also, this makes a great freezer meal, but don't add the pasta until the day you serve it. It will get mushy when you reheat it if you freeze it in the soup.

So here's what you need (and you probably already have most of it in your pantry!):

1/2 onion, diced
2 cloves garlic, minced - about 2 teas.
2 carrots, shredded or finely chopped
2 stalk celery, finely chopped
1 can red beans, rinsed and drained
1 can cannellini or other white beans, rinsed and drained
1 (29 oz. can) tomato sauce or puree
1 carton (4 cups) beef broth
1 TBSP Italian seasoning
1 TBSP dried parsley
1/2 TBSP dried basil
1/2 TBSP dried oregano
salt and pepper, to taste
1 1/2 cups small pasta - I used shells but anything small will work

In a large saucepan, heat a little olive oil. Add the onions, garlic, carrots, and celery. Cook until slightly soft. Stir in the remaining ingredients, except the pasta. Simmer for 10 minutes - or as long as you like to let the flavors blend.

Bring the soup to a boil, then add the pasta. Cook until the pasta is tender. Garnish with some Parmesan cheese if desired.


Sunday, January 20, 2013

Menu Plan January 21-27

After a week of rain and even a little snow (it didn't stick, it was too warm), the sun has returned to the Deep South! Yay! I found myself dragging last week, tired and cranky. I need more of the sun! And more of the Son, too!

Now on to this week's menu:

Monday
Steak bites (didn't get to this last week), twice baked potatoes

Tuesday
Cheesy chicken and tater tots (crockpot), broccoli

Wednesday
Beef stew over rice, pretzel bread (recipe to come)

Thursday
Parmesan crusted tilapia, cheesy green chile rice

Friday
Spaghetti and meatballs, garlic bread

Saturday
Meatball sliders, fries
Sunday
Chicken and corn chowder


For more meal planning inspiration, visit Organizing Junkie's Menu Plan Monday. You'll find tons of other menu plans to help get your own planning jumpstarted.

Tuesday, January 15, 2013

Cheesy Broccoli Quinoa

Quinoa is quickly becoming one of my favorite ingredients to use in my cooking. It's full of protein and can be used in a variety of dishes. I've made muffins and chili with it. How is that for variety?

This recipes takes the classic cheesy broccoli rice casserole and offers the modern twist of quinoa instead of rice. I think I like it even better than rice!

Here's what you need:

1 cup quinoa, rinsed
2 cups chicken broth
1 cup chopped cooked broccoli
1 1/2 cups shredded cheddar cheese, divided
1/2 cup milk
1 egg, lightly beaten
1/2 teas seasoning salt
1/2 teas garlic powder
1/4 cup panko bread crumbs

In a saucepan, combine the quinoa and broth. Bring to a boil, then cover and simmer for 15 minutes, until the liquid is absorbed and the quinoa is tender. Mix the cooked quinoa with the broccoli, 1 cup of cheese, milk, egg, seasoning salt and garlic powder.

Transfer to a greased 8x8 dish. Sprinkle with the remaining cheese then the panko crumbs. Bake at 350 degrees for 15-20 minutes.